56
NITTY GRITTY.IT
make it shine
A
B
C
D
CLINOX PRO • AIR • POWER • SURFACE
USER MANUAL
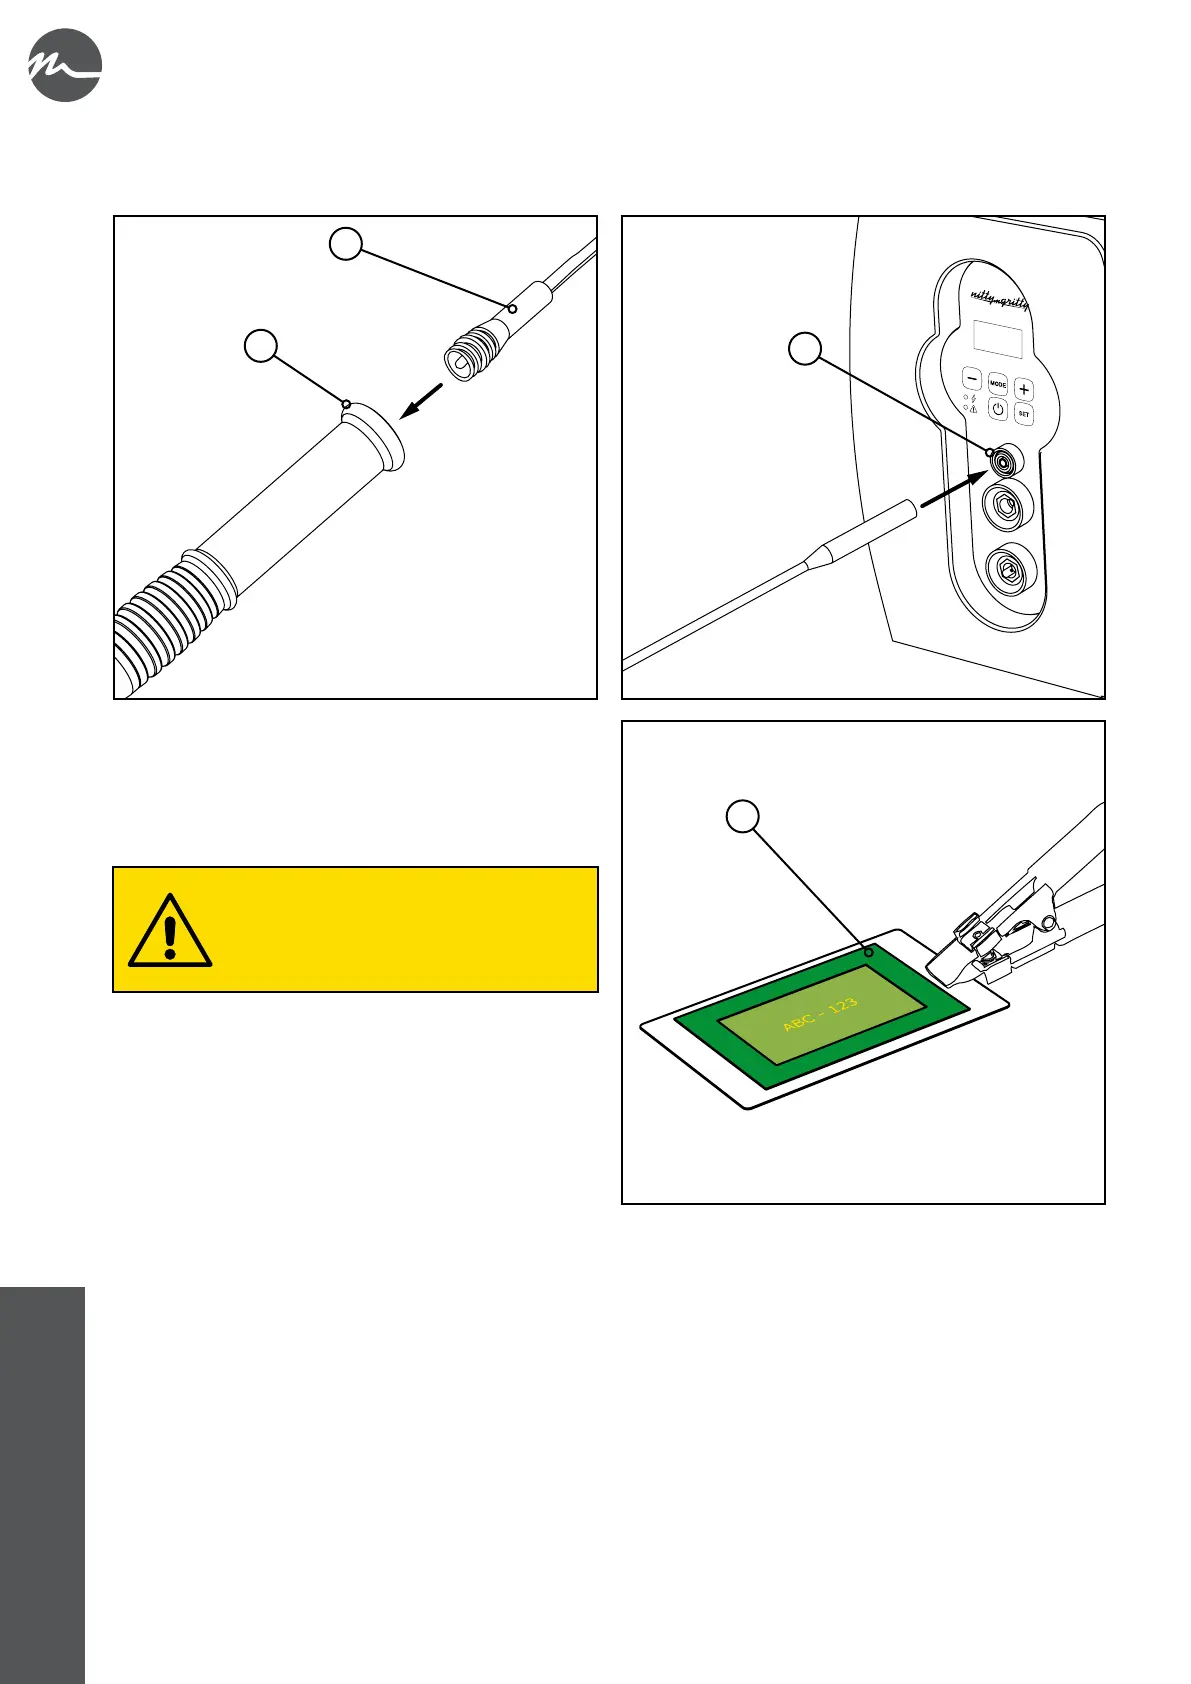
9.4.
• Use the supplied cable (A) to carry out the electrical installation of the marking torch; connect one end to the appropriate
coupling on the marking torch (B) and the other to the dedicated bushing on the front panel of the device (C).
• Lay the screen-printing screen (D) on the piece to be
marked and check that all the preliminary operations
described in chapter 5 have been carried out correctly. In
particular, make sure that the earth cable crocodile clip has
been fastened to the stainless steel piece to be treated.
Before using a new screen-printing screen, it
is recommended that you use it on a sample
surface to make some test markings in order
to fully open its meshes and obtain an optimal
image.