Installation
3-14
Part 237478_03
E 2012 Nordson Corporation
Installing the Heat Shield
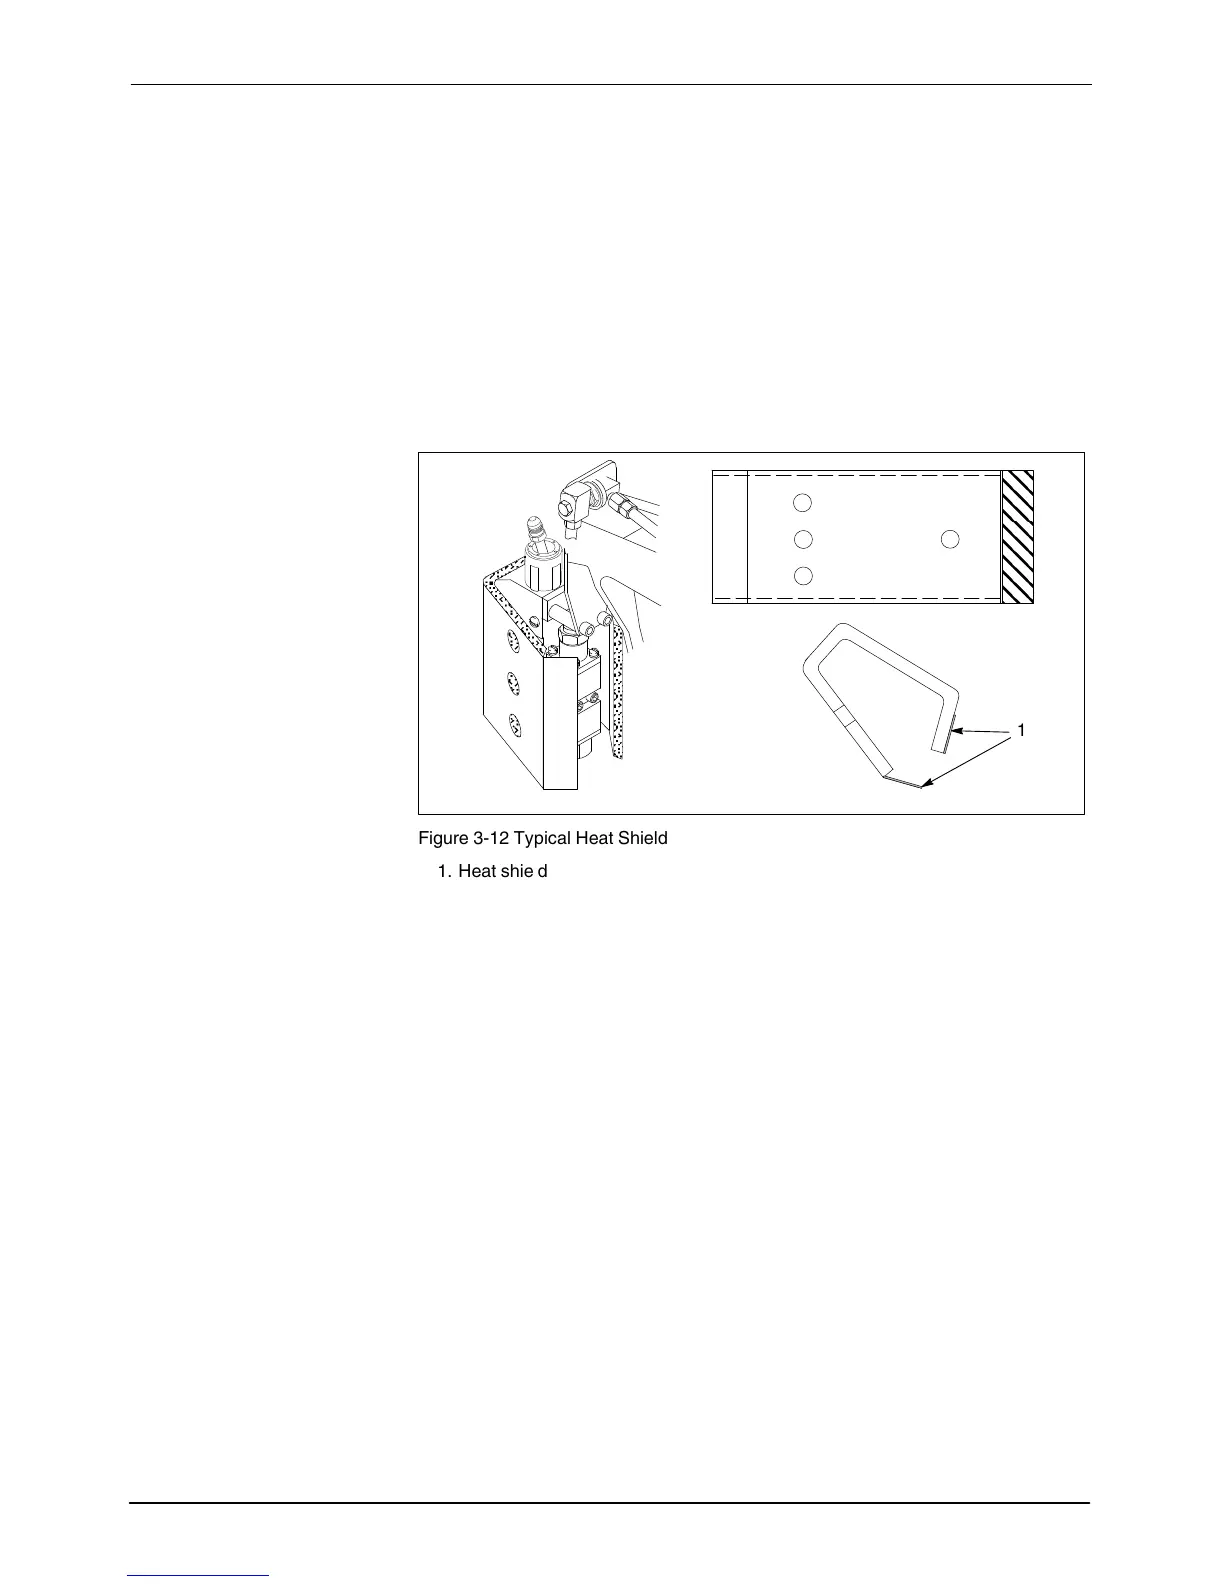
NOTE: This heat shield is required for the gun to meet CE approval
standards. The FP‐200 gun installation kit includes a heat shield.
1. Remove the auxiliary guide handle.
2. Disconnect each air line on the service block by unthreading the air line
fitting tube nut.
3. Wrap the heat shield around the service block and module and secure it
as shown in Figure3‐12.
4. Reconnect each air line and the reinstall the auxiliary guide handle.
Figure 3‐12 Typical Heat Shield
1. Heat shield fastener
Connecting the Gun to the Air Supply
NOTE: The air supplied to the gun should be dry, regulated, unlubricatedair.
1. Connect the polyethylene air line tubing to the facility's air supply.
2. Install an air pressure regulator and gauge at the beginning of the air
supply line.
Connecting the Hose to the Applicator
Connect the hose hydraulically and electrically to the applicator in
accordance with the applicator product manual.
 Loading...


