Page: 42
Service Guide ML395/395C
Chapter 3 Maintenance & Disassembly
3.2.08 Printer Mechanism
1. Remove the control board (3.2.06).
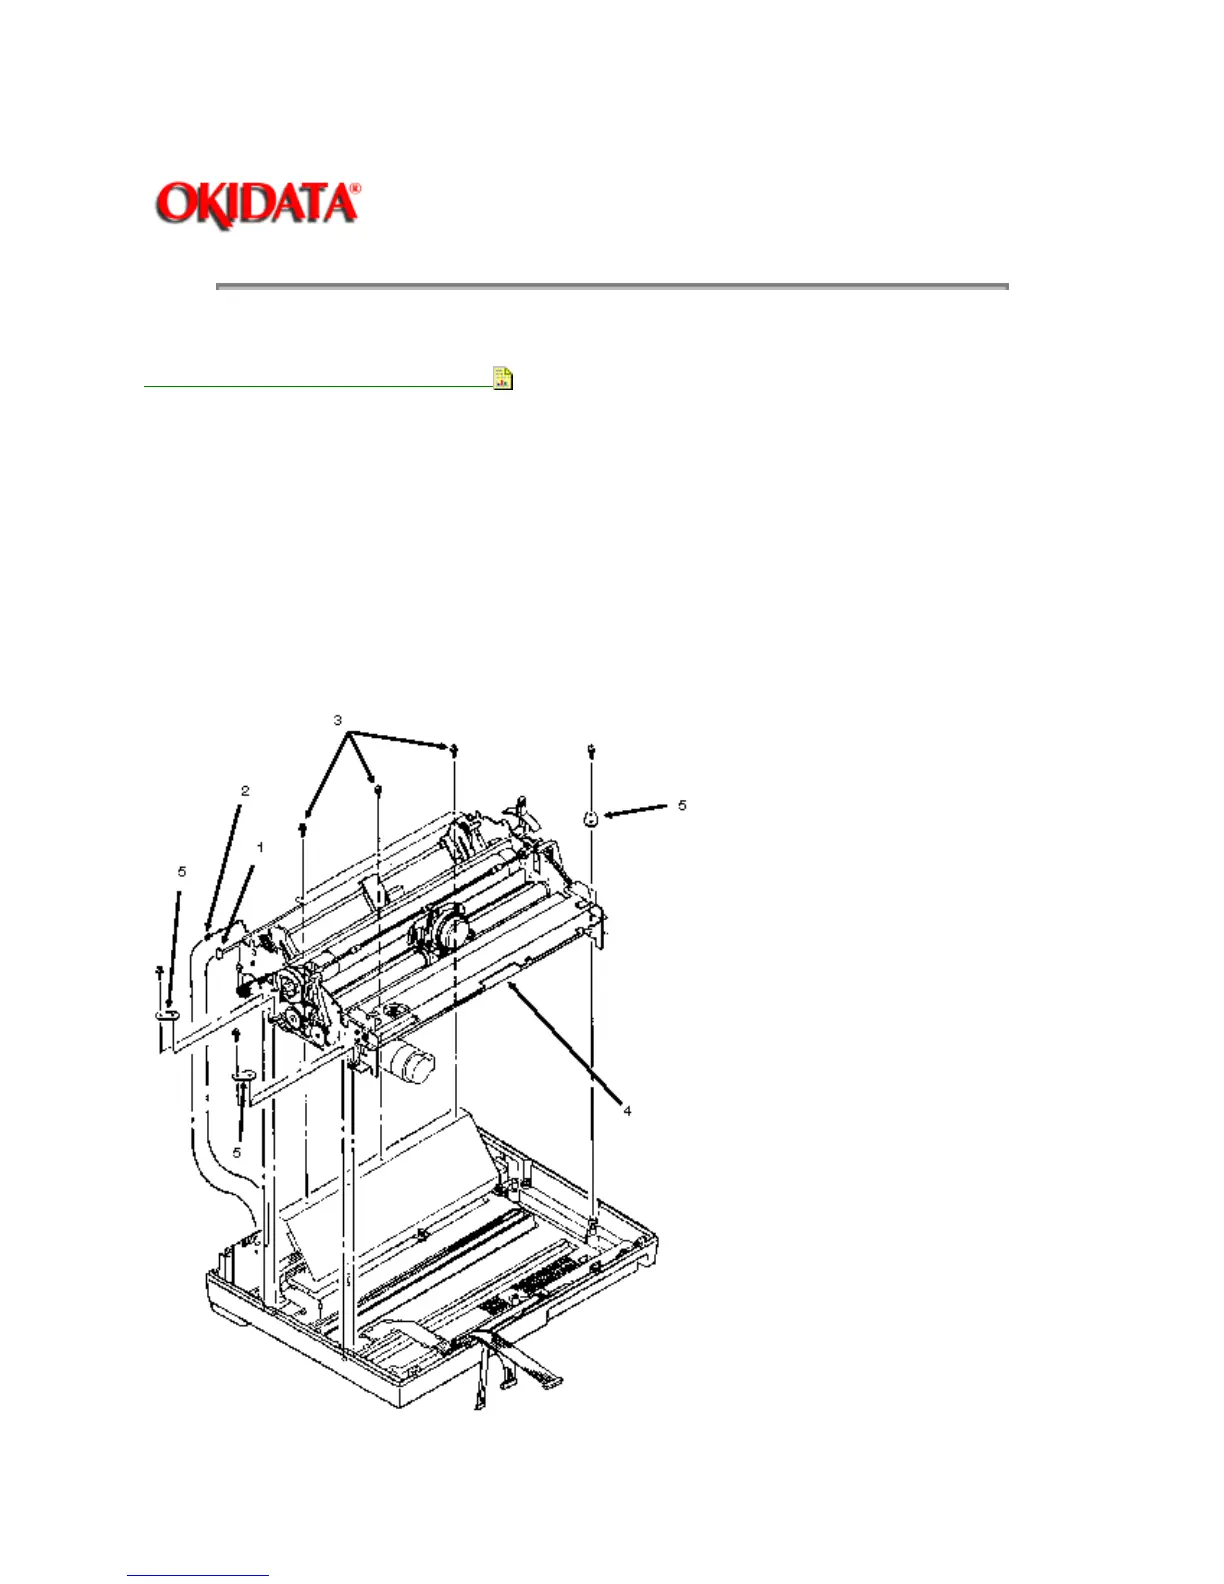
2. Detach connectors CN102 (1) and CN103 (2) from the interface connector board.
3. Remove the three mounting screws (3) at the rear of the printer mechanism (4).
4. Remove the three mounting screws and brackets (5). There are two on the left side of the printer
mechanism and one on the right side.
CAUTION:
Do not grasp the ribbon cartridge bracket, paper chute, or the guide shaft of the sheet feeder
assembly when lifting the printer during the next step. These parts are easily bent.
5. While holding the base tray, lift the printer mechanism and remove it.
NOTE: When assembling the printer, do not allow cables to get caught under the control board.