69
MX63/MX63L
69
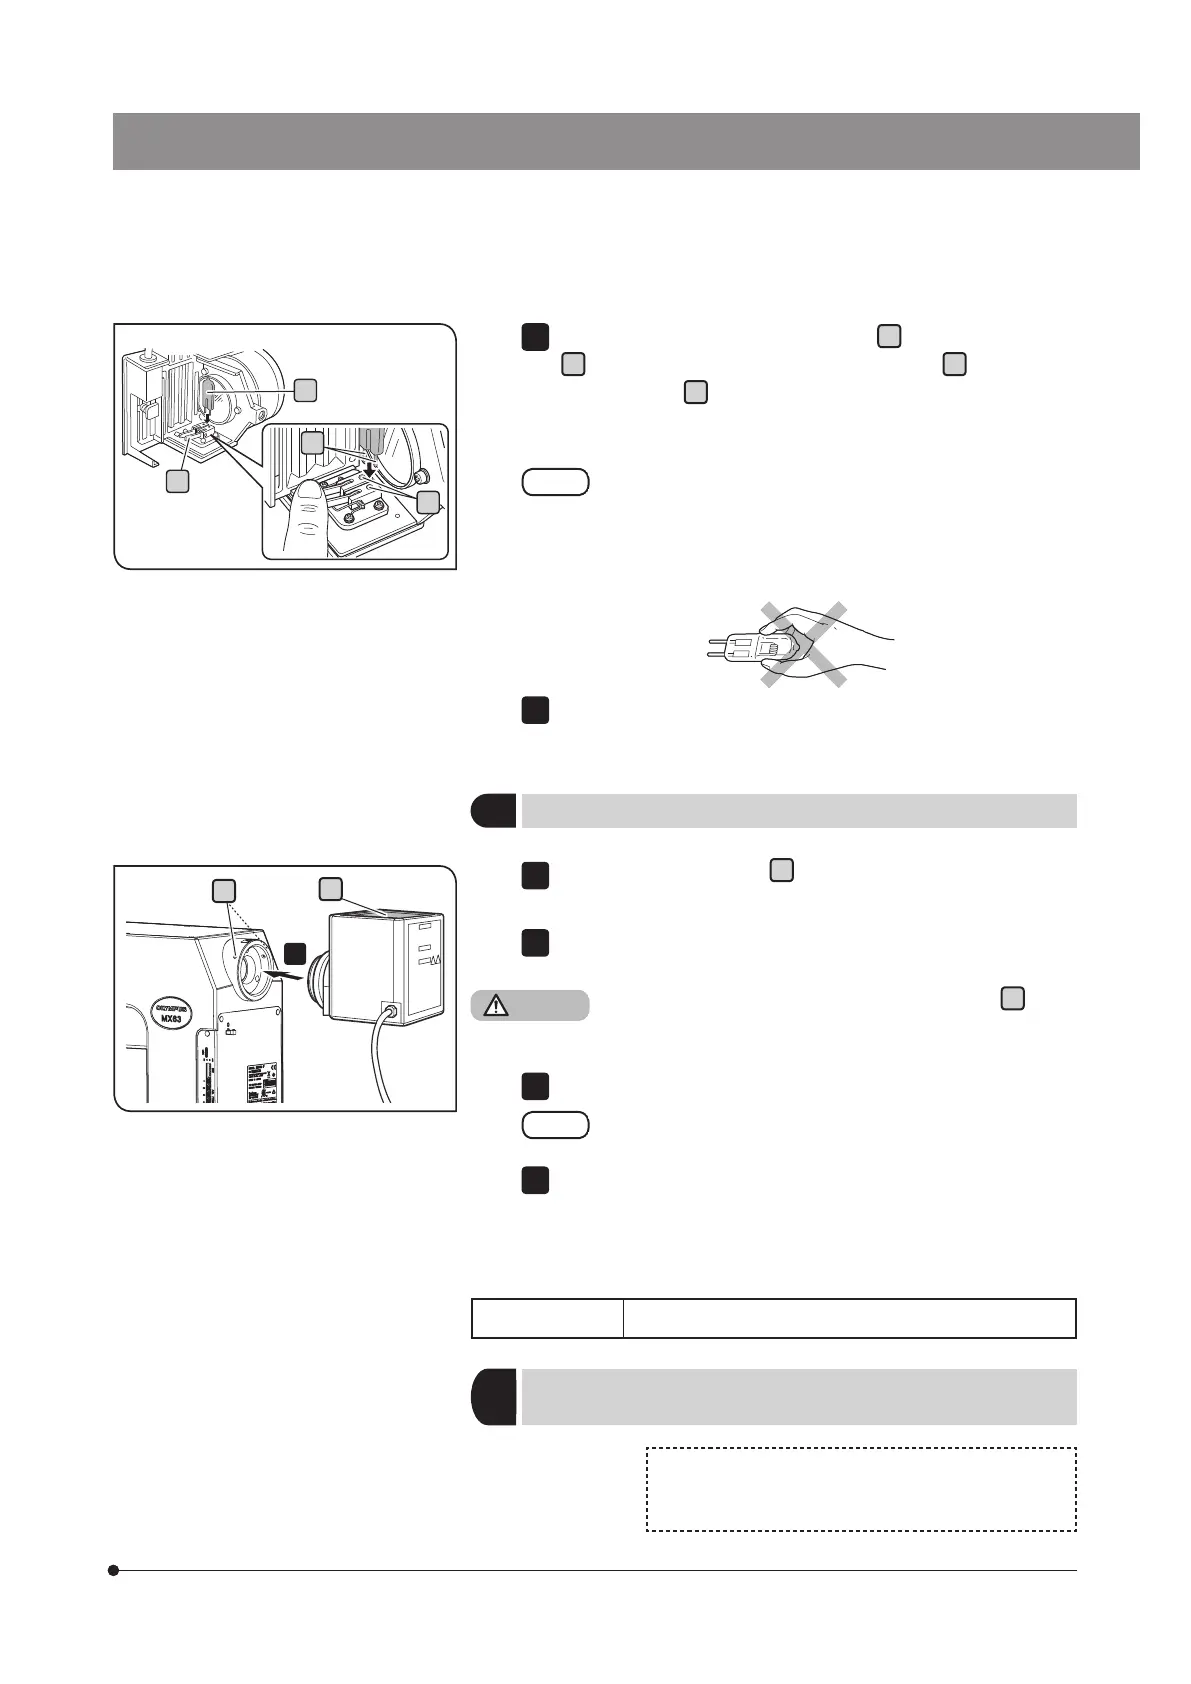
While pressing down the bulb fixing lever
d
, hold the halogen bulb
e
wrapped with gauze, etc. and insert the terminal
f
until it touches
the pin position
g
.
Place the bulb fixing lever carefully to the original position to secure
the bulb.
Be careful not to touch the bulb directly with your hand.
If fingerprints or stains are attached to the bulb, wipe it
with a soft cloth, etc. to prevent the lifetime reduction or
the bulb explosion. If fingerprints or stains are attached to
the bulb, clean it by wiping gently with a piece of cleaning
paper slightly moistened with absolute alcohol.
Fit the halogen lamp housing from the above and while pressing down
the mounting screw, tighten it.
4
5
Loosen the mounting screw
a
(2 positions) on the microscope frame
using the Allen screwdriver.
Insert the halogen lamp housing in the light source mount hole until
it touches the end.
Attach the lamp housing with the heat radiating fin
b
facing
up, and secure he sufficient space above, below and at rear
of the lamp housing. Otherwise, fire may be caused.
Tighten the mounting screw using the Allen screwdriver.
Do not tighten the screws too firmly. The lamp housing
mount may be deformed.
Connect the cable for halogen lamp housing to the connector of the
power supply (TH4-100/TH4-200). For details, see “Connecting the
cables" (P.96).
1
2
3
4
d
3
Attaching the halogen lamp housing
g
d
e
f
For procedures to replace the light guide halogen bulb
for transmitted light illumination, refer to the instruction
manual provided with the unit.
Applicable lamp JCR12V100WB (made by Ushio Co.)
a
2
1
Replacing the light guide halogen bulb for
transmitted light illumination