52
5 Product Specic Instructions - Rehab Buggy
– Kimba –
For assembly of the xation kit HR32549700 you will need the following tools: a ring wrench size 10, an Allen
wrench size 4, pointed pliers
Guidance for tting the Pelvic Belt
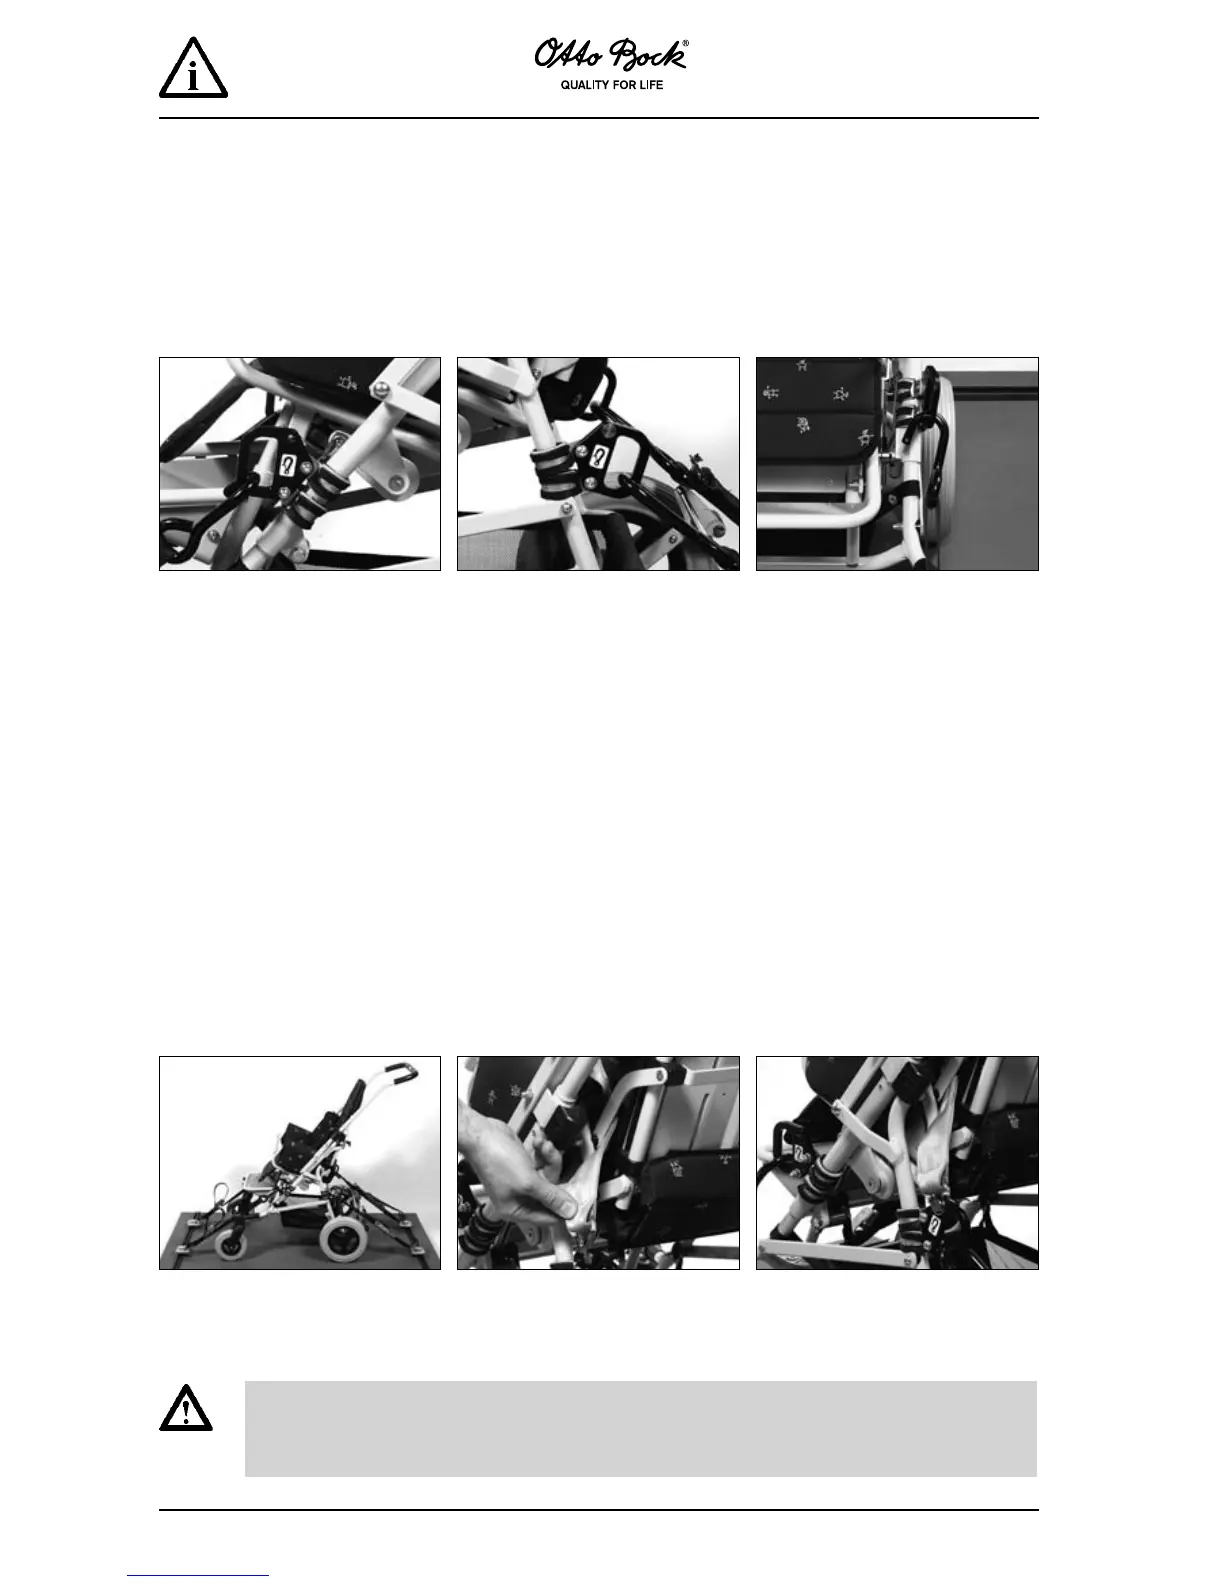
Assembly tip: Important - Only attach the anchor plates to the frame at the indicated points, using the pipe
clips and screws provided. Use pointed pliers to keep the pipe clips closed whilst assembling the anchoring
plate and tightening the screws. Do not fully tighten the screws until the pipe clips and anchoring plates have
been positioned correctly. To check this fold the buggy and check the anchoring plates do not make contact
with the frame.
Assemble two D20 pipe clips around
the front frame on either side of the
unit. Then attach the anchor plates
using the screws provided so the
nuts and hook symbol are facing
outwards.
Assemble two D20 pipe clips around
the rear frame on either side of the
unit and attach the anchor plates
using the screws provided so the
nuts are on the inside and the hook
symbol is facing outwards.
Adjust the position of the front an-
choring plates by rotating them out-
wards by about 10° – Folding test!
Attaching the anchoring points to the product
This rehab buggy is equipped with back angle and seat tilt adjustment. Before starting adjust the
seat tilt so the automatic locking mechanism engages. Then place the backrest in almost upright
position and secure by tightening the set handle. Observe the specications in the Instructions
for Use Manual of the Rehab Buggy.
Pass one end of the pelvic belt through under the folding lever. Now clip the
pelvic belt buckle onto the "Anchor Pin" on the the side frame anchoring
plate. Then repeat on the opposite side for the other half of the pelvic belt.
Kimba showing the correct position-
ing of the tie-down straps.
 Loading...