Chapter 1 Preparation — About your projector
22 - ENGLISH
About your projector
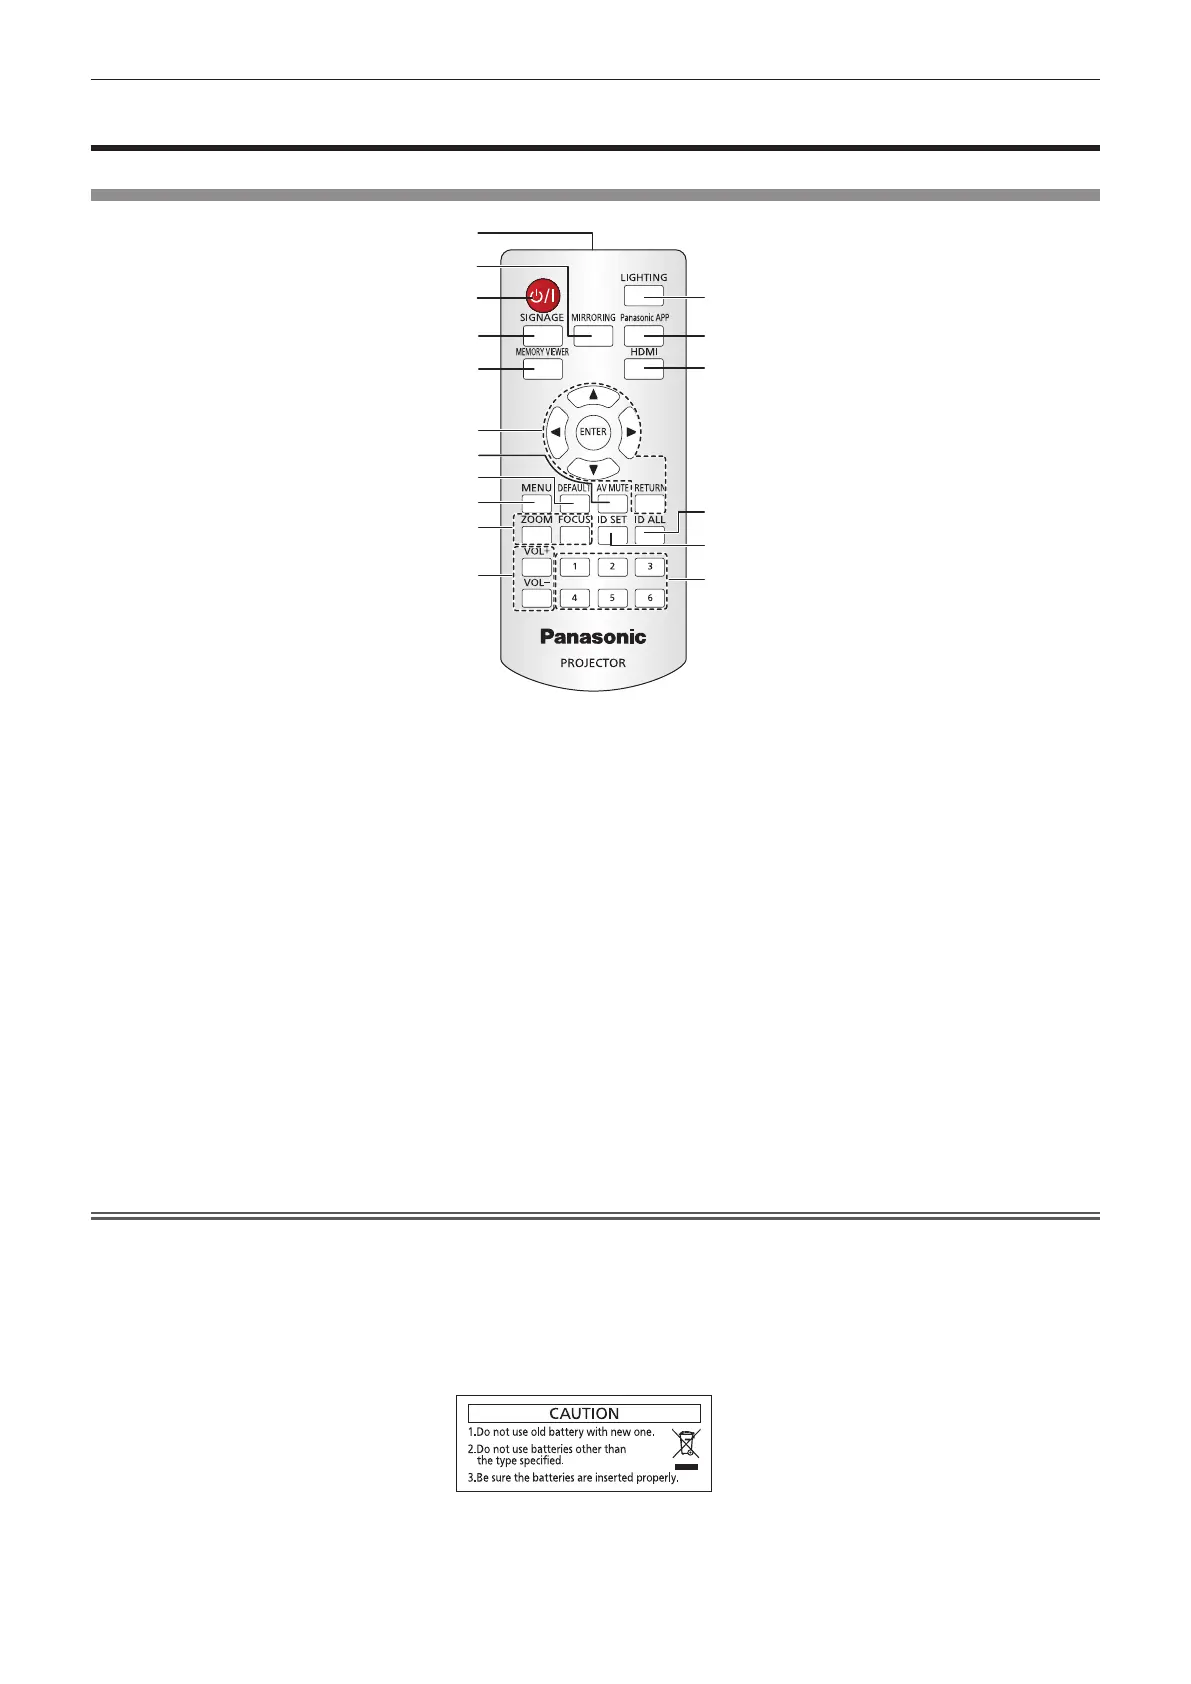
Remote control
1
12
13
14
15
17
16
3
2
4
5
6
9
8
7
10
11
1 Remote control signal transmitter
2 Power <v/b> button (v standby / b power on)
Turns on/off the power of the projector. (x page 46)
3 <MIRRORING> button
Switches the input to MIRRORING. (x page 51)
4 <SIGNAGE> button
Switches the input to signage. (x page 51)
5 <MEMORY VIEWER> button
Switches the input to Memory Viewer. (x page 51)
6 asqw buttons/<ENTER> button/<RETURN> button
Used to operate the menu screen. Also used when entering
[SECURITY PASSWORD].
7 <AV MUTE> button
Used to turn off the image and audio temporarily. (x page 56)
8 <DEFAULT> button
Resets the settings of the sub-menu to the factory defaults.
(x page 59)
9 <MENU> button
Displays the main menu. (x page 58)
10 <ZOOM> button/<FOCUS> button
Displays the lens menu and adjusts the projection lens.
(x page 52)
11 <VOL+>/<VOL
-
> buttons
Adjusts the volume of audio output. (x page 55)
12 <LIGHTING> button
Use to turning on/off the spotlight. (x page 55)
13 <Panasonic APP> button
Switches the input to Panasonic APPLICATION. (x page 51)
14 <HDMI> button
Switches the input to HDMI. (x page 51)
15 <ID ALL> button
Used to simultaneously control all the projectors with a
single remote control in a multiple projector environment.
(x page 26)
16 <ID SET> button
Sets the ID number of the remote control in a multiple projector
environment. (x page 26)
17 Number (<1> - <6>) buttons
Used in a multiple projector environment.
Used to enter ID number or password.
Attention
f Do not drop the remote control.
f Avoid contact with liquids or moisture.
f Do not attempt to modify or disassemble the remote control.
f Observe the following instructions that are indicated on the caution label at the back of the remote control:
g Do not use a new battery together with an old battery.
g Do not use unspecied batteries.
g Make sure the polarities (+ and
-
) are correct when inserting the batteries.
For other instructions, read the instructions related to batteries that are described in “Read this rst!”.
Caution label at the back of the remote control
 Loading...