Chapter 1 Preparation — About your projector
ENGLISH - 23
Note
f When operating the remote control by directly pointing to the remote control signal receiver at the power supply unit of the projector, operate
the remote control within a distance approximately 7 m (22'11") or shorter from the remote control signal receiver. The remote control can
control at angles of up to ±30° vertically and horizontally, but the effective control range may be reduced.
f If there are any obstacles between the remote control and the remote control signal receiver, the remote control may not operate properly.
f The signal from the remote control can be reected off the projection surface to operate the projector. However, the operating range may be
limited from light reection loss or the shape of the projection surface.
f The remote control may not operate properly if the remote control signal receiver on the power supply unit of the projector is directly
receiving strong light, such as uorescent light. Install the projector in a place distant from the light source.
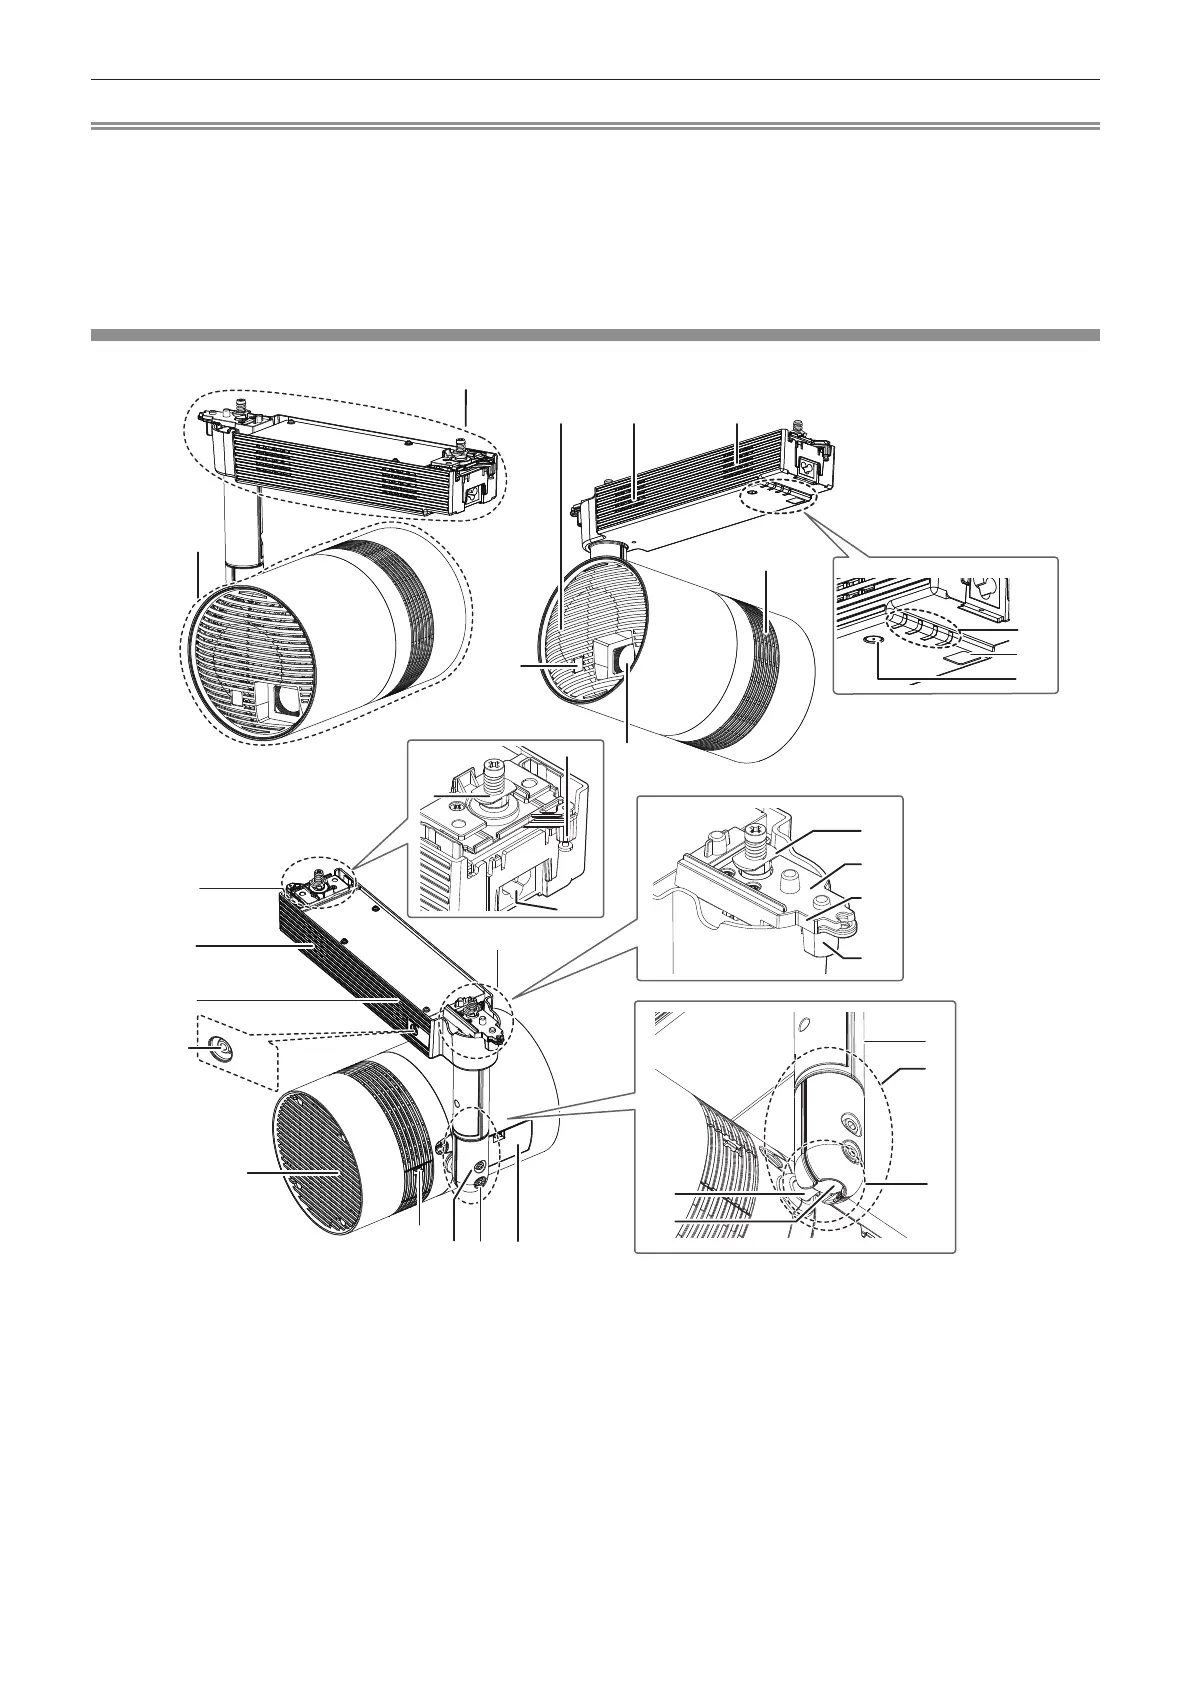
Projector body
AUDIO OUT
1
9
10
8
4
7
6
5
11
13
15
14
16
2
19
1
1
17
3
22
23
24
20
2
2
2
25
26
21
18
12
Power supply unit
Main unit
1 Air intake port
2 Air exhaust port
3 Remote control signal receiver (Main unit)
4 Projection lens
5 Indicators (x pages 24, 134)
6 Remote control signal receiver (Power supply unit)
7 Power <v/b> button (v standby / b power on)
Turns on/off the power of the projector. (x page 46)
8 Track mount part B (x page 33)
9 Lever B
10 <AC IN> terminal
This is the terminal to connect the supplied adapter.
11 Hook clasp B
12 Track mount part A (x page 33)
13 Lever A
14 Stopper for lever A
15 Lever plate A
16 Hook clasp A
17 <AUDIO OUT> terminal
This is the terminal to output audio signal when a audio signal is
input to the <HDMI IN> terminal and when the movie with audio
in the SD card is played back. (x page 43)
18 <DC OUT> terminal cover
<DC OUT> terminal is inside. (x page 24)
19 Ball joint xing screw
Fixes the angle between the shaft holder and the main unit after
adjusting the orientation of the main unit. (x page 38)
 Loading...