Chapter 2 Getting Started — Installing/removing the projector
40 - ENGLISH
3) Tighten the ball joint fixing screw.
f While supporting the main unit, securely tighten the ball joint xing screw using the supplied Allen wrench
(opposite side size 5.0 mm (3/16")).
Attention
f The main unit and the power supply unit are connected with cables, etc. Do not rotate or tilt the main unit more than necessary.
f When adjusting the orientation of the main unit while connected to an external device via connection cable, please be careful not to damage
the connection cable.
f Please store the ball joint stopper in an appropriate manner for future use.
Note
f After adjusted roughly, ne adjust the projection position while projecting.
f The ball joint xing screw and the ball joint stopper are hexagonal socket head xing screws (M6). Note that the ball joint stopper can be
removed if you need and the ball joint xing screw will come off the projector if it is loosened too much.
Removing the projector from the track system
1) Turn off the power of the track system.
WARNING
When removing the projector from the track system, be sure to turn off the power of the track system.
Electric shocks can result.
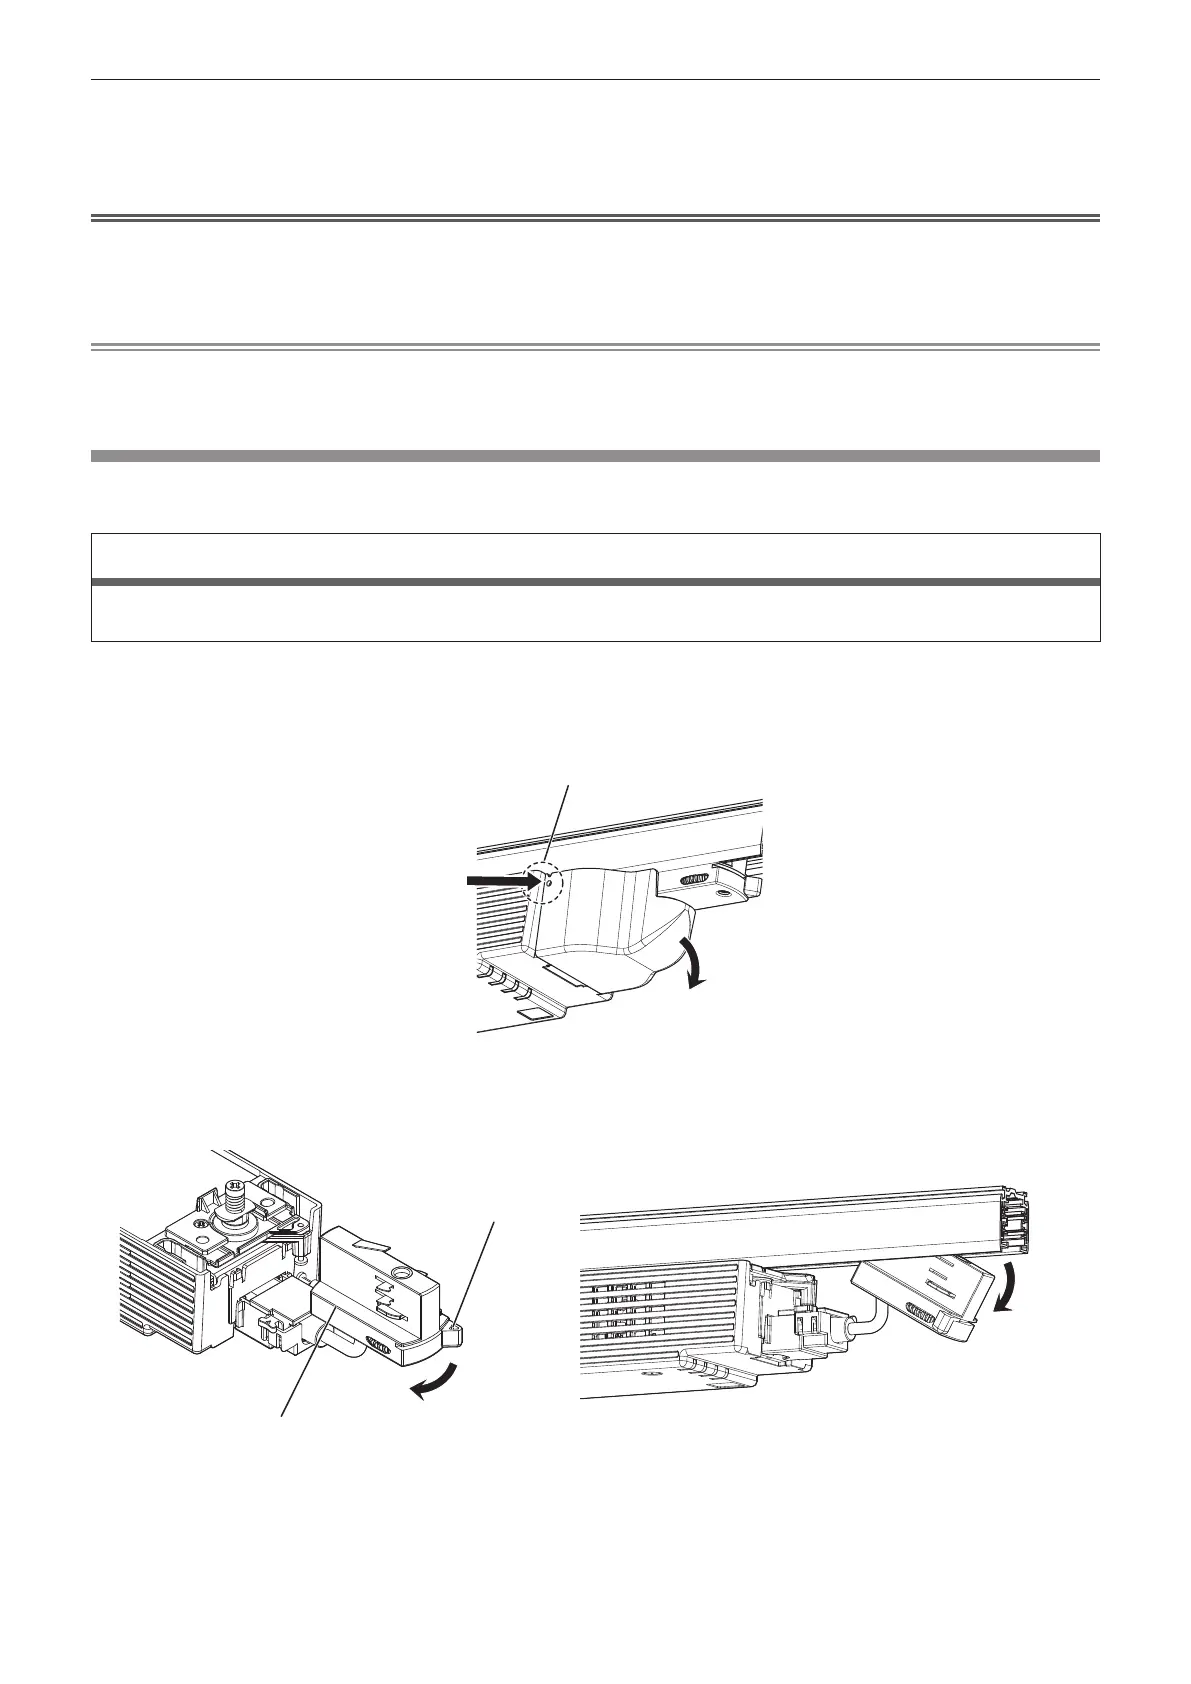
2) Remove the adapter cover.
f While pushing both tabs at the upper side of the adapter cover inward (i), pull the cover in the direction of
the arrow (ii) shown in the gure to remove.
(i)
(ii)
Tab
3) Remove the adapter from the track system.
f Completely turn the adapter lever in the direction of the arrow shown in the gure (i), and pull out from the
track system while tilting the adapter (ii).
(i)
(ii)
Lever
Adapter
 Loading...