Chapter 2 Getting Started — Installing/removing the projector
38 - ENGLISH
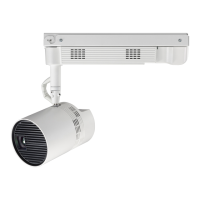
f Allowing for attaching the adapter cover to be performed in Step 17), mount the adapter to the track system
using the rough dimension shown in the gure.
30 mm (1-3/16") -
50 mm (1-31/32")
16) Turn the adapter lever to secure the adapter to the track system.
f Completely turn the adapter lever in the direction of the arrow shown in the gure.
f The track system and the projector are electrically connected.
Lever
Adapter
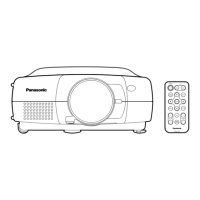
17) Attach the adapter cover.
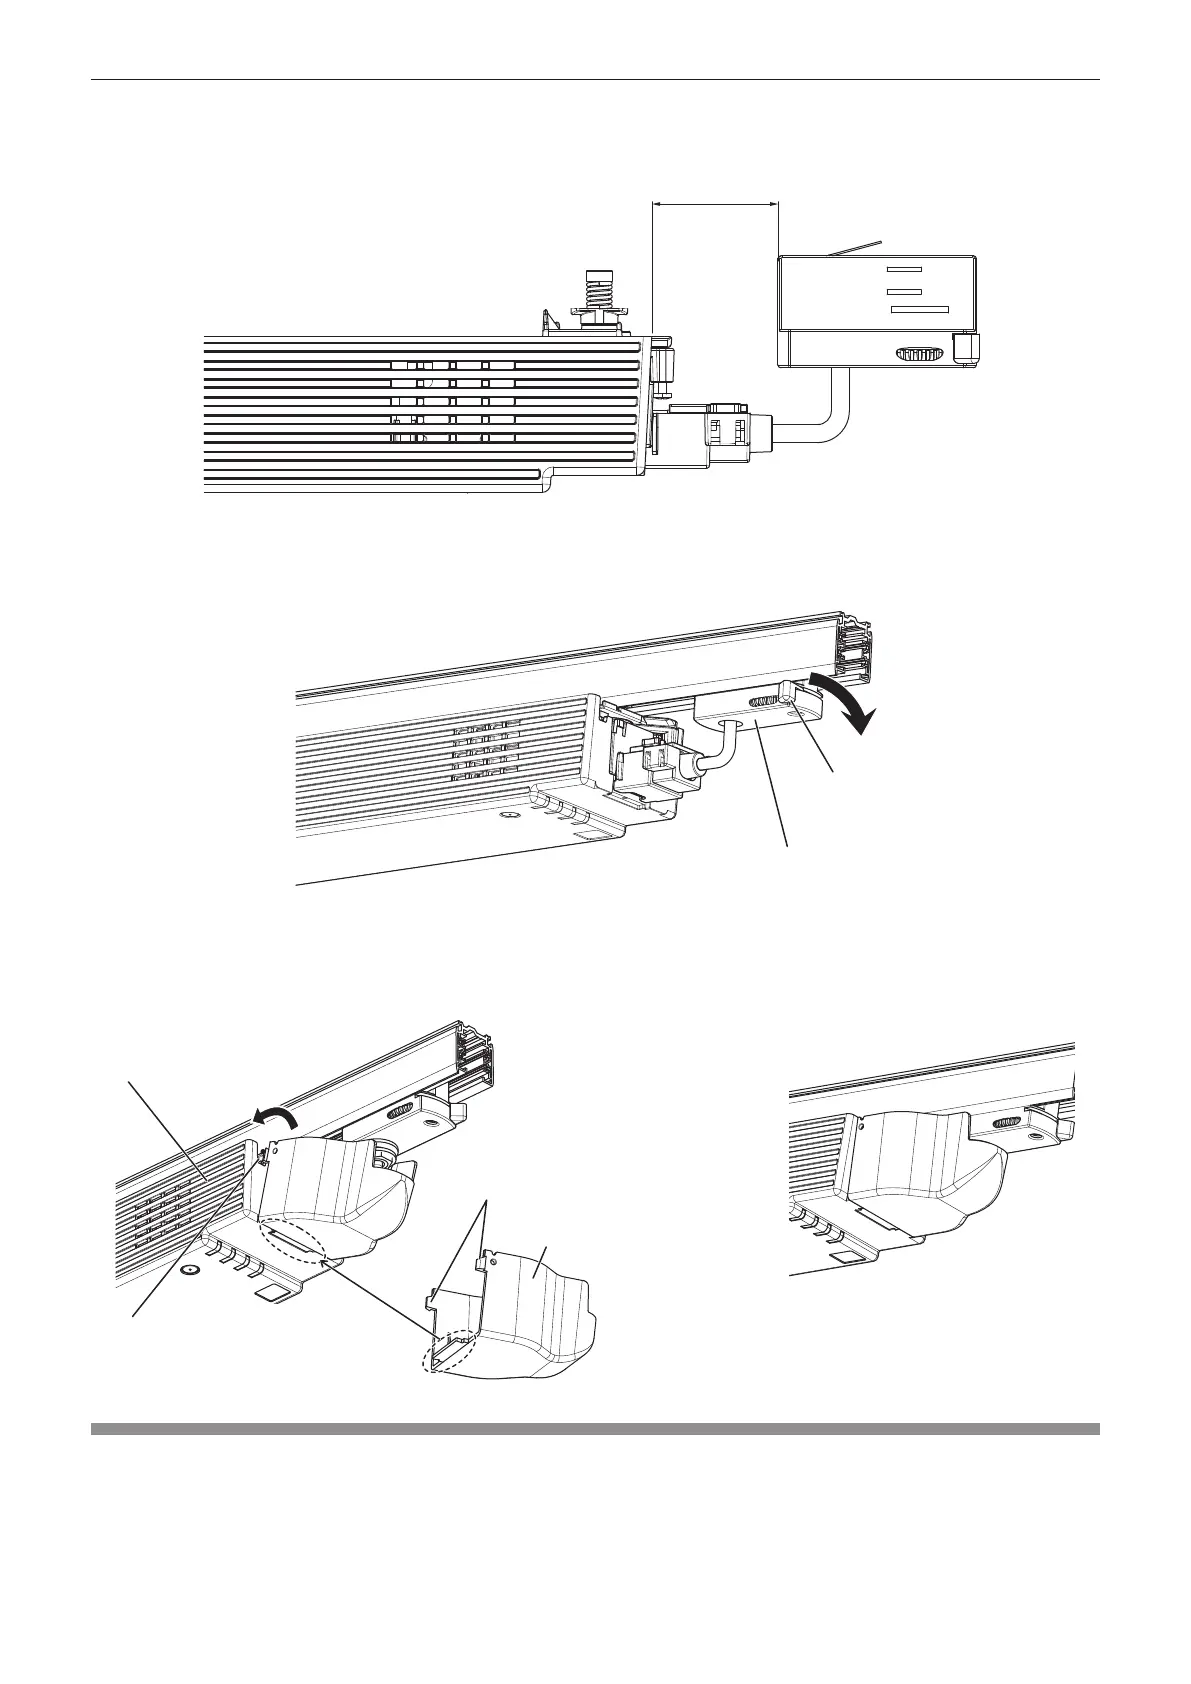
f While aligning the protrusion at the lower center of the adapter cover to the depression on the power supply
unit (i), push both tabs at the upper side of the adapter cover into the notches of the power supply unit until
they click (ii). Be careful not to get the string caught in the adapter cover.
(ii)
(i)
Illustration after the adapter cover has been
attached
Power supply unit
Tabs
Adapter cover
Notch
Adjusting the projection position
After mounting the projector to the track system, adjust the orientation of the main unit to determine the projection
position.
 Loading...