Chapter 2 Getting Started — Installing/removing the projector
34 - ENGLISH
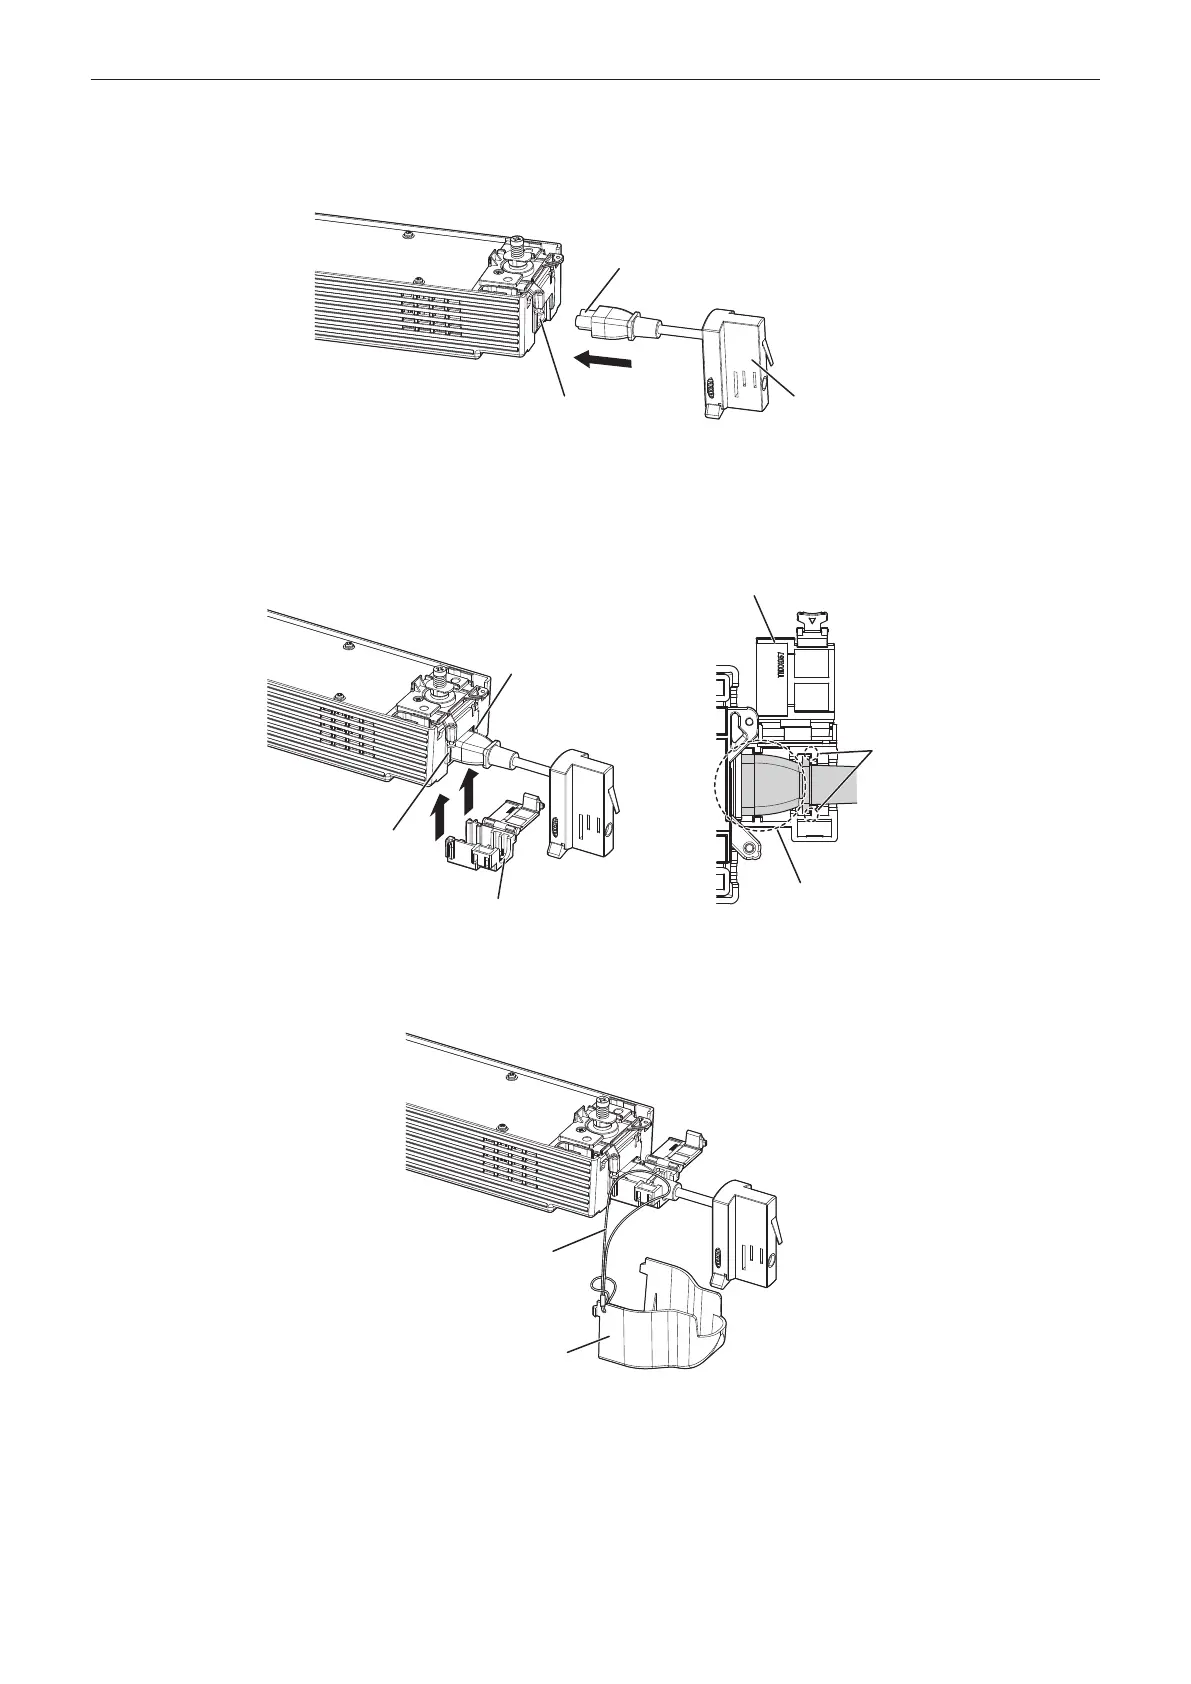
4) Completely insert the power connector of the supplied adapter into the <AC IN> terminal on the
power supply unit.
f Check the shapes of the <AC IN> terminal on the power supply unit and the power connector of the
adapter, and insert the power connector into the <AC IN> terminal completely.
Power connector
<AC IN> terminal
Adapter
5) Attach the supplied connector secure lock.
f Attach the connector secure lock from under the <AC IN> terminal on the power supply unit along the
guides on both sides.
f Conrm that the power connector of the adapter is placed inside the ribs of the connector secure lock (the
power supply unit side) as shown in the gure.
Guide
Guide
Connector secure lock
Connector secure lock
Ribs
Power connector
6) Put the string of the adapter cover on the connector secure lock.
f Put the string already attached to the supplied adapter cover on the connector secure lock as shown in the
gure.
String
Adapter cover
7) Fix the connector secure lock.
f Push the connector secure lock in until the tab of the connector secure lock clicks with the string put on.
Be careful not to get the string caught in the tab.
 Loading...