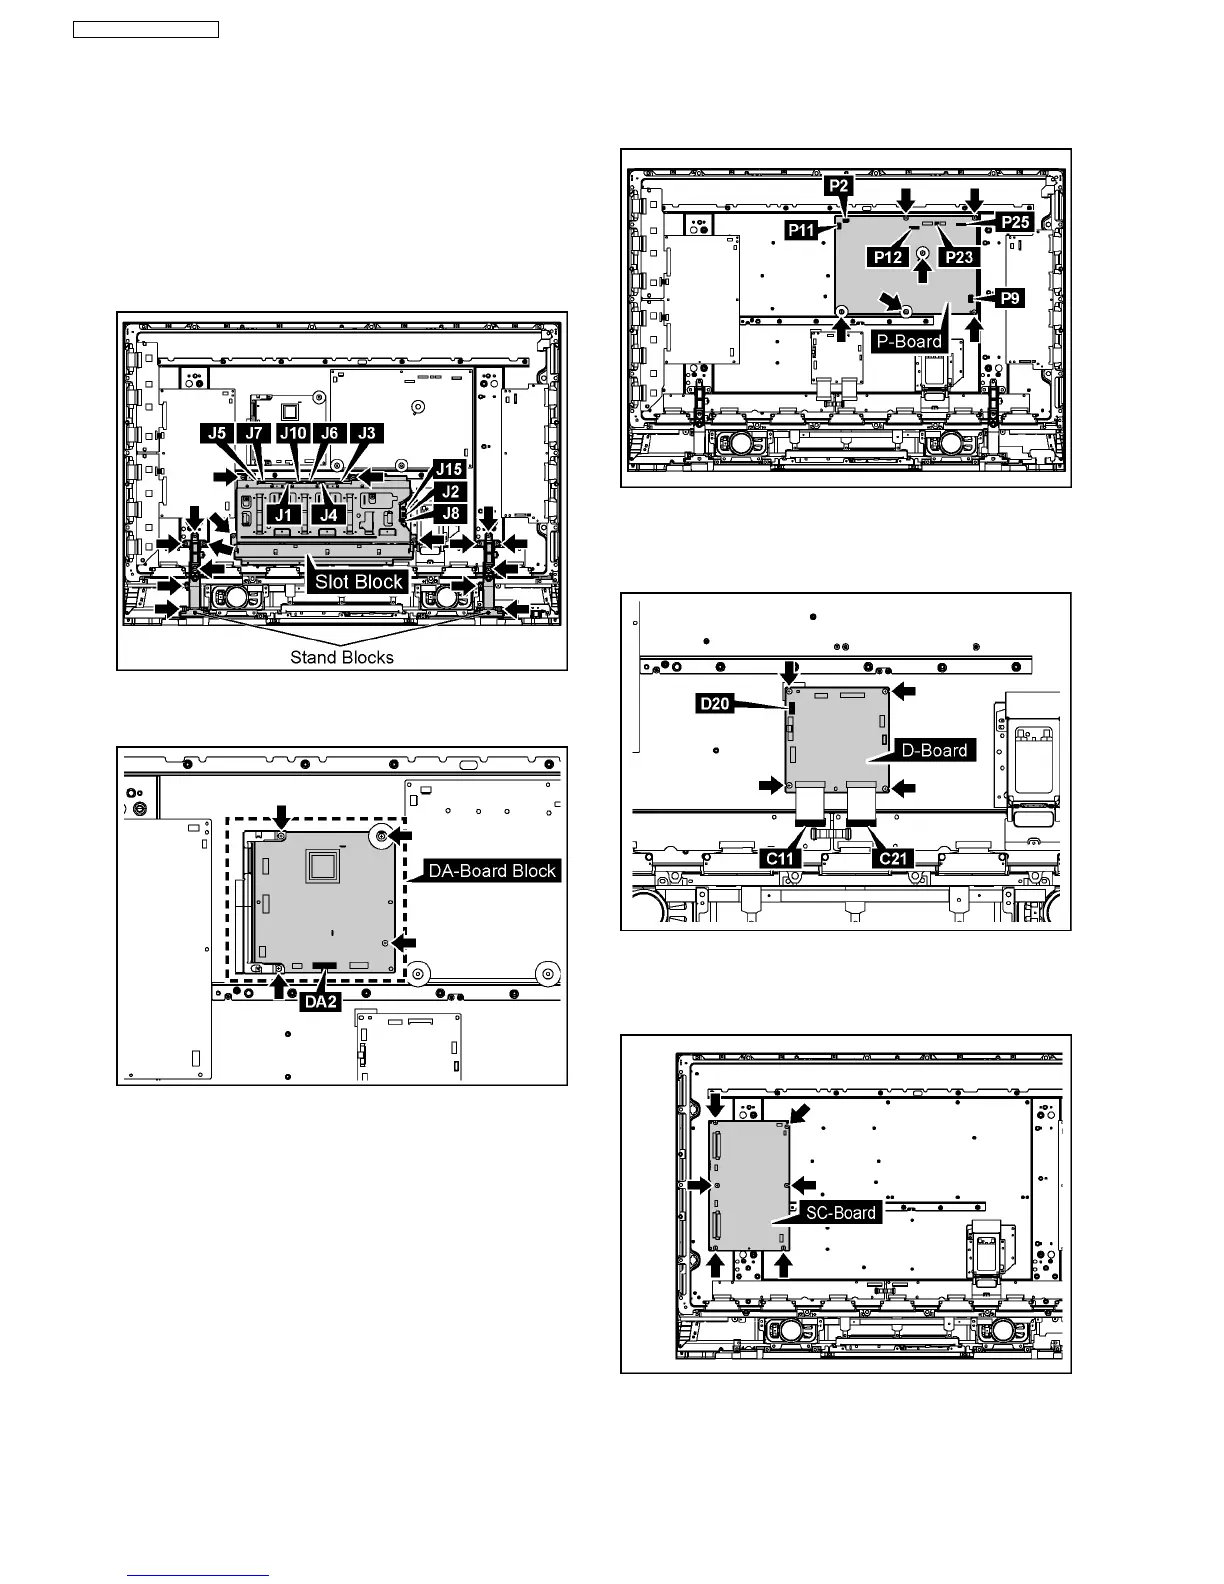
6.20. Removal of the Plasma Panel
·
The C1,C2 module is connected with the plasma panel
for the repair.
1. Remove the each 6 screws and then remove the Stand
Blocks.
2. Disconnect the couplers(J1, J2, J3, J4, J5, J6, J7, J8, J10,
J15).
3. Remove the 4 screws and then remove the Slot Block.
4. Remove the Flexible Cable from the couplers(DA2).
5. Remove the 4 screws and then remove the D-Board Block.
6. Disconnect the couplers(P2, P9, P11, P12, P23, P25).
7. Remove the 6 screws and then remove the P-Board.
8. Disconnect the coupler(D20).
9. Remove the Flexible Cable from the couplers(C11, C21).
10. Remove the 4 screws and then remove the D-Board.
11. Remove the SU-Board and the SD-Board.
(Reference to Removal of the SU-Board and the SD-Board)
12. Remove the 6 screws and then remove the SC-Board.
18
TH-37PG9W / TH-42PG9W