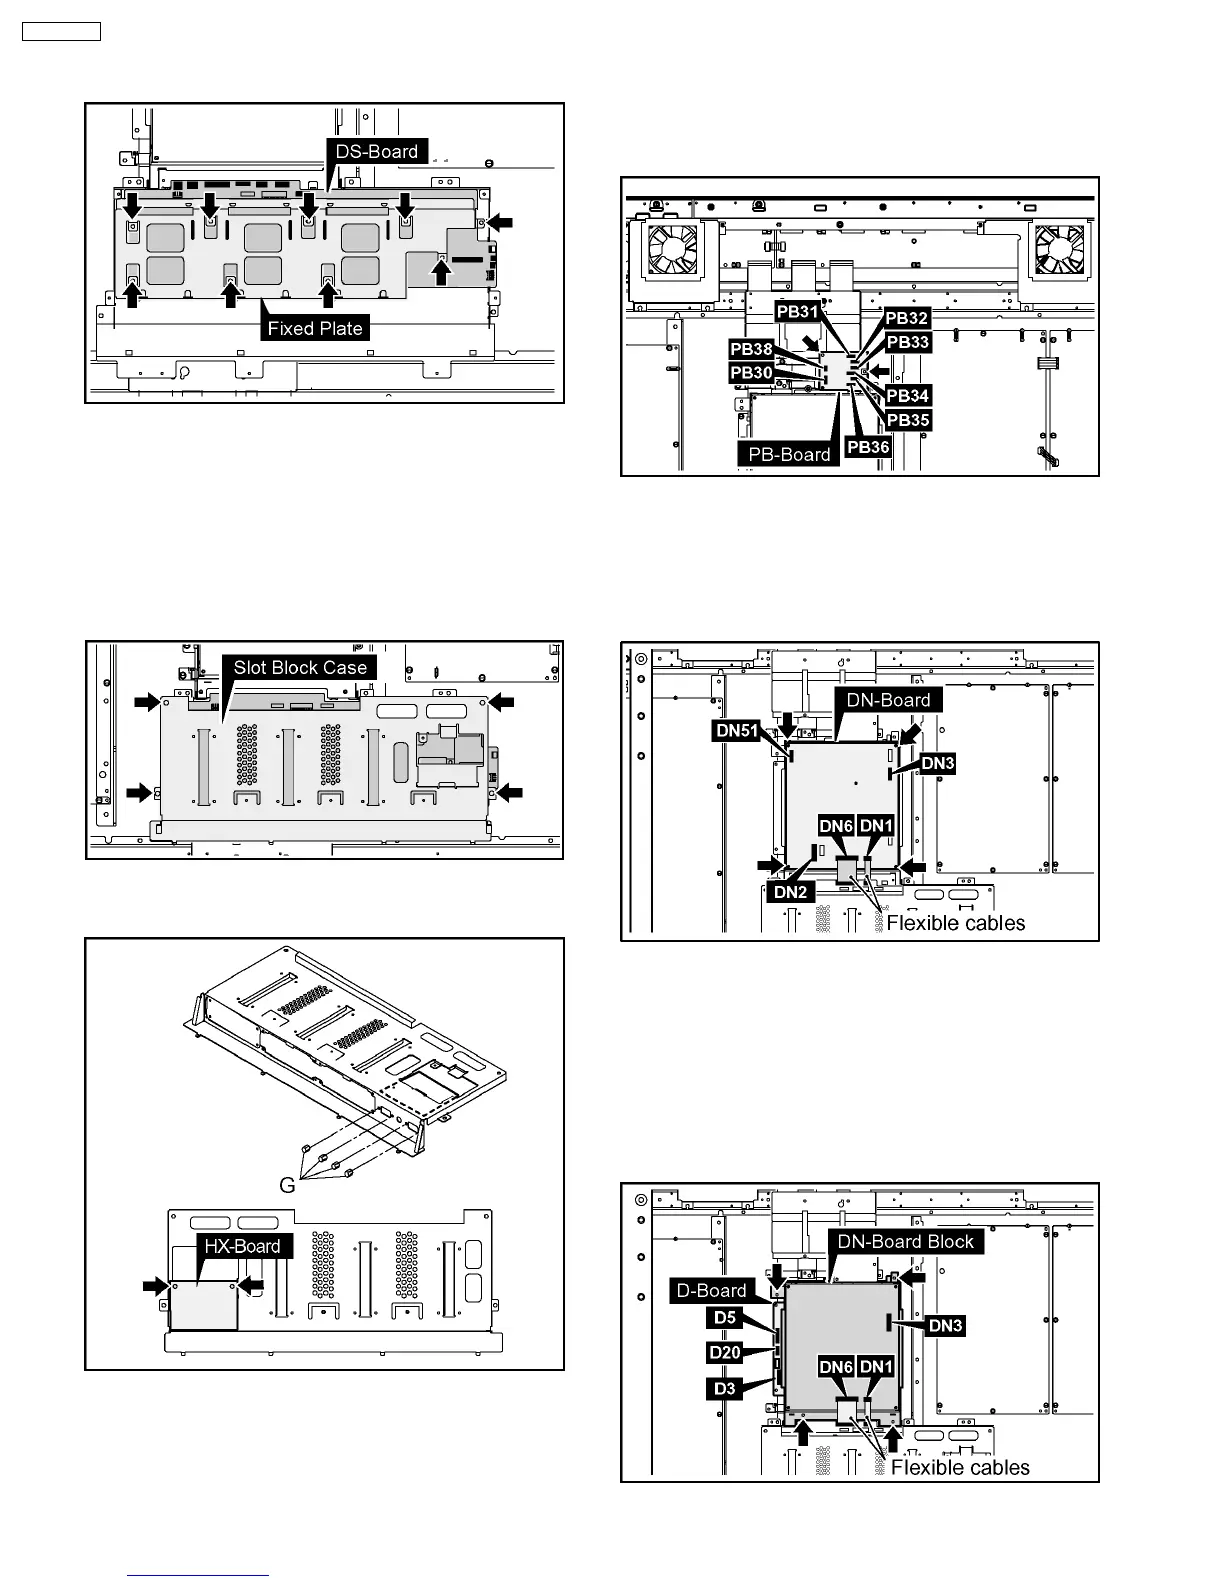
5. Remove the 9 screws and then remove the DS-Board and
Fixed Plate.
6.5. Removal of the HX-Board
1. Remove the HA Terminal Block and the HDD Terminal
Block.
(Reference to Removal of the HA-Board and the HDD-
Board)
2. Remove the 4 screws and then remove the Slot Block
Case.
3. Remove the 4 Hexagonal-Head screws (G) and the 2
screws of the HX-Board and then remove the HX-Board.
6.6. Removal of the PB-Board
1. Disconnect the couplers (PB30, PB31, PB32, PB33, PB34,
PB35, PB36, PB38).
2. Remove the 2 screws and then remove the PB-Board.
6.7. Removal of the DN-Board
1. Remove the flexible cables from the couplers (DN1, DN6).
2. Disconnect the couplers (DN2, DN3, DN51).
3. Remove the 4 screws and then remove the DN-Board.
6.8. Removal of the D-Board
1. Remove the PB-Board. (Reference to Removal of the PB-
Board)
2. Remove the flexible cables from the couplers (DN1, DN6).
3. Disconnect the couplers (D3, D5, D20, DN3).
4. Remove the 4 screws and then remove the DN-Board
Block.
10
TH-65PF9UK
 Loading...