Chapter 14
DA7 Users’ Guide
14
-
5
14
Automation
14-2 AUTOMATION, EXECUTE Window
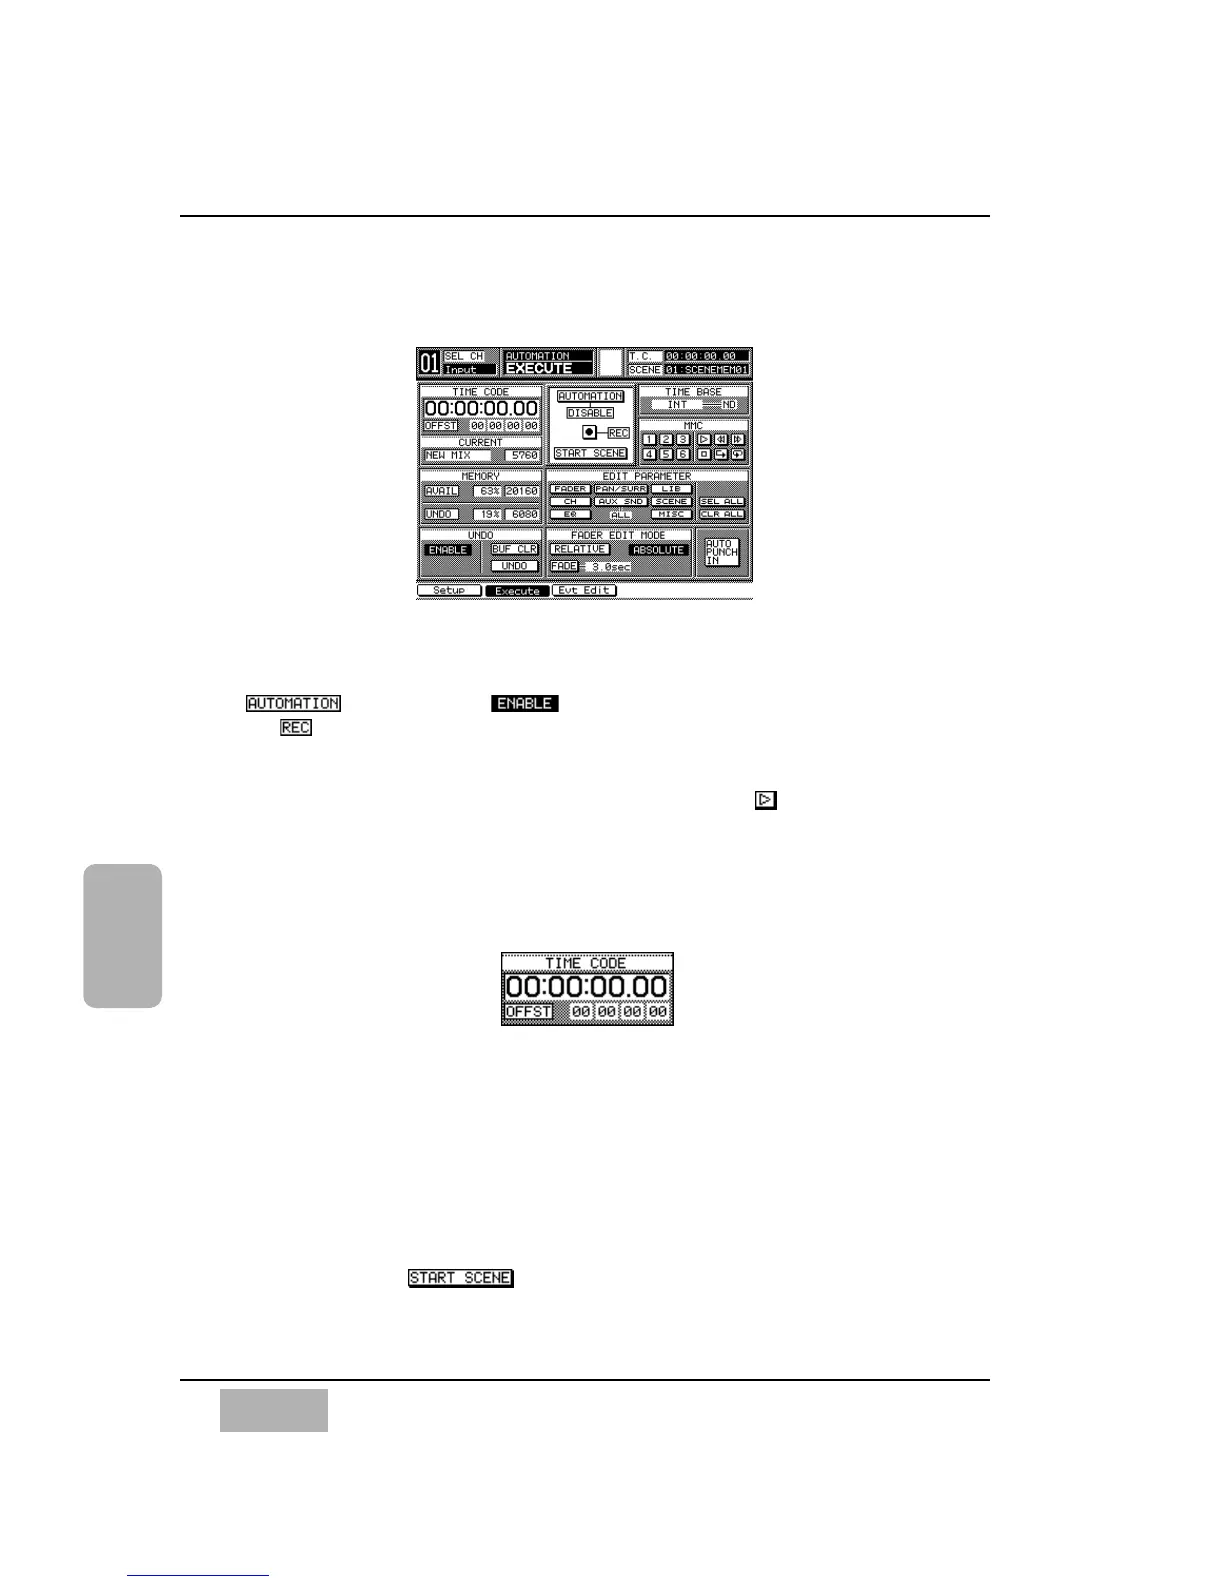
Automation is principally controlled from the [AUTOMATION>EXECUTE]
window. Recording and playback of automation are not possible unless the
button is set to . Automation recording is “enabled” when
the button is pressed, and recording begins when Timecode starts
running. You can also "enable" the automation by pressing the AUX /
AUTOMATION LED button on the front panel, located just below the
MASTER DISPLAY area. Cursor to the [MMC] area [Play ] button, and
press the ENTER button to start Timecode.
While in record mode, the [taskbar] flashes the words Automation and
Recording.
[TIME CODE] Area
The current timecode information appears in this area. Hours, minutes,
seconds and frames are displayed in 8 digits when [Internal], [MTC], or
[SMPTE] is selected for time base. When the [MIDI CLK] is selected, the
[TIME CODE] area displays measures, beats, and clocks while the far right of
the [OFF SET] Area indicates the time signature. The initial time signature is
4/4. See setting [TIME BASE] on page 14-8 for additional information.
The [START SCENE] timecode appears and turns to inversed video for a
half second when is overwritten. In the same manner the locate
point appears in the [TIME CODE] Area when one of the locator buttons is
selected.
EXECUTE Window
TIME CODE Area