Bulletin 100-50-9.1 – Page 127
12. Press the SET button to move the valve to the desired
position. e display will revert to .
13. Repeat steps 9 – 12 to move the valve to any desired
position.
14. When nished, press the ESC button twice to return to
the default display and exit Test Mode.
19.12 MANUALLY POSITION EEPR
1. From the default display, press the button. e
display will show .
2. Use the ▲▼ buttons to enter the Technician password
and press SET.
3. e display will show .
4. Press the ▼ button until e is displayed.
5. Press SET to enter the Test sub-menu. The display will
show e(Test Enable).
6. Press SET to enter ON/OFF sub-menu. The display will
show o(Or current state of Test Enable).
7. Press the ▲ button to o.
8. Press SET to activate Test Mode. The display will
revert to e.
9. Press the ▲ button until is displayed.
10. Press the SET button. The current EEPR % open value
will be displayed.
11. Use the ▲▼ buttons to adjust the desired valve
position.
12. Press the SET button to move the valve to the desired
position. The display will revert to .
13. Repeat steps 9 – 12 to move the valve to any desired
position.
14. When finished, press the ESC button twice to return to
the default display and exit Test Mode.
19.13 CLEAN MODE
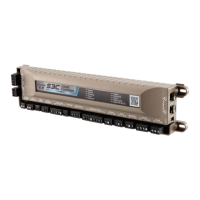
The S3C Case Control supports a Clean Mode. Putting the
control in this state shuts off refrigeration and evaporator
fans, suspends defrost requests and disables all alarms. They
will remain off until the user terminates the Clean Mode.
This allows for either cleaning of the case or performing
service functions that require the case to be in an “OFF”
state. Clean Mode can be initiated or terminated using any
S3C Display Module (DM) in the case line-up.
Warning: The Clean Mode feature is not to be used
for safety critical servicing. Use proper lockout tag out
producers, as defined by local requirements and codes, on
the case if electrical repair or other safety critical servicing
is required.
19.13.1 SINGLE KEY PRESS CLEAN MODE
ENTRY
Warning: It is imperative that Clean Mode be manually
terminated in a timely fashion to prevent product loss or
possible equipment malfunction. Single key press Clean
Mode entry:
1. From the default display, press and hold the and ▼
buttons for 3 seconds. The display will show
.
2. Use the ▲▼ buttons to enter the Technician password
and press SET.
3. The display will show .
4. Press SET to enter ON/OFF sub-menu. The display will
show o (Or current state of Clean Mode).
5. Press the ▲ button to o.
6. Press SET to activate Clean Mode.
19.13.2 STANDARD MENU ENTRY FOR
CLEAN MODE
1. From the default display, press the button. The
display will show .
2. Use the ▲▼ buttons to enter the service password and
press SET.
3. The display will show .
4. Press SET to enter ON/OFF sub-menu. The display will
show o (Or current state of Clean Mode).
5. Press the ▲ button to o.
6. Press SET to activate Clean Mode.
19.13.3 TO EXIT CLEAN MODE AND RESUME
NORMAL OPERATION
1. From the default or display, press the button.
The display will show .
2. Use the ▲▼ buttons to enter the Technician password
and press SET.
3. The display will show .
4. Press SET to enter ON/OFF sub-menu. The display will
show o (Or current state of Clean Mode).
5. Press the ▲ button to o.
6. Press SET to deactivate Clean Mode.
19.14 TEST MODE
The controller may be placed in test mode to manually
toggle the internal relays or operate the step motor
valves. This mode can help verify correct operation of the
components and may aid in troubleshooting. Note: Once
the controller is placed in test mode (N set to o),
the controller will remain in test mode until N is set
to off or by pressing the ESC button until the default
display (case temperature) is shown.
 Loading...
