Bulletin 100-50-9.1 – Page 79
7. Press the SET button when (Expansion Valve
Type) is displayed. Use ▲▼ buttons to choose the
Expansion Valve Type based on the below chart; press
SET.
8. Press the SET button when e (Number of
Evaporators) is displayed. Use the ▲ button and scroll
to 1(1 Evaporator); press SET.
9. Press the SET button when (Building Automation
System Expected) is displayed. Use the ▲▼ buttons to
choose e or o; press SET.
a. If e is chosen, the display will show
(Building Automation System Protocol). Press the
SET button then use ▲▼ buttons to choose the
B.A.S. Protocol based on the below chart; press SET.
10. Press the SET button when o (Month) is shown.
Use the ▲ button to choose the current month; press
SET.
11. Press the SET button when d (Day) is shown. Use
the ▲ button to choose the current day; press SET.
12. Press the SET button when e (Year) is shown. Use
the ▲ button to choose the current day; press SET.
13. Press the SET button when e (Time) is shown.
Use the ▲ button to choose the current time in 24
hour format; press SET. Note: Holding the ▲ or ▼
down while setting the time will accelerate the
scrolling.
14. Press the SET button when ef (Refrigerant Type) is
shown. Use the ▲▼ buttons to choose the Refrigerant
Type; press SET. e list of refrigerants can be seen in
Table on page 99.
15. Press the SET button when (Number of Cases
Expected in Line-up) is shown. Use the ▲▼ buttons to
choose the number of cases expected in the Line-up;
press SET.
16. Press the SET button when (Evaporator Pressure
Regulating Valve Type) is shown. Use the ▲▼ buttons
to choose from either 25 or 6386 depending on the
valve; press SET. Please consult the literature supplied
with the valve to determine the correct step count. For
custom valve selection, see valve conguration menu
in Section 11.13.
17. Press the SET button when (EPR Location) is
shown. Press the ▲ button to scroll to (EEPR per
Line-up); press SET.
18. Press the SET button when d (Discharge Air Low
Temperature Setpoint) is shown. Use the ▲▼ buttons
to choose the setpoint in °F; press SET.
19. Press the SET button when d (Discharge Air
Medium Temperature Setpoint) is shown. Use the ▲▼
buttons to choose the setpoint in °F; press SET.
20. Press the SET button when def (Defrost Type) is
shown. Use the ▲▼ buttons to choose the Defrost
Type; press SET. Defrost options are:
21. Press the SET button when de (Defrost Termination
Fail-safe Time) is shown. Use the ▲▼ buttons to
choose the fail-safe time in minutes; press SET.
22. Press the SET button when de (Defrost Termination
Fail-safe Time) is shown. Use the ▲▼ buttons to
choose the fail-safe time in minutes; press SET.
23. Press the SET button when dfd (Number of Defrosts
Per Day) is shown. Use the ▲▼ buttons to choose the
defrost per day; press SET.
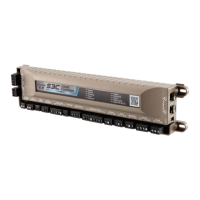
The S3C Case Control system is now set-up and will begin
controlling the refrigerated display case.
Display Meaning
hg
Hot gas
ee
Electric
Air
Display Meaning
485
Modbus Protocol over RS-485
6485
Bacnet Protocol over RS-485
Bacnet Protocol over IP (Ethernet)
o
Modbus Protocol over IP (Ethernet)
Display Meaning
u
Pulse Width Modulation Valve
5
500 Step Valve
1596
1596 Step Valve
25
2500 Step Valve
3193
3193 Step Valve
6386
6386 Step Valve
u
Custom Stepper Valve (See Section 11)
 Loading...
