P350 flexitrax Operation Manual 15
Figure 2.11: Installing the large adjustable elevator
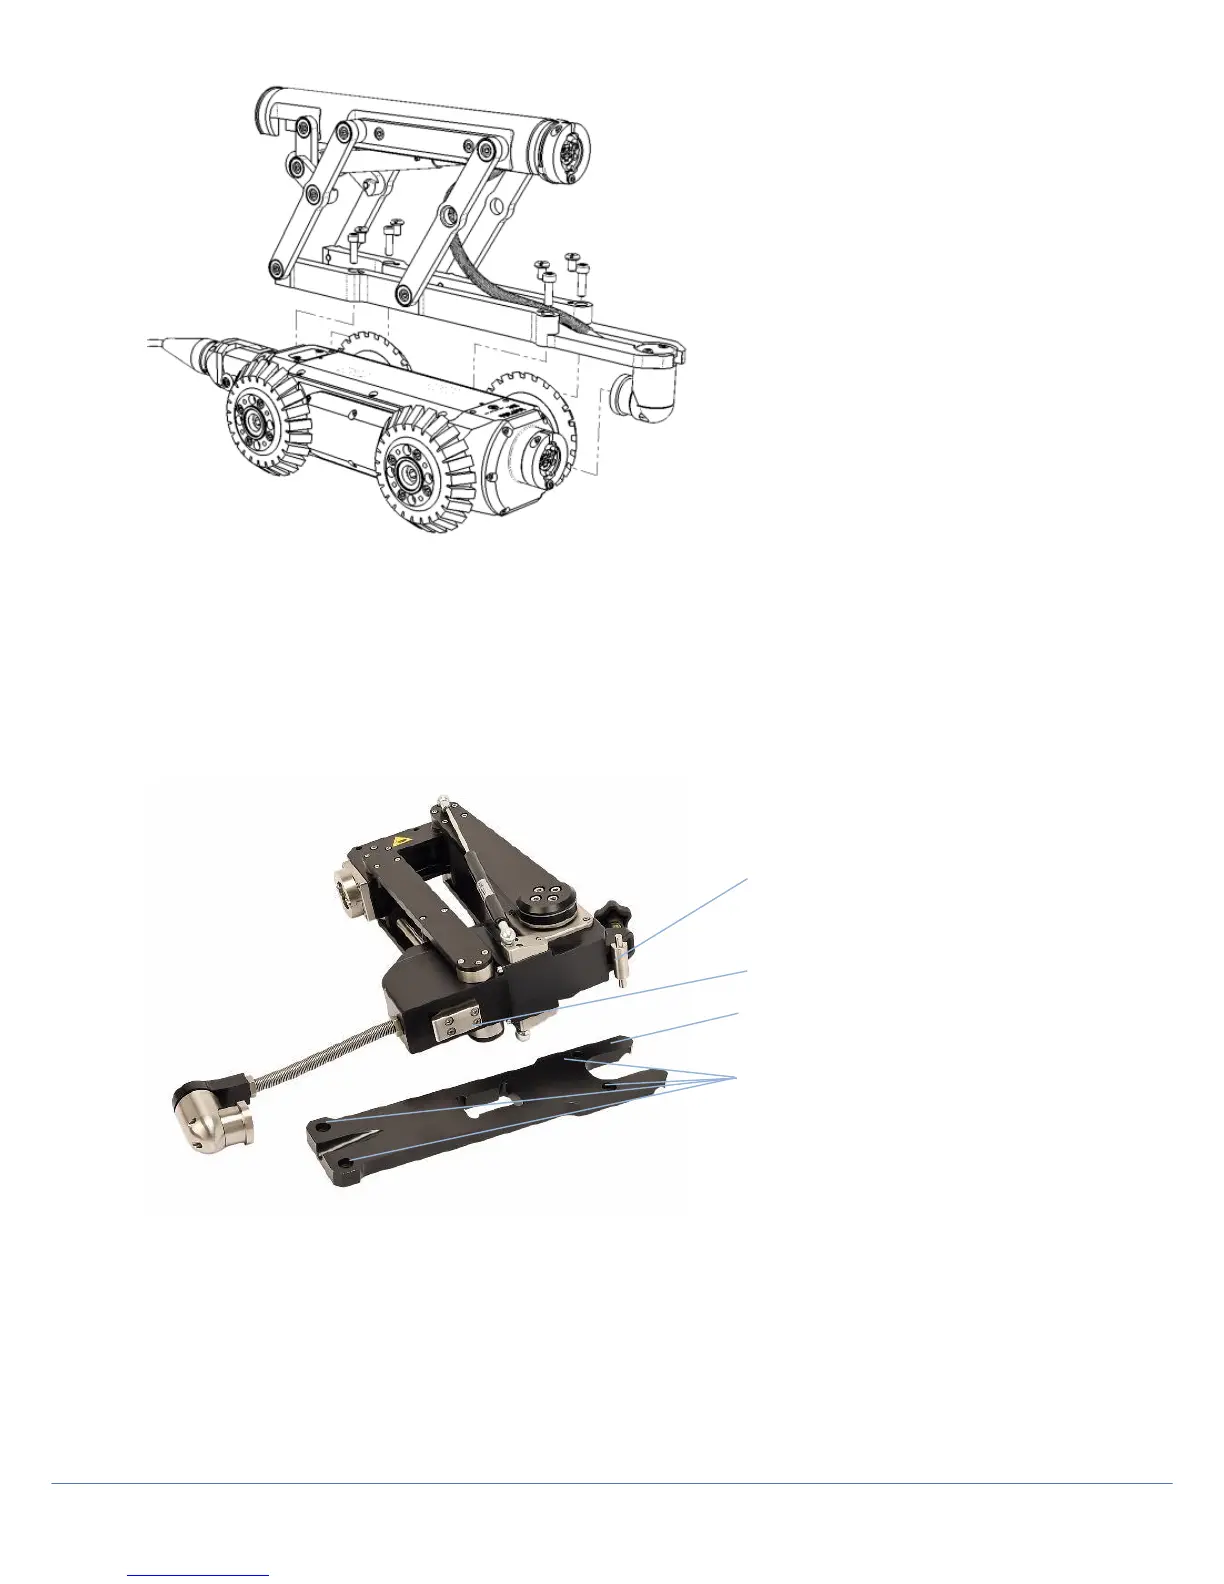
Powered elevator
Installing the powered elevator
The powered elevator is fitted onto a baseplate that first needs to be fitted to the P356 crawler.
Four mounting screws are provided, which should be used to fit the baseplate to the top of the P356 crawler. Once
fitted, there is no need to remove the baseplate even when inspecting smaller pipes.
Figure 2.12: Installing the powered elevator
Once the baseplate is fitted, the powered elevator can be mounted and removed using a quick-release mechanism.
First, loosen off the thumbscrew at the rear of the elevator so that there is plenty of play in the mechanism
Line the elevator up with the P356 crawler, and slide the ‘shoe’ projecting from the bottom of the elevator into the
corresponding recess in the baseplate.
The thumbscrew mechanism should engage with corresponding recesses in in the baseplate. Once located, tighten
the thumbscrew to fix the elevator to the crawler.
The electrical connection can then be fitted to the front of the crawler as normal.