PRUNING SHEARS C45, C45-P150, C45-P200
163529-D
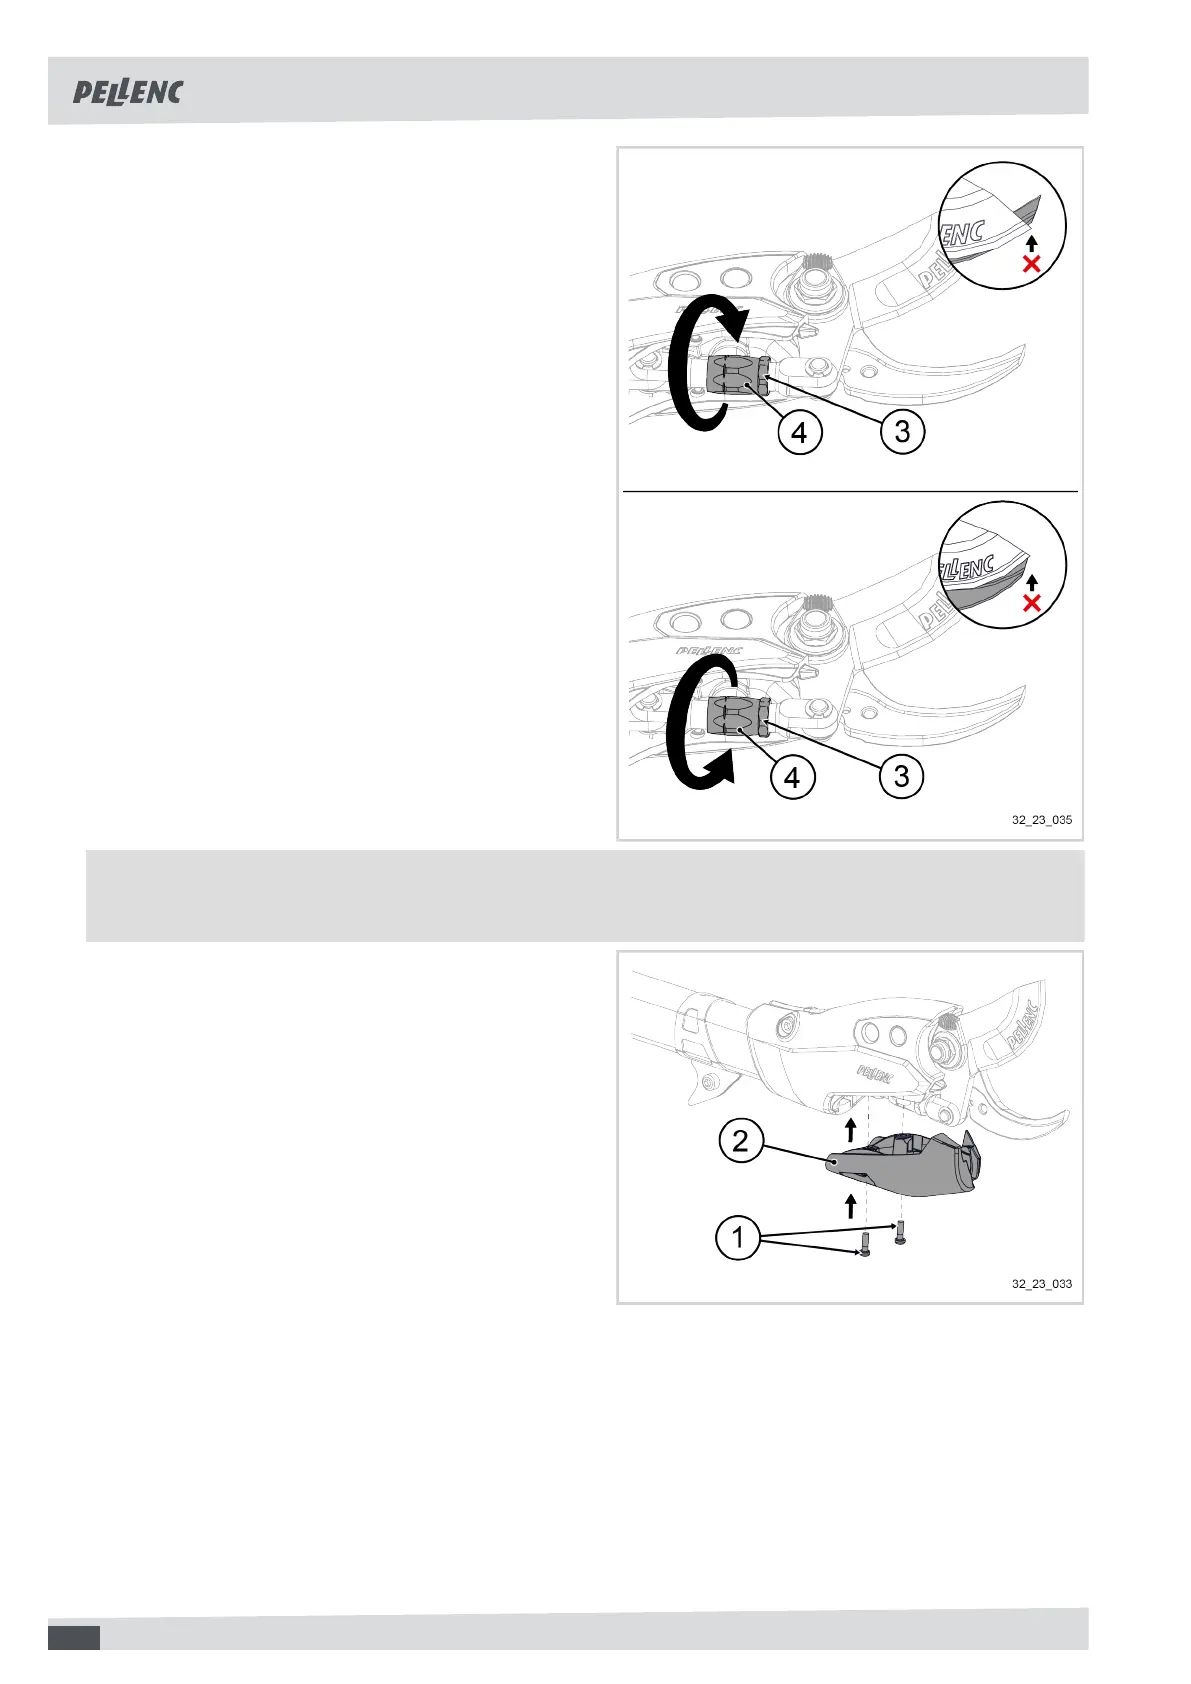
8.
If the blade crossing is too significant:
• Unscrew the safety ring (3) with a 13 mm
wrench.
• Unscrew the adjustment link (4) to extend it.
• Screw on the safety ring (3) to secure the posi-
tion of the adjustment link (4).
If the blade crossing is insufficient:
• Unscrew the safety ring (3) with a 13 mm
wrench.
• Screw in the adjustment link (4) to shorten it.
• Screw on the safety ring (3) to secure the posi-
tion of the adjustment link (4).
Important
Be careful not to unscrew the adjustment link (3) too far, as it could come off or collide with the blade hook.
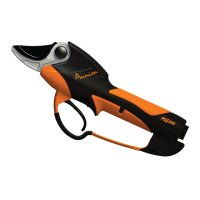
9. Put the cutting head cover (2) on the tool.
10. Tighten the two screws (1) to secure the position of
the cutting head cover using a Torx T10 screwdriver.
11. Connect the tool to the battery.
See 4.7. Connecting the tool to the ULIB 150P and
250 batteries, page 17.
12. Switch on the battery.
See the operating instructions for the battery.
13. Start the tool.
See 5.2.2. Starting the tool with a pole with Ac-
tiv' Security activated (factory setting), page 20 or
5.3.2. Starting the tool with Activ' Security deactivat-
ed, page 22.
14. Close the blade by pulling the trigger of the tool.
15. If the blade crossing setting is not satisfactory, re-
peat all the points in the above procedure.
36