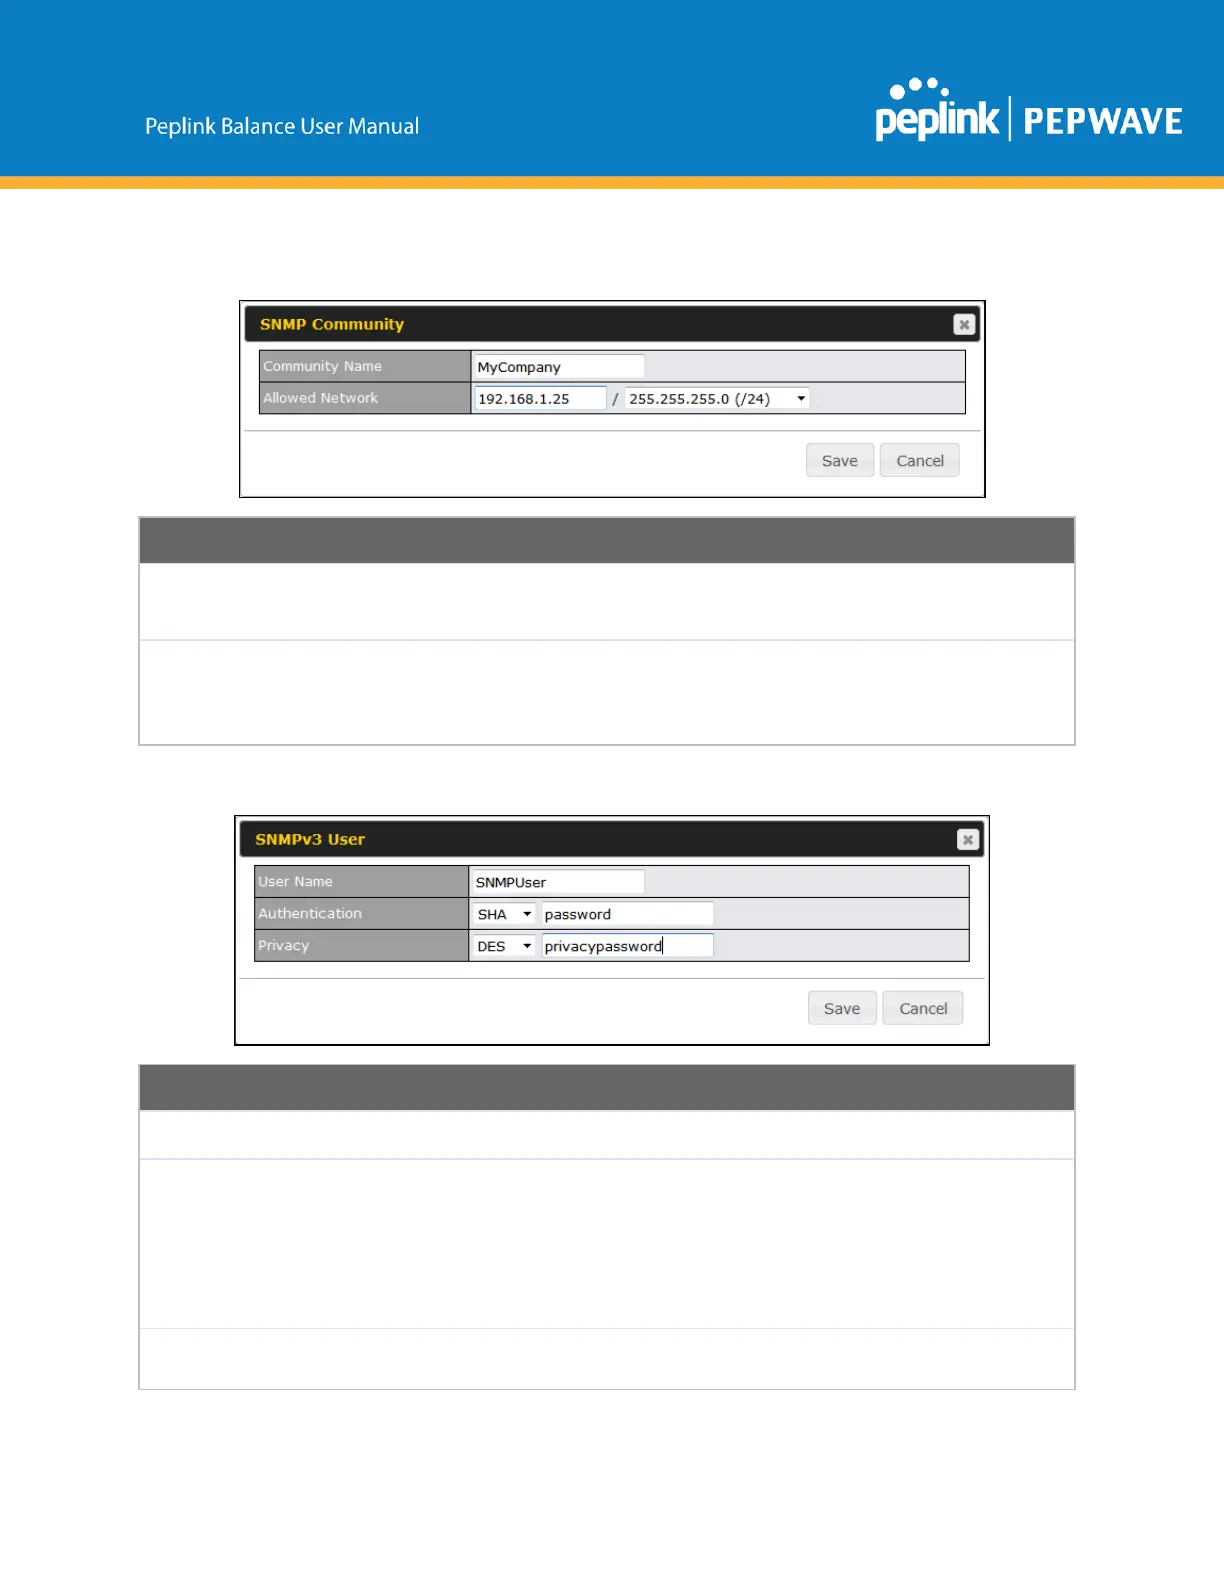
ToaddacommunityforeitherSNMPv1orSNMPv2,clicktheAddSNMPCommunitybuttoninthe
CommunityNametable,uponwhichthefollowingscreenisdisplayed:
ThissettingspecifiestheSNMPcommunityname.
AllowedSource
Subnet
Address
This setting specifies a subnet from which access to the SNMP server is allowed. Enter
subnetaddresshere(e.g.,192.168.1.0)andselecttheappropriatesubnetmask.
TodefineausernameforSNMPv3,clickAddSNMPUserintheSNMPv3UserNametable,uponwhich
thefollowingscreenisdisplayed:
ThissettingspecifiesausernametobeusedinSNMPv3.
Thissettingspecifiesviaadropdownmenuoneofthefollowingvalidauthentication
protocols:
● NONE
● MD5
● SHA
WhenMD5orSHAisselected,anentryfieldwillappearforthepassword.
Thissettingspecifiesviaadropdownmenuoneofthefollowingvalidprivacy
protocols:
Copyright@2019Peplink