FL MGUARD CENTERPORT
232
PHOENIX CONTACT 105656_en_05
11.3 Installing and booting the
FL MGUARD CENTERPORT
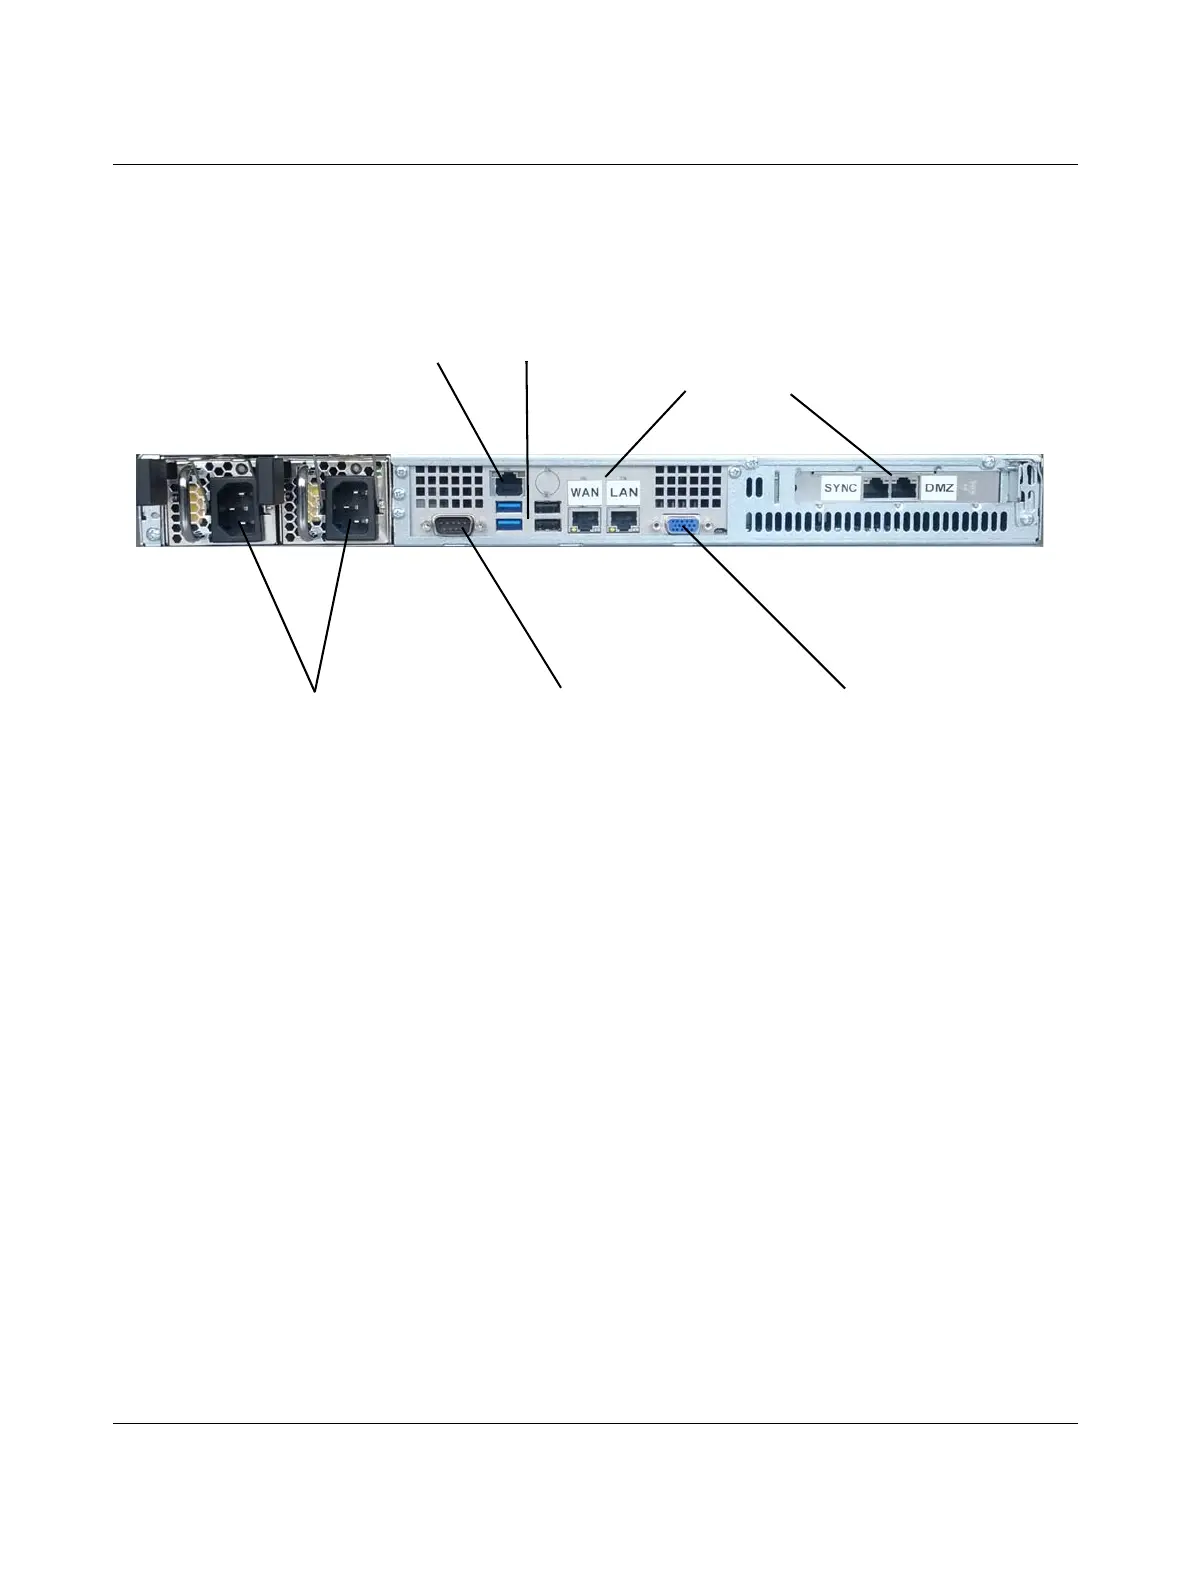
Figure 11-3 FL MGUARD CENTERPORT back
11.3.1 Connecting the device
1. Optional: Install the device in a 19" frame/industrial cabinet (“Installation in a 19"
frame/industrial cabinet” on page 234).
2. Connect the two mains input sockets to the mains or power supply source (100 - 240 V
AC) using a mains connecting cable.
3. Connect the network connections (see “Connecting the network connections” on
page 233).
4. Optional: Connect a PC monitor to the VGA port (not supplied as standard).
5. Optional: Connect a PC keyboard to one of the USB connections (not supplied as stan-
dard).
The keyboard and monitor do not need to be connected to start and operate the device. The
monitor and keyboard must only be connected
– in order to use one of the boot options upon starting (booting) the device (see “Boot
options - when monitor and keyboard are connected” on page 234).
– in order to perform a rescue procedure or recovery procedure. See “Restart, recov-
ery procedure, and flashing the firmware” on page 240.
2 x power supply/mains input socket, redun-
dant wide-range AC power supply unit
(100 - 240 V AC voltage source)
Serial interface
VGA port
Back
4 x USB
IPMI port
Ethernet (10/100/1000 Base-TX)
(WAN | LAN | SYNC | DMZ ports)
 Loading...