BLUEMARK LED
2-6
PHOENIX CONTACT 103933_en_01
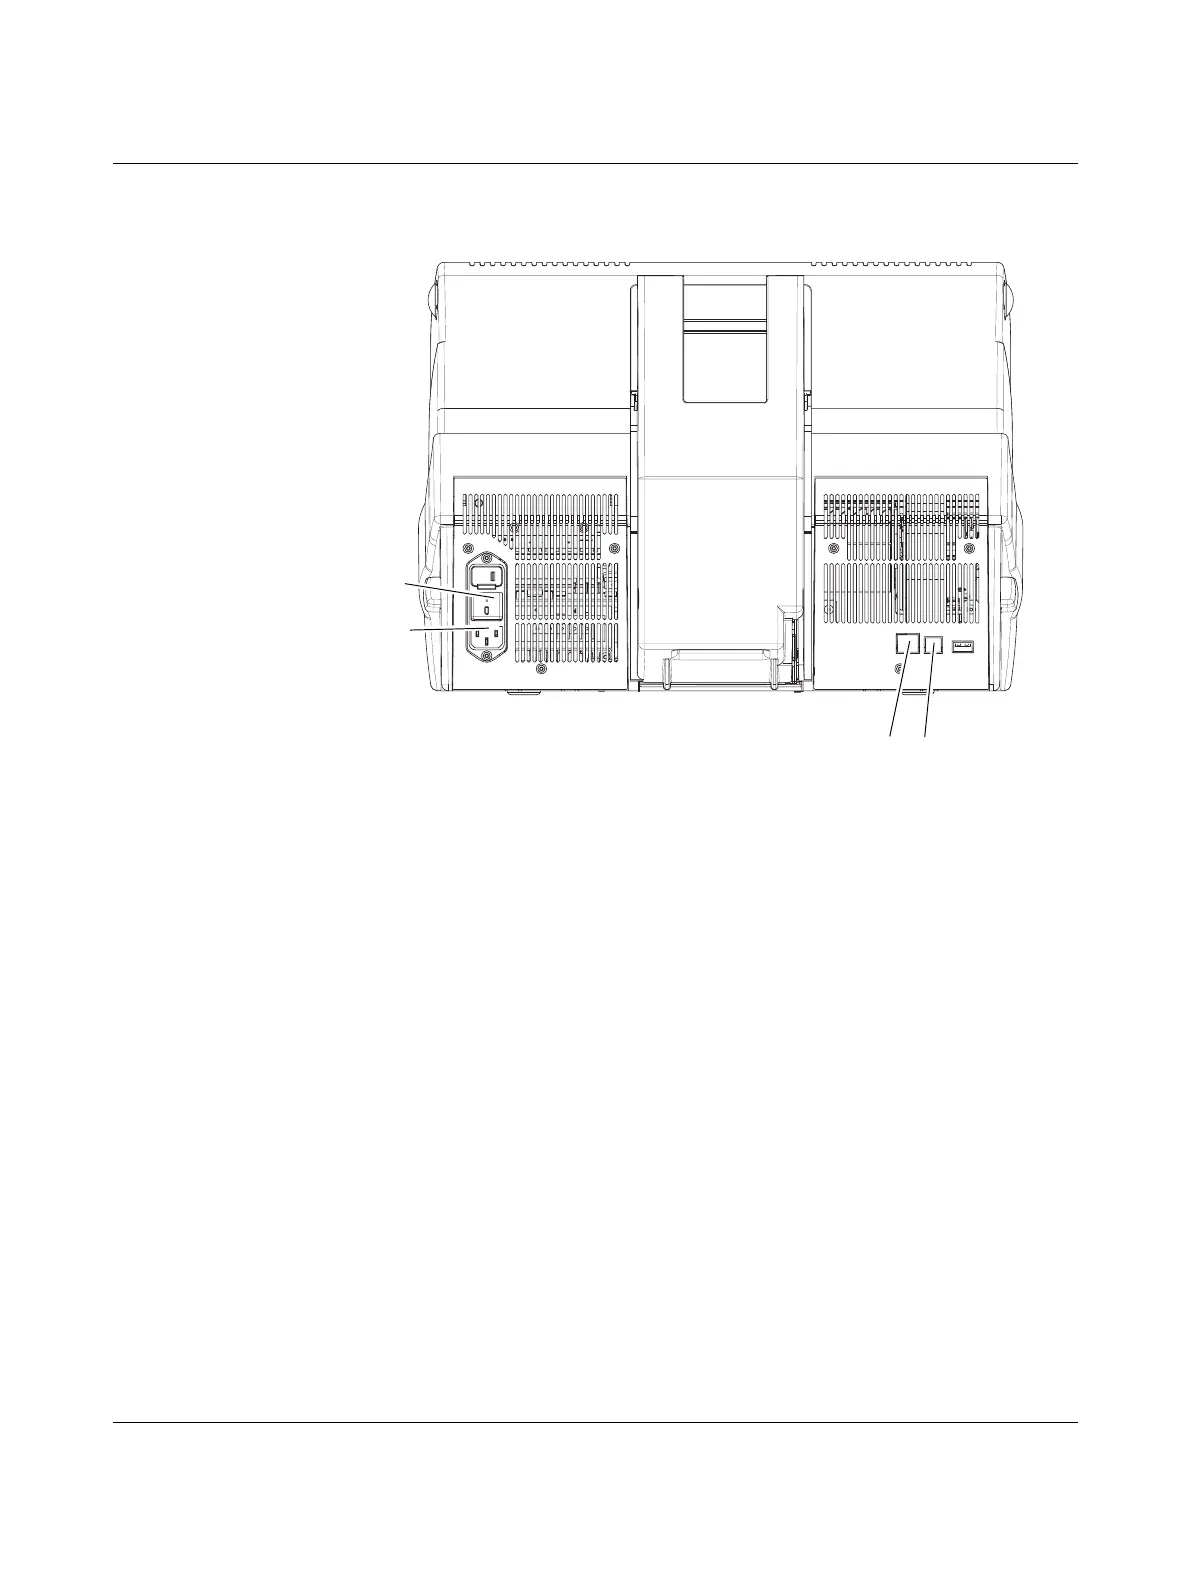
2.5 Connecting the printer
Figure 2-6 Connections on the back of the printer
1 On/off switch
2 Mains connection
3 Ethernet connection (LAN)
4 USB connection
2.5.1 Mains connection
• Connect the printer to the mains using the corresponding mains cable.
The printer has a wide-range power supply unit (100 V AC ... 240 V AC), which means
that no voltage switch-over is required on the device.
The BLUEMARK LED can be connected to the computer via USB, Ethernet (LAN) or
Bluetooth.
The BLUEMARK LED automatically selects the interface via which it receives data.
The interface can also be preset via the menu (see "Setting the interface" on page 3-10).
1
2
43
 Loading...