Printing sheets and setting up the printer
103933_en_01 PHOENIX CONTACT 3-1
3 Printing sheets and setting up the printer
3.1 Loading sheets
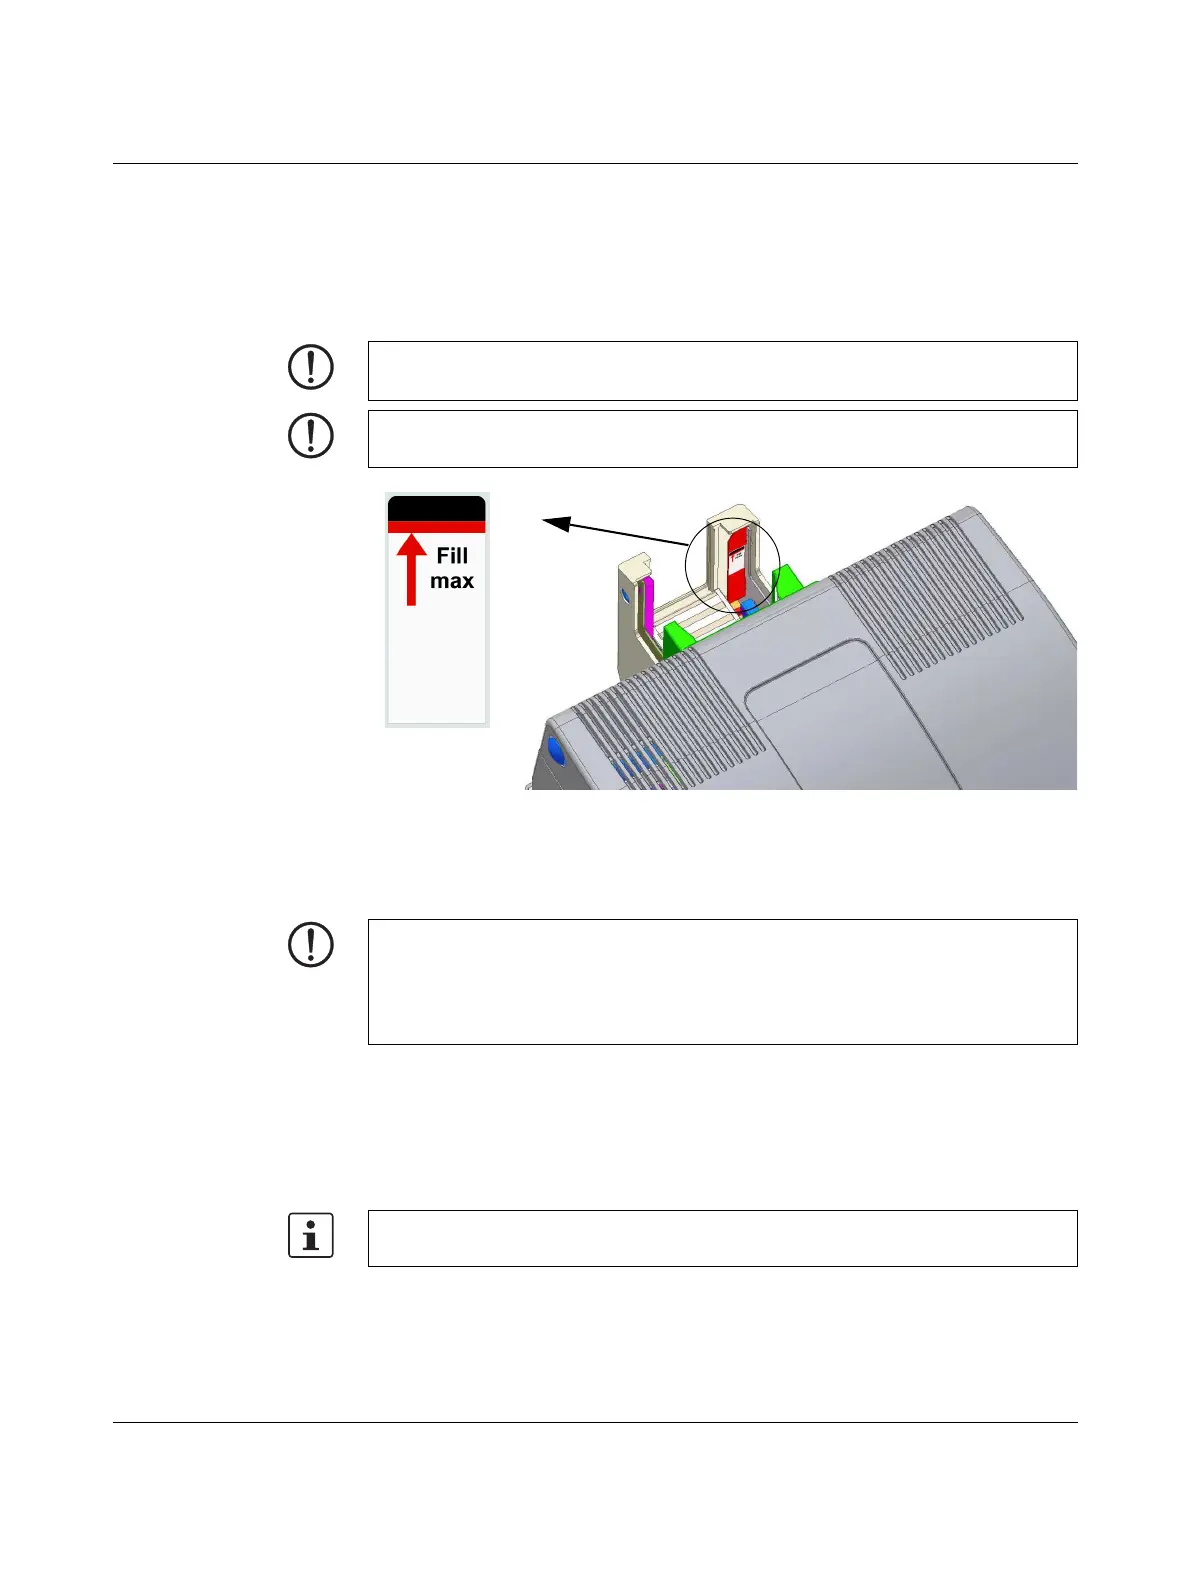
Figure 3-1 Transport module with capacity indicator
Before printing, load the sheets in the transport module. A marking indicates the maximum
capacity. It is around 15 mm below the top edge. If too many sheets are loaded, the
transport module cannot move up and the sheets or printer may be damaged.
3.2 Specifying printing
The sheets can be labeled using CLIP PROJECT advanced or popular Microsoft Office
products.
In CLIP PROJECT advanced the correct sheet type must be set, in MS Word or MS Excel
the page size (e.g., 76 x 120 mm) must correspond to the sheet size.
NOTE: Only use media which has been approved by Phoenix Contact.
Only print on media with complete rows, as missing rows can damage the printhead.
NOTE: Observe the maximum capacity when loading sheets.
NOTE: The transport module holds around 20 sheets with a typical height of around 4 mm.
The output tray holds fewer sheets than the input tray (around 10). It must therefore be
emptied during printing.
For automatic ejection, a sheet slide (BLUEMARK CARD SLIDER, Order No. 5147010) is
available as an accessory, which transports the sheets from the output tray.
Please note that the sheet type or the page size must be specified in the application
program.
 Loading...