38 PianoDisc Installation Guide
228CFX - PianoCD - iQ
K. Place a connecting link in lever #2. Drill a ¼” hole thru lever #2 for the
connecting screw to the ball linkage. (See Fig. 22) Locate the screw,
washers, felt and nut in the kit. Assemble the hardware on lever #2.
L. Mounting lever #2. First, place a pivot bracket on each side of the pivot
pin. Next, attach the connecting screw, on lever #2, to the ball linkage on
lever #1. (See Fig. 22) Then, center the lever #2 on the line at the bass/
tenor break. This is the ball linkage line established in step 21-A. Then
Position lever #2 so it will mount outside of the rail cover area. Attach the
lever with the screws supplied in the kit.
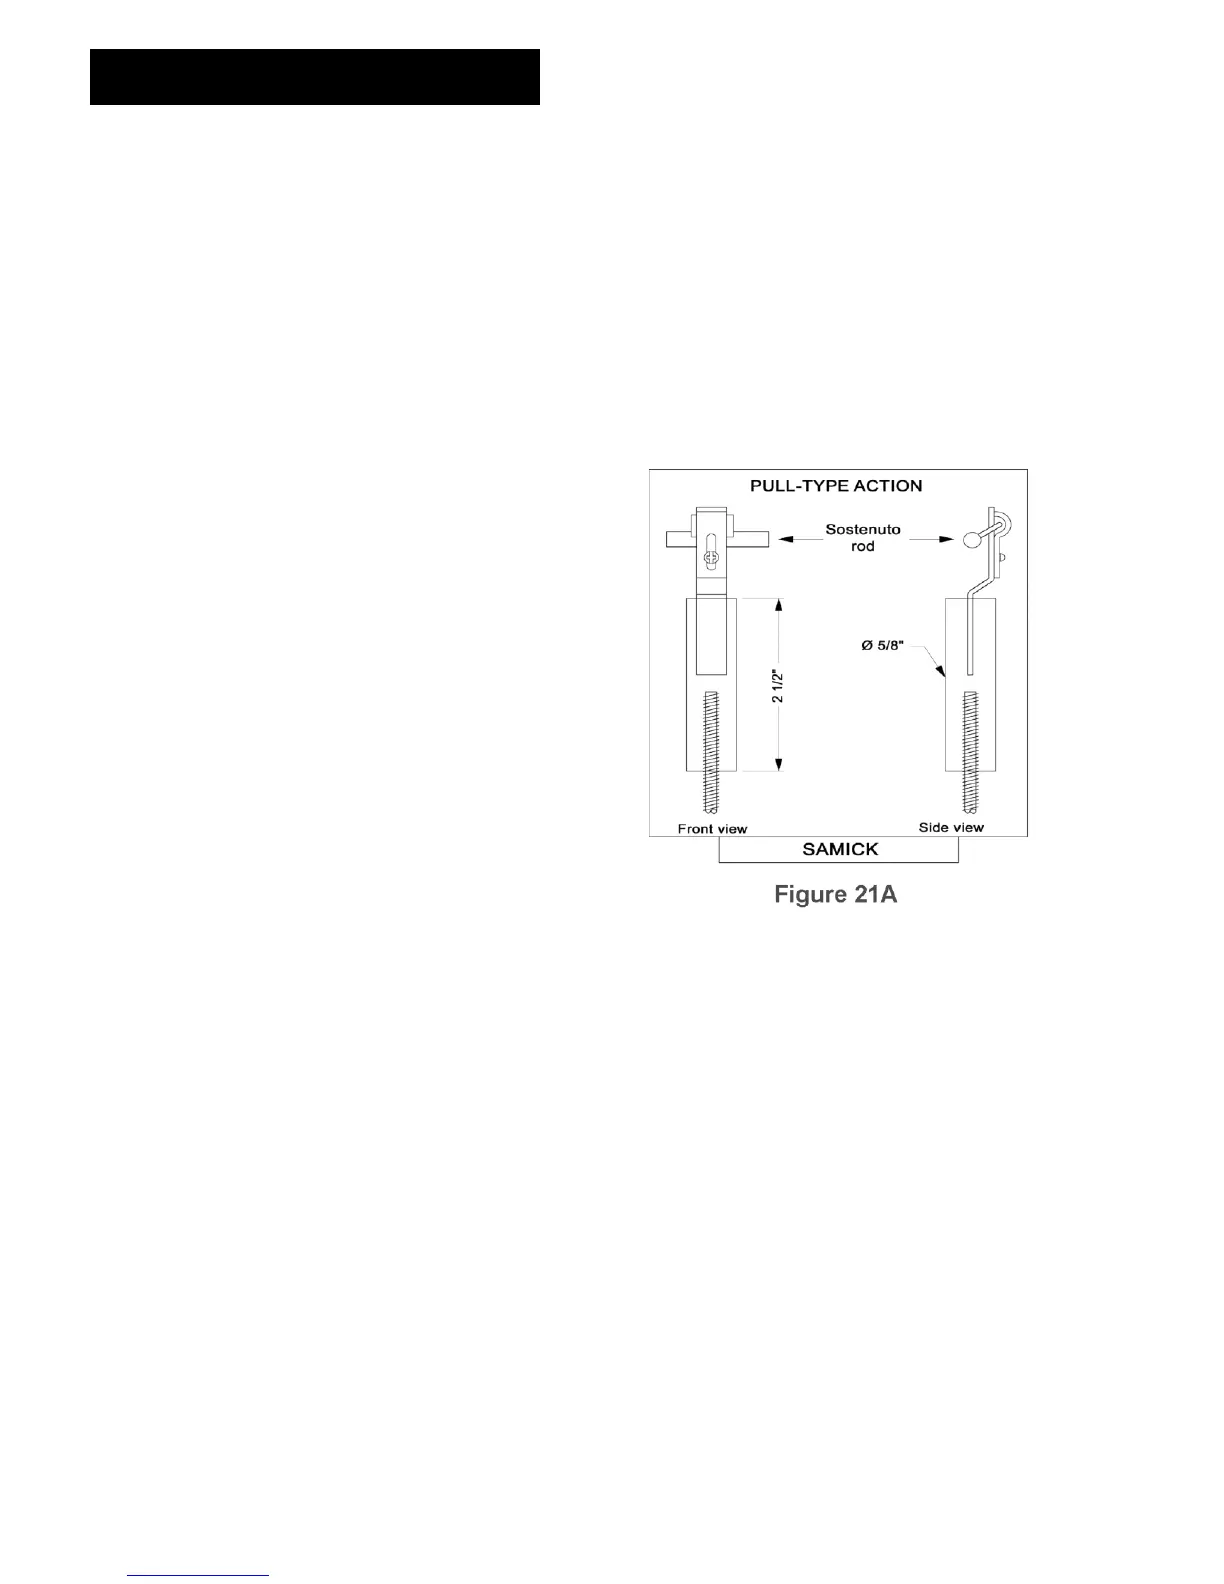
M. Connect the threaded rod to the sostenuto linkage.
Before proceeding it is important to
determine exactly how the sostenuto
linkage is done on this particular
piano. Linkage varies a great deal
from one piano to another, so you can
customize this part of the installation
process.
In examples A thru C, the rod
connects in various ways. In example
A, use a 5/8” x 2 ½” (16 mm x 64 mm)
wood dowel to make the connection