PianoDisc Installation Guide 39
. . . . .
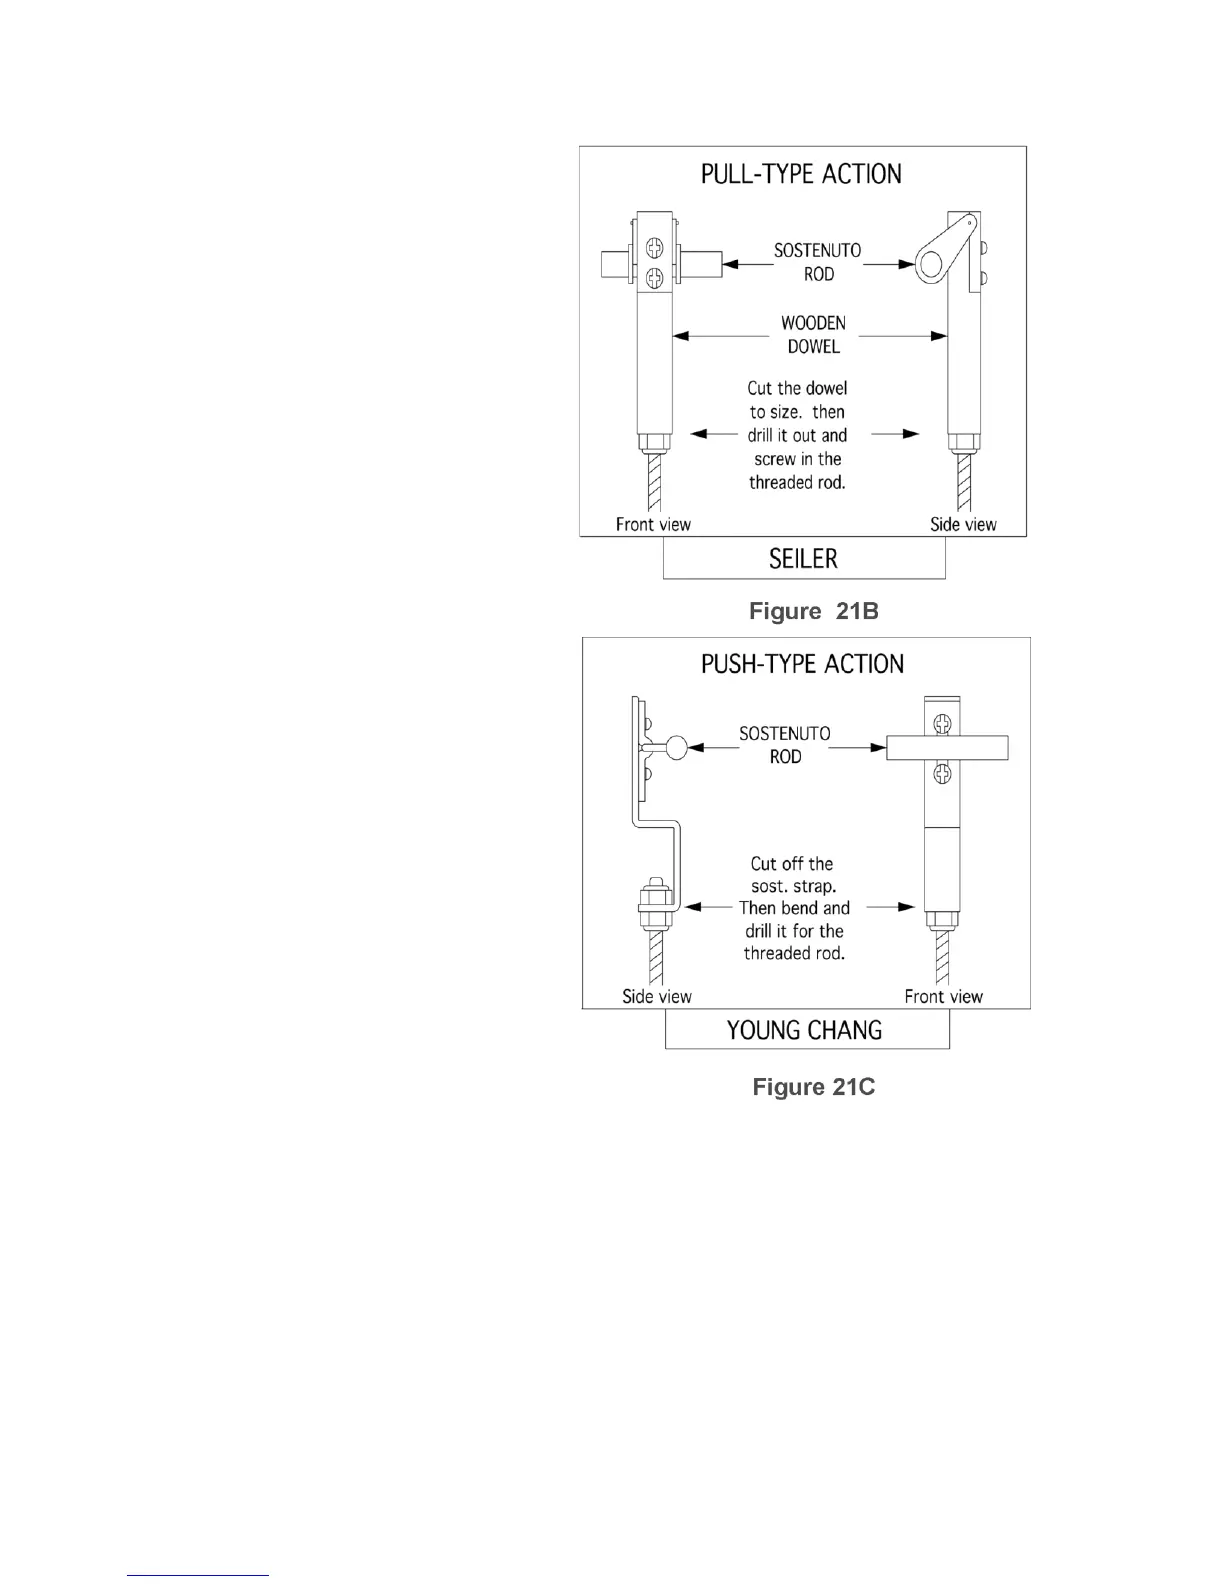
Approximately half of the
original sostenoto rod must be
cut off. Using the correct size of
die, thread 1” (25 mm) of the
rod. Then use the correct size
of drill bit (screw in fit) to drill
the dowel. Use super glue on
the rods during assembly.
In example B, it is necessary to
drill out the end of the dowel
and screw the rod into the
dowel with super glue.
In example C, the rod is
secured with 2 nuts and 2 flat
washers. These are only three
examples and there are
other styles of connections.
If you have any trouble with
this, please call PianoDisc tech
support.
N. Determine the connection
point of the threaded rod to
the sostenuto lever. As the
illustration above indicates, the
threaded rod should be at an
exact right angle to keybed.
Determine the place on the
lever where the threaded rod
needs to be mounted to form
the 90°angle. Mark this location
on the lever.
O. Determine the proper length
for the threaded rod. You will
need to trim off excess length
from the threaded rod before completing this assembly. The rod should be
trimmed so that it will stick through lever #2 about 1/2” (13 mm). Mark the
rod to indicate where to cut off the excess.
P. Remove lever #2 and drill access hole. Remove lever #2 and the
threaded rod assembly from the sostenuto rod. Using a 1/4” (6.5 mm) drill
bit, drill all the way through lever #2 at the point where the threaded rod will
pass through.