9 CONTROL PANEL
User’s Manual Planmeca ProOne 37
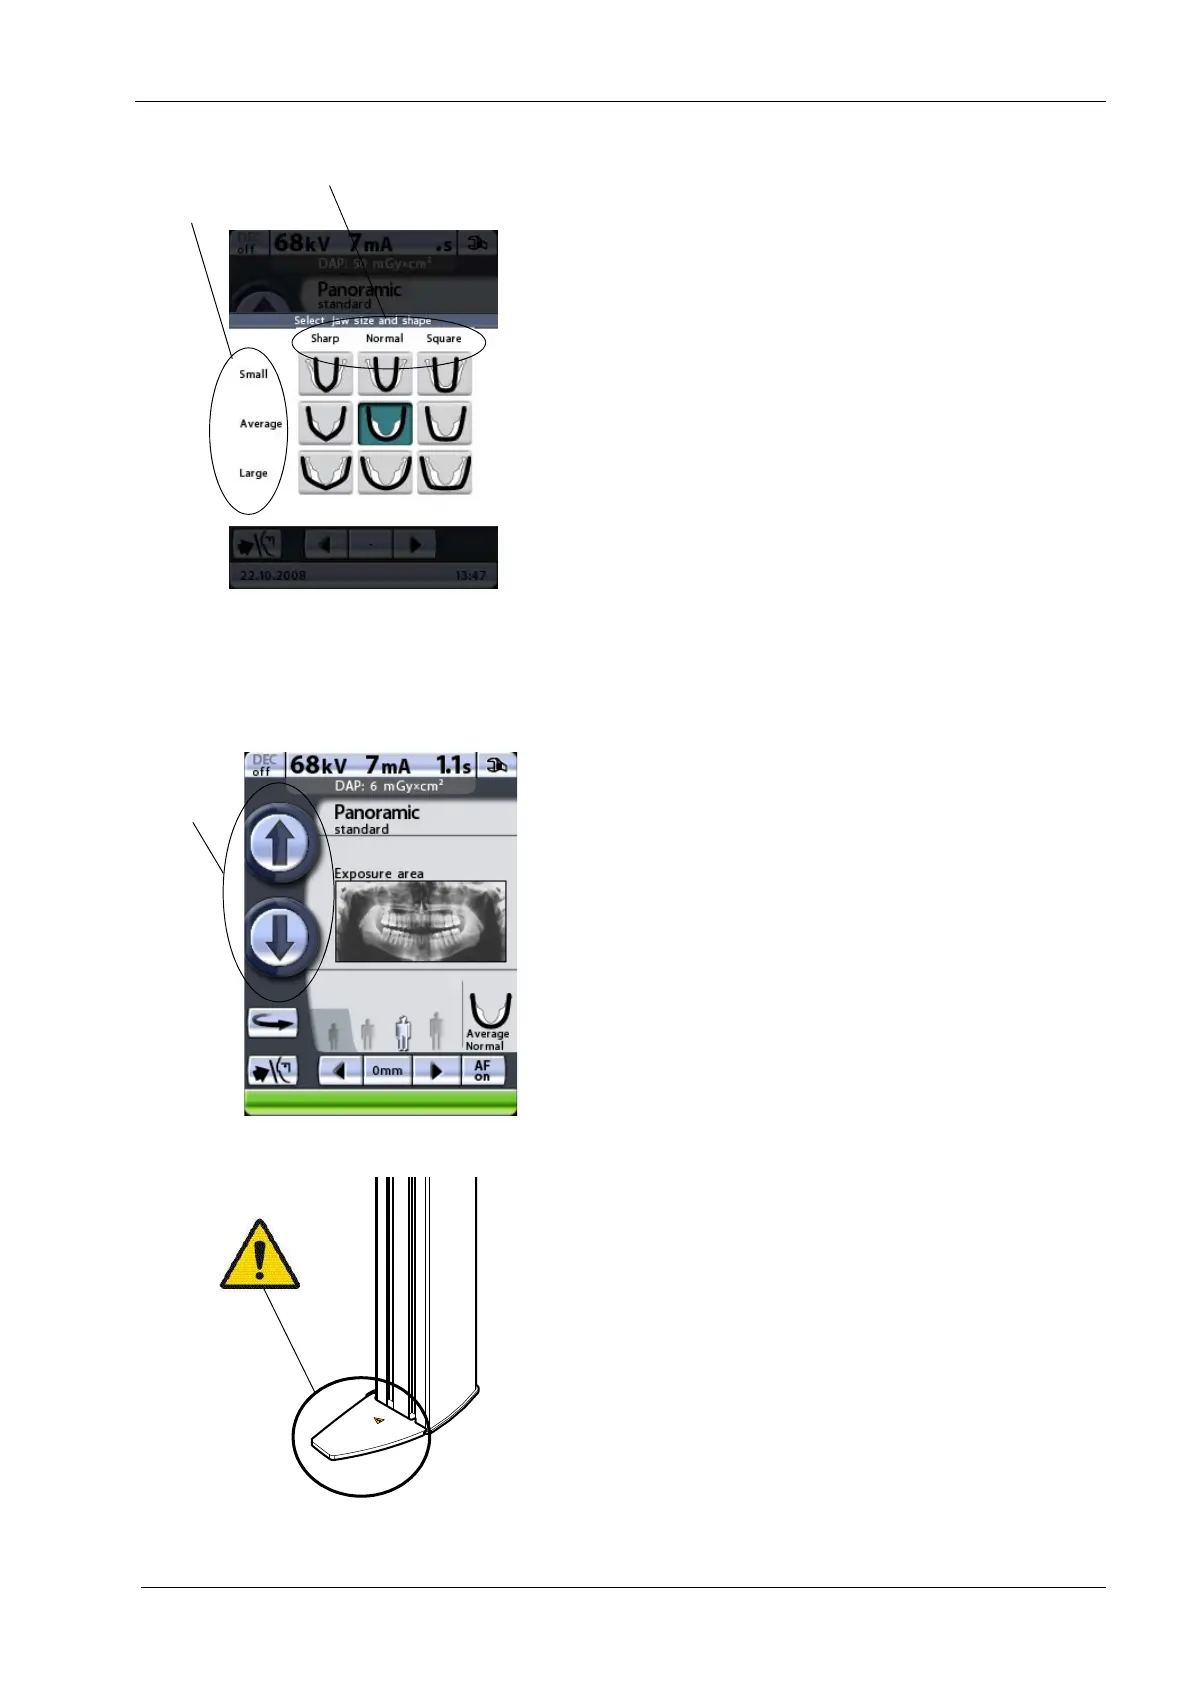
To select jaw shape, or to change the automatic jaw size
setting, touch the jaw field on the main display. A display
showing different jaw sizes and shapes appears. The
marking on the jaw icon demonstrates the focal layer.
Select the required jaw shape (or size) by tapping the
corresponding icon on the display. The selected jaw icon
will be highlighted.
Selecting jaw size manually will override the automatic
setting.
Jaw shape selection (sharp, normal or square) is possible
in panoramic programs only.
9.10 Adjusting unit height
Touch and hold either of the height adjusting buttons to
move the C-arm up or down so that the X-ray unit can be
adjusted to suit the height of the patient. The movement
will stop when you release the button.
The X-ray unit moves slowly at first, then faster.
When positioning seated patients (e.g. in a wheelchair)
always first move the C-arm down until the patient support
is approximately level with the patient’s mouth before you
position the patient in the X-ray unit.
Make sure that there is no object under the X-ray unit
when you press the down button. If something is in danger
of becoming trapped, release the button immediately to
stop the movement. Clear any obstruction before pressing
the button again.
A safety plate is attached to the column. Keep this
area clear at all times.