12 SINUS EXPOSURE
62 Planmeca ProOne User’s Manual
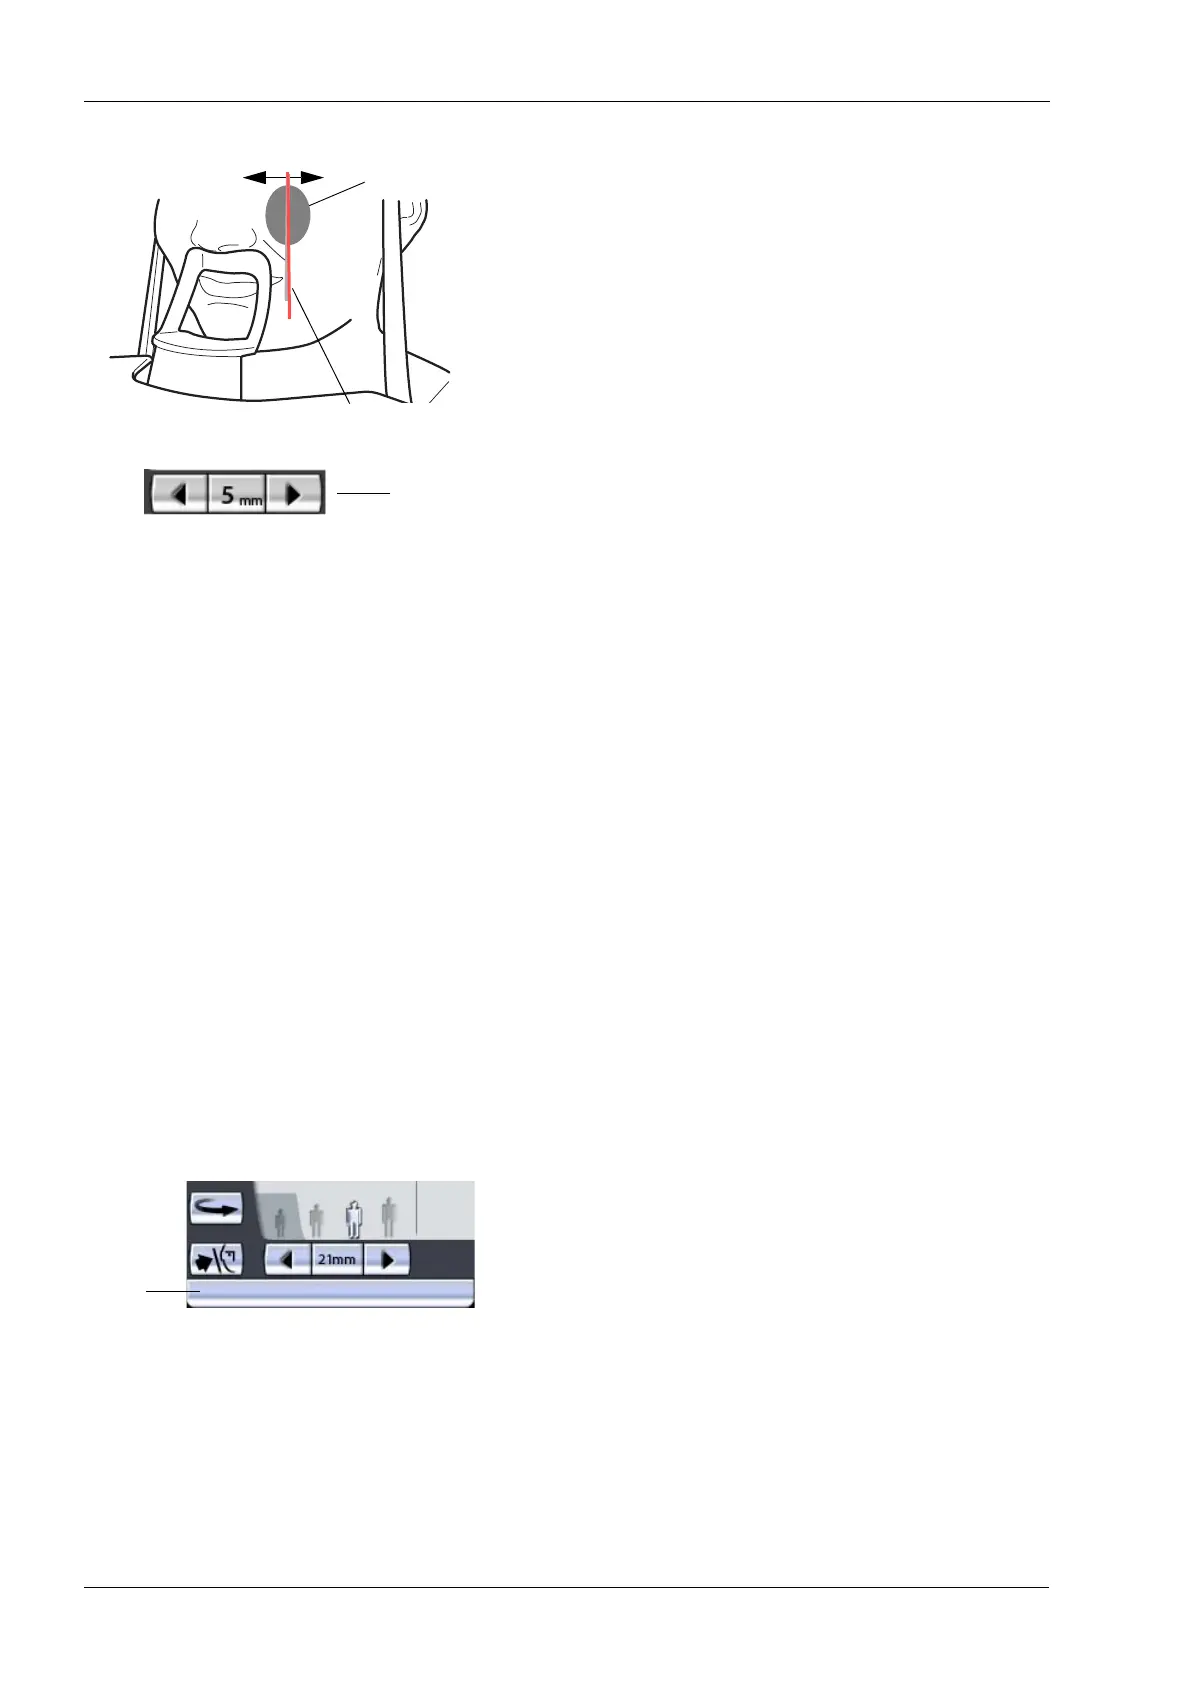
The layer light will be automatically positioned in the
region of the maxillary sinus.
For posteroanterior exposures you can fine-adjust the
position of the layer light manually. To do this, touch and
hold either of the target position arrows until the layer light
is in the correct position for the exposure you wish to take.
The arrow pointing to the left moves the C-arm forward
and the arrow pointing to the right moves the C-arm
backward. The number in the target position field
indicates the position of the layer light and serves as a
reference for later retakes.
The layer light is always positioned on the patient’s left
side, even when taking exposures of the patient’s right
maxillary sinus.
The layer light position cannot be adjusted for lateral or
midsagittal exposures.
Check that the Frankfort plane light and the midsagittal
plane light are still correctly positioned. Reposition them if
necessary.
12.2 Taking an exposure
Make sure that you have selected the right patient and the
panoramic exposure mode in the Romexis program before
you take an exposure. Refer to the Romexis User’s
Manual.
Images can be saved on a USB memory stick instead of
the computer. Refer to section 14.2.6 “Imaging without PC
(P2600)” on page 96 for more information.
The status bar at the bottom of the display will turn green
when the unit is ready to take an exposure.
roOne_007
Target pos.
Layer light
Sinus area
arrows
Green = Ready for exposure
Grey = Not ready for exposure
Status
bar