12 SINUS EXPOSURE
User’s Manual Planmeca ProOne 61
Close the temple supports by touching the temple support
button.
Stand behind the patient and check that the patient’s
shoulders are level and the neck muscles relaxed.
The three patient positioning lights will automatically
switch on when you select the exposure program. They
will switch off after four minutes. If the lights go out before
you have positioned the patient, you can touch either of
the target position arrows to switch the lights back on.
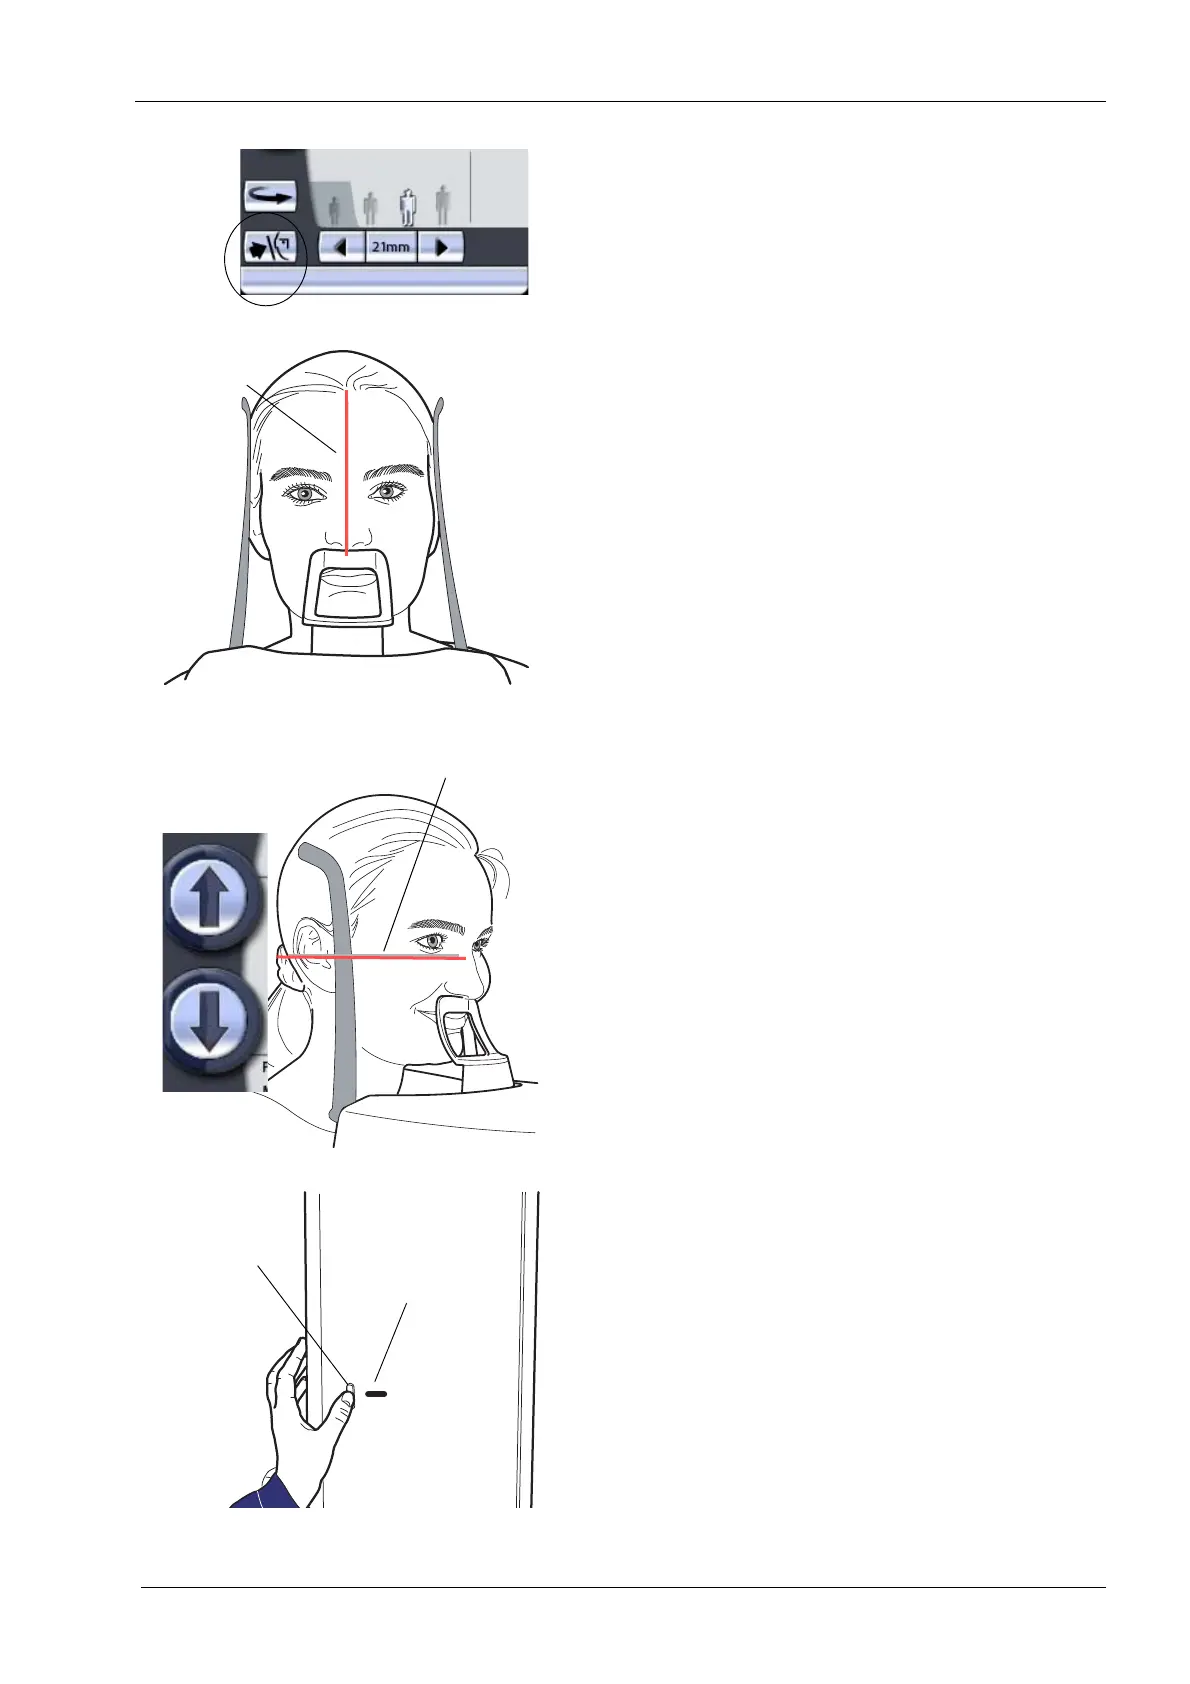
Position the patient’s head so that the midsagittal plane
coincides with the midsagittal plane light beam. Make
sure that the patient is looking straight ahead as the light
may appear to be correctly positioned but the patient’s
head could be turned slightly to one side.
Position the patient’s head so that the Frankfort plane
coincides with the Frankfort plane light beam.
To do this support the back of the patient’s head with your
hand and then adjust the tilt of the patient’s head by
raising or lowering the unit with the height adjusting
buttons. The patient’s back should be straight. If
necessary, stretch and straighten the patient’s neck by
moving the unit up slightly.
Note that the Frankfort plane light, located on the side of
the column, can be moved up or down to accommodate
different head sizes. This is done by moving the adjusting
lever that is located next to the light slot.
Frankfort plane light
Height
adjusting
buttons
Frankfort plane
Adjusting lever
light slot