11 TEMPOROMANDIBULAR JOINT EXPOSURE
User’s Manual Planmeca ProOne 57
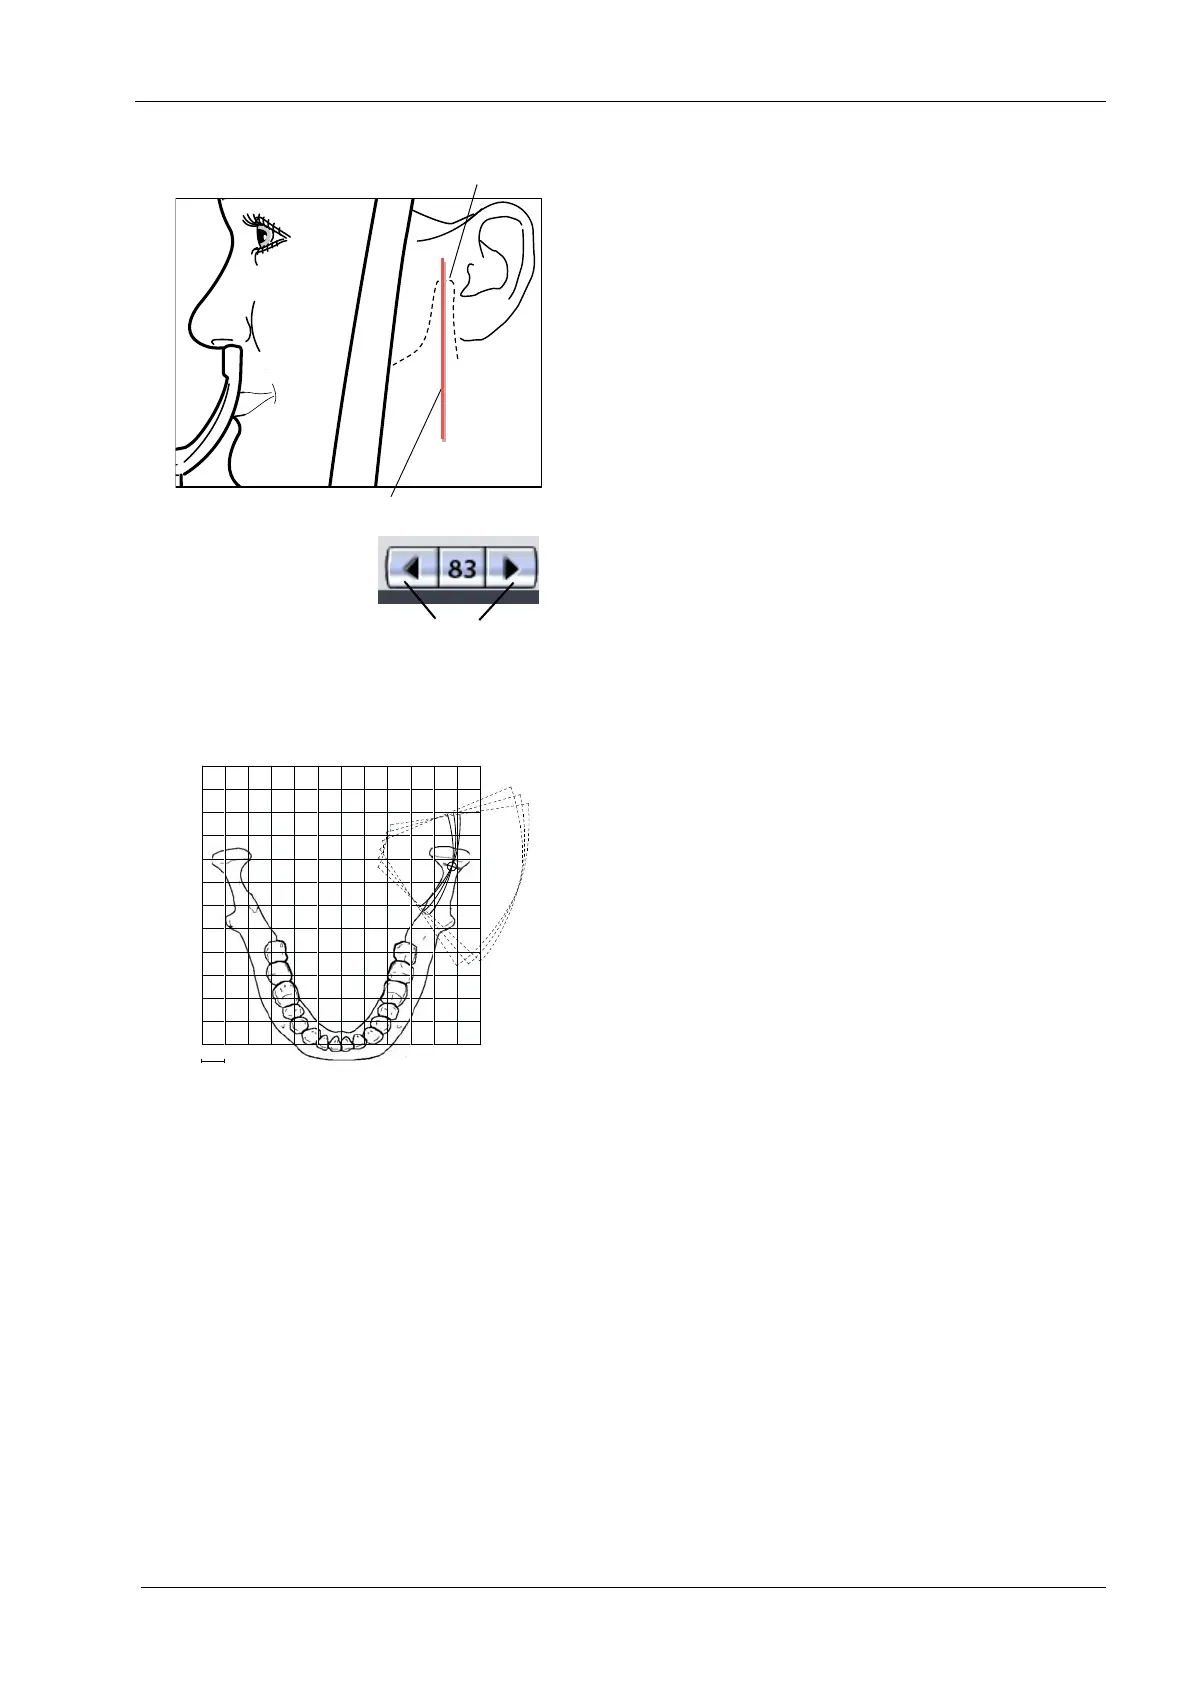
The layer light will be automatically positioned at the back,
in the area of the patient’s temporomandibular joint. To
fine-adjust the position of the layer light manually, touch
and hold either of the target position arrows until the layer
light is positioned at the patient’s temporomandibular
joint.
The arrow pointing to the left moves the C-arm forward
and the arrow pointing to the right moves the C-arm
backward. The number in the target position field
indicates the position of the layer light and serves as a
reference for later retakes.
The layer light is always positioned on the patient’s left
side, even when taking multi-angle exposures of the
patient’s right temporomandibular joint.
The imaging angle can be adjusted as described in
section 9.3.1 “Selecting imaging position for
temporomandibular joint (TMJ) exposures” on page 23.
The imaging angle for the first exposure is the selected
angle minus seven degrees, and the imaging angle for the
third exposure is the selected angle plus seven degrees.
The imaging angle will be automatically changed between
exposures.
Check that the Frankfort plane light and the midsagittal
plane light are still correctly positioned. Reposition them if
necessary.
ProOne_010
Target position arrows
Temporomandibular joint
Layer light
1 cm
1 2 3
3 angles lateral, left
First exposure = Selected angle - 7°
Second exposure = Angle selected by the user
Third exposure = Selected angle + 7°
(factory
default angle: 17°)