13 SCANNING / ERASING IMAGING PLATES
38 Planmeca ProScanner User’s & installation manual
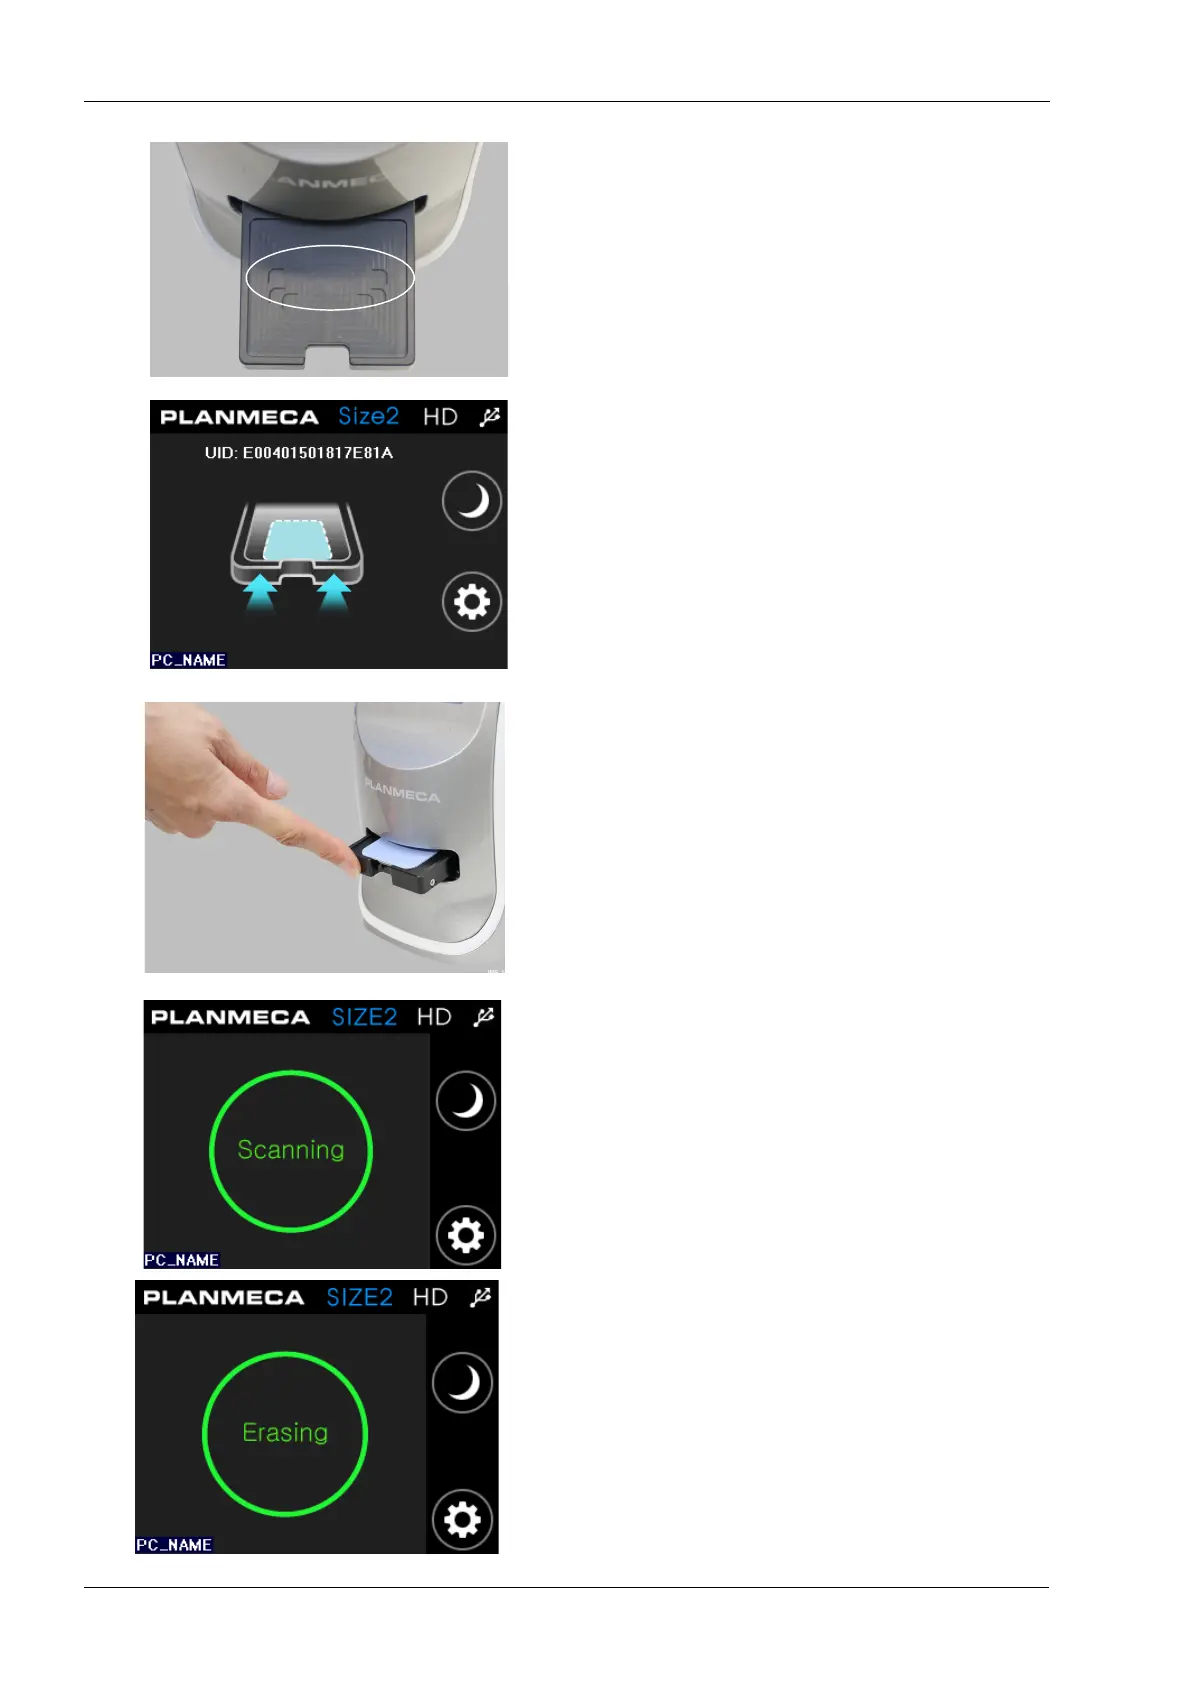
The outlines for imaging plates of different sizes
are marked on the tray to help with correct
positioning.
Make sure the imaging plate is in correct position
and direction.
When the imaging plate has been placed on the
tray, the following window appears. The scanner
is now ready for scanning.
In shared use (N-to-N) once the imaging plate on
the tray is recognised and the UID code displays
you can no longer change the plate. Proceed
with scanning with the recognised plate.
3. Gently push the tray inside the scanner until the
interlock holds the tray.
If the tray cannot be inserted check that the
Planmeca Romexis imaging window is open and
that the plate has been read with Planmeca
ProID (when applicable)
4. When the tray is attached to the interlock
remove your hand from the opening.
The tray door closes and the scanning starts
automatically.
The scanner then automatically reads and
erases the plate and sends the image to
Planmeca Romexis.