BODY / STEERING / SUSPENSION
5.10
FRONT STRUT CARTRID GE
REPLACEMENT
REFER TO ILLUSTRATION ON PAGE 5.8
1. Hold strut rod and remove top nut.
2. Compress spring using strut spring compressor
tools.
Strut Spring Compressor Tools
(PN 2871573) and (PN 2871574)
3. Remove upper strut pivot assembly.
4. Remove coil spring and collapse strut cartridge.
5. Remove two pinch bolts from strut casting.
6. Remove strut cartridge.
7. Install cartridge until bottomed in strut casting.
8. Install pinch bolts with wire clamp(s). Torque
pinch bolts to 15 ft. lbs. (21 Nm).
9. Reassemble spring and top pivot assembly. Be
sure all parts are installed properly and seated
fully.
10. Torque strut rod nut to specification. Do not over
torque nut.
Strut Rod Nut Torque
15 ft. lbs. (21 Nm)
BALL JOINT REPLACEMENT
REFER TO ILLUSTRATION ON PAGE 5.8
1. Loosen front wheel nuts slightly.
2. Elevate and safely support machine under
footrest/frame area.
CAUTION: Serious injury may result if machine tips
or falls. Be sure machine is secure before beginning
this service procedure.
3. Remove wheel nuts and wheels.
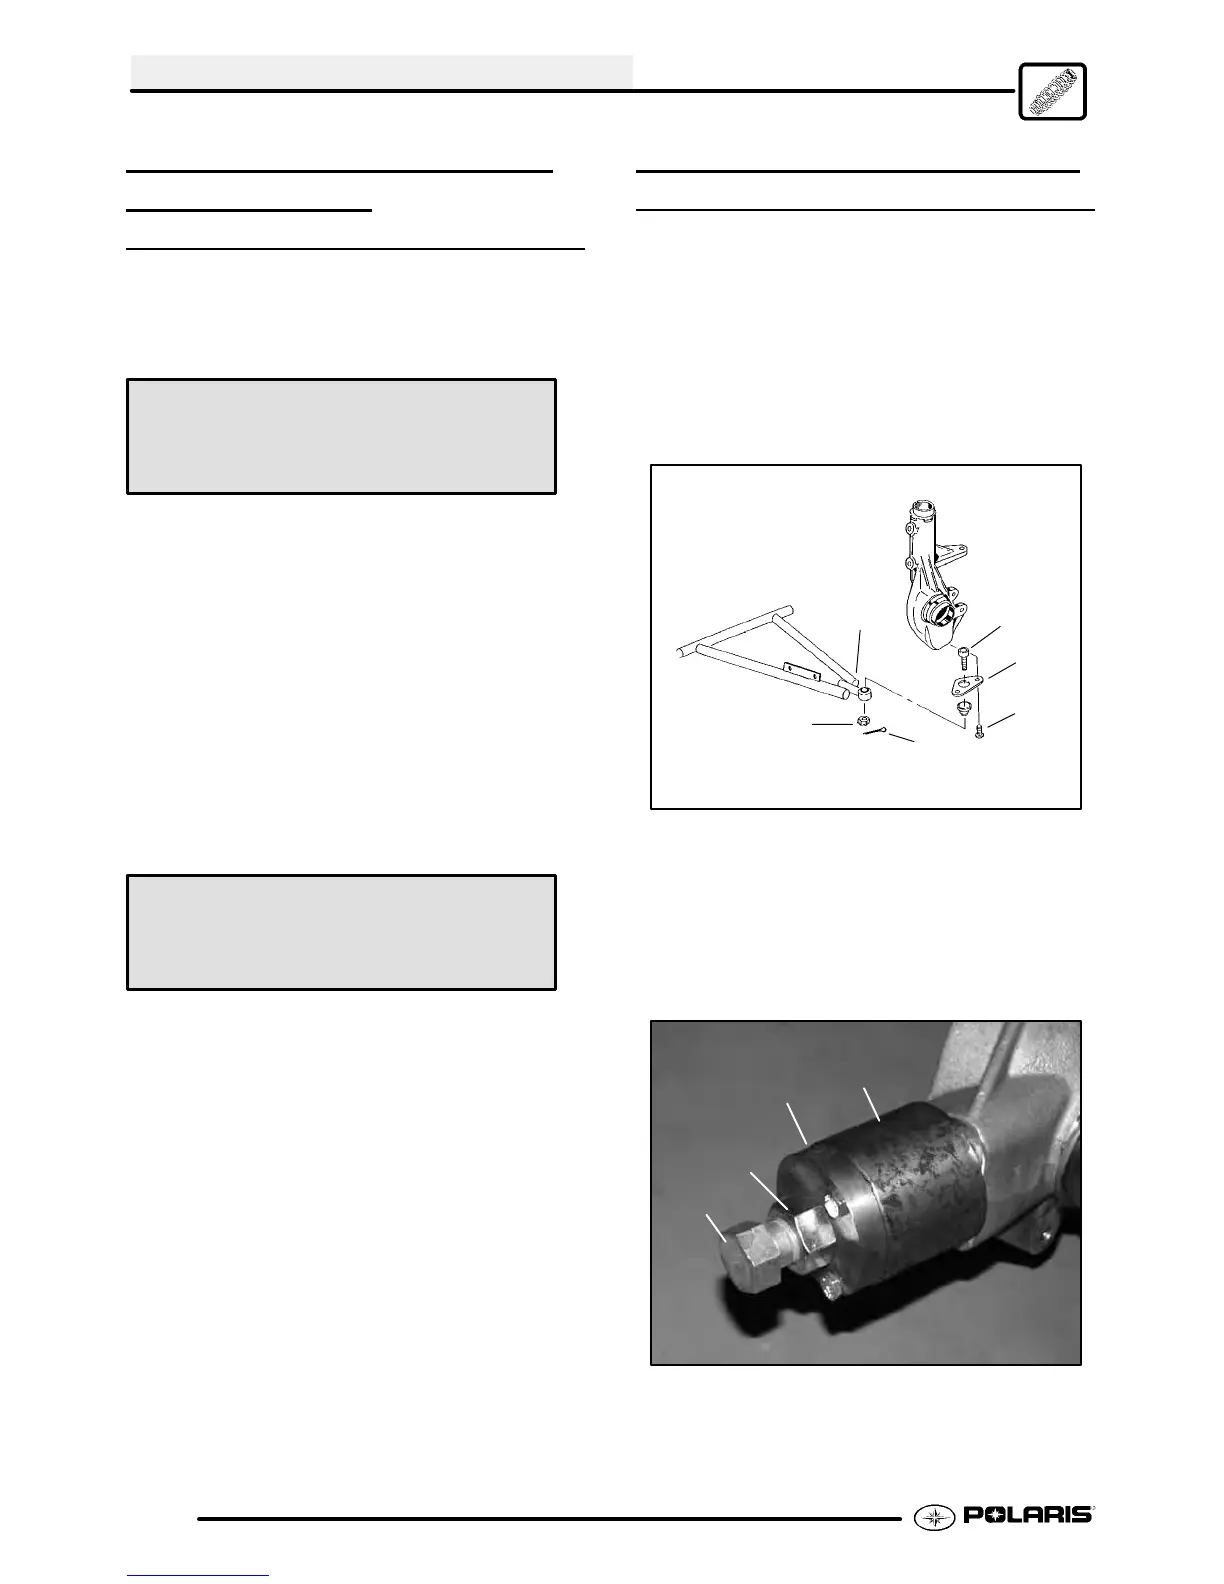
4. Remove cotter pin (A) from ball joint castlenut.
A
B
C
D
E
F
5. Remove castle nut (B) and separate A-arm (C)
from ball joint stud.
6. Remove screws (D) and ball joint retaining plate
plate (E).
7. Using the Ball Joint Replacement Tool (PN
2870871), remove ball joint (F) from strut
housing. Refer to photos.
A
B
C
D
G Install puller guide (A) withextension
cap (B).

 Loading...