3 - 10
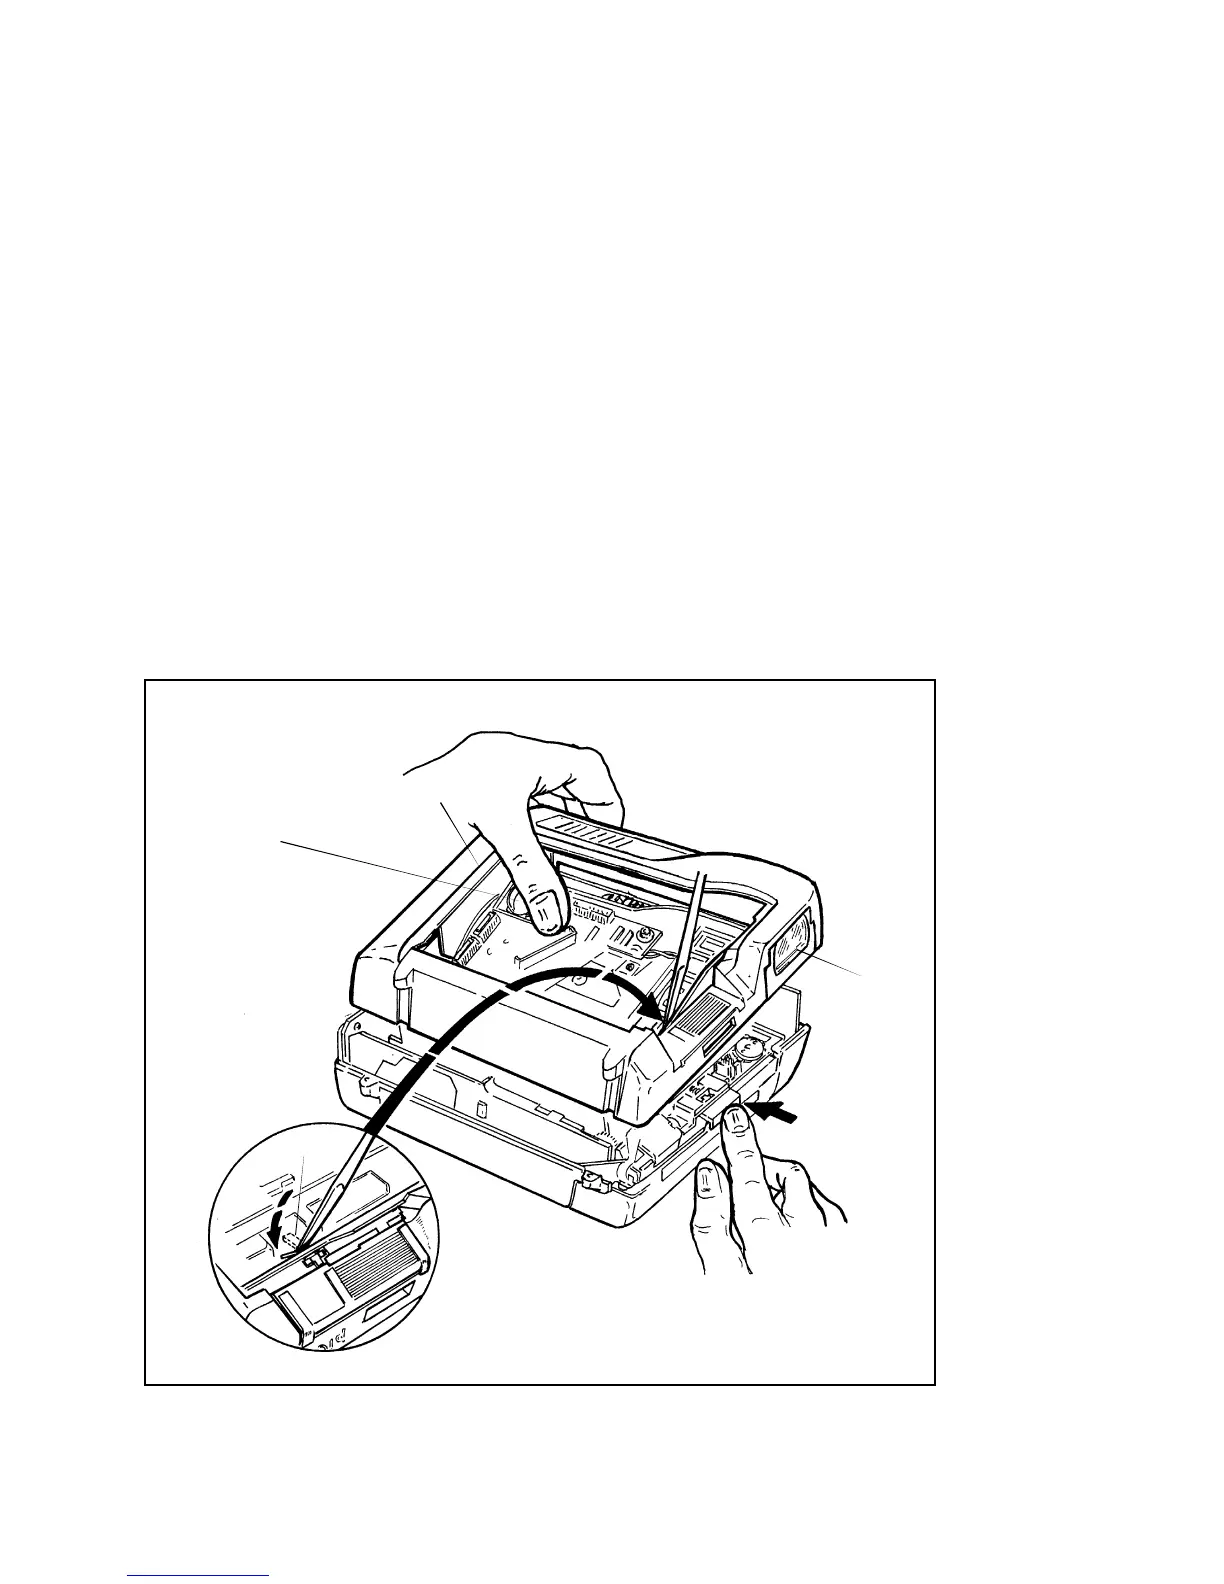
Notes: • When replacing the Mid Cover, the spring-loaded lens assembly
at the rear of the Viewfinder must be rotated 90
0
toward the front
of the ProCam and kept tucked in under the VF Side Cover
(Figure 3-5).
• Also, the molded vertical partition A on the Mid Cover
(Figure 3-5) must slip down between this VF rear lens assembly
and the vertical Interface PC Board.
• Also, using a greenstick, keep the lower leg of the spring-loaded
Lens Cover actuating arm B (Figure 3-5) pushed forward and in
frontof the Front Bezel, as the Mid Cover is lowered into place.
• Press in Door Latch (button marked FILM).
• Finally, slip the Strobe Insert C (Figure 3-5) on the front of the
Strobe and Reflector Assembly into place in its Mid Cover
recess.
Figure 3-5. Replacing Top Cover and Mid Cover
PUSH IN
DOOR LATCH
ROTATE VIEWFINDER
REAR LENS ASSEMBLY
A
C
B

 Loading...