123
Polyend Synth Manual
122
Polyend Synth Manual
MIDI & Connectivity
8
MIDI & Connectivity
8
NOTES
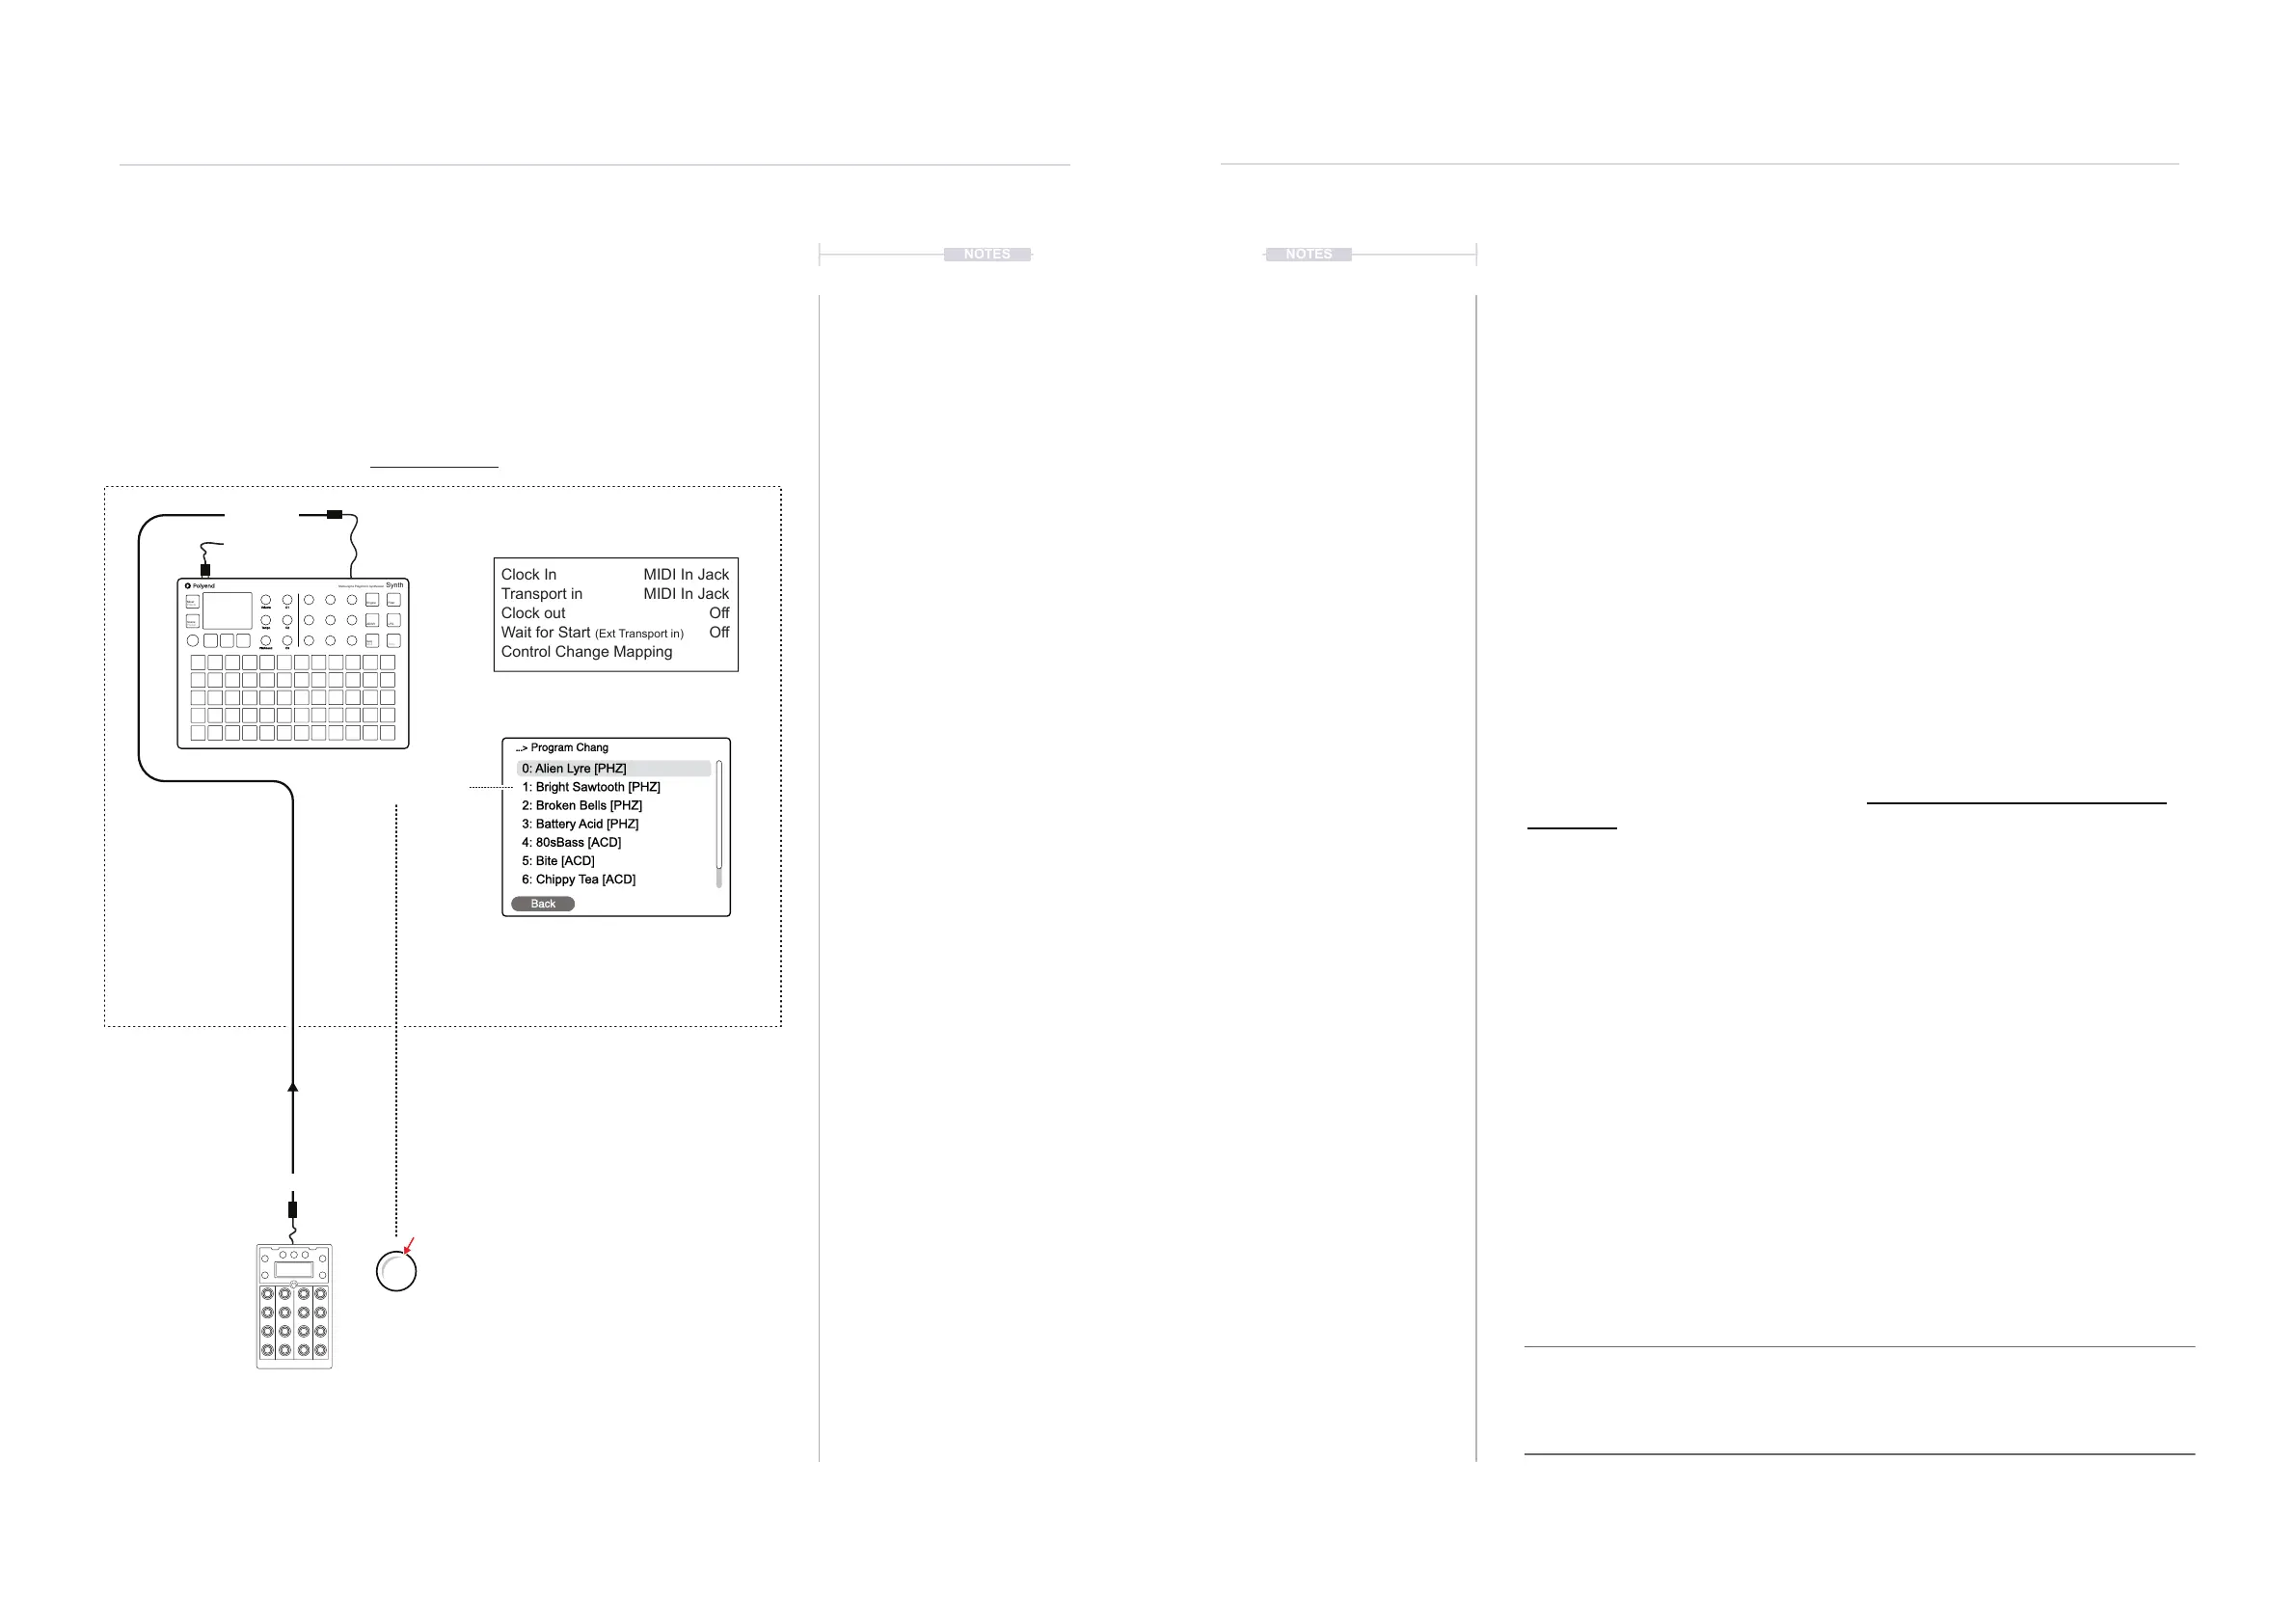
8.6 External Program Change Messages
The synth can receive PC Program Change messages to switch presets
remotely. PC control introduces a creative dimension, especially useful for
live performances. Up to 8 PC messages can be mapped to dedicated
patches and, therefore, changed on-the-y for the associated synth. This
mapping is handled at the Scene level.
MIDI In Jack
MIDI In Jack
Off
Off
Clock In
Transport in
Clock out
Wait for Start (Ext Transport in)
Control Change Mapping
Main Menu > MIDI
Main Menu > Scene Settings >
Program Change Mapping
The MIDI Channel is set per synth.
The PC Message is sent to switch
between mapped presets 0-7.
Each PC Message received will switch to the
preset assigned. The presets selected must
be assigned based on the active synths set
to the 3 slots.
Example: Preset 1
PC 1
Each button
mapped PC 0-7
Push
Back
0: Alien Lyre [PHZ]
1: Bright Sawtooth [PHZ]
2: Broken Bells [PHZ]
3: Battery Acid [PHZ]
5: Bite [ACD]
4: 80sBass [ACD]
6: Chippy Tea [ACD]
...> Program Chang
USB MIDI
Optional controller used for
Program Change (PC) messages
Example Conguration 3: Synth as the secondary follower controlled with Faderfox EC4.
MIDI OUT
MIDI IN
Mixer
Effects
Engine Filter
Scene
Preset
ADSR LFO
Seq
Mod
Shift
Volume
Tempo
Pitchbend
C1
C2
C3
Multi-engine Polyphonic Synthesizer
Synth
NOTES
PC messaging is set up in Synth at the Scene level. There is only one map
for all PC changes, and these will apply preset switching to the 3 loaded
synth engines. As such, the chosen presets must be based on the 3 synth
engines loaded and the MIDI channel matched. For example, ACD synth
presets will only operate when an ACD synth is assigned to a synth slot for
the same MIDI channel as the incoming PC message.
▌ CONNECTING AN EXTERNAL PC CONTROLLER
1. Ensure the connected device has the ability to congure PC output
messages, for example, with a button or knob. Synth uses PC numbers
0-7 to map to the presets. The external device must be able to send a
0-7 PC message. Connect the devices using the MIDI or USB
connections.
2. Ensure the Synth to control is set to the same MIDI Channel as the
external device. Navigate in the Main Menu and Press (Screen) to open
when highlighting the ‘Synths’ menu. Use the parameter knobs to set
the ‘Midi Channel’ port and number. It is important to set these synth
slots rst.
3. To map the program change presets, open the Main Menu by Pressing
(Screen). Navigate to the ‘Scene Settings’ option and Press (Screen) to
select. Open the ‘Program Change Mapping’ option by pressing
(Screen) when highlighted.
4. The Program Change Mapping page shows the list of 8 slots. To map
the preset:-
• With a slot chosen and highlighted, Press (Screen).
• Firstly select an engine, Press (Engines) and Turn (Screen). The
engine selected will lter the presets for this synth. The Synth must
be loaded to a synth slot beforehand. Press (Screen) to choose.
• Select a Preset for the PC slot. Turn (Screen) and highlight a preset.
Press (Screen) to assign the preset to the PC slot.
5. When a PC Message is received, it will change the preset assigned to
the specic synth on the dened MIDI Channel.
Note that the PC application can vary between devices. For example, some may start at 0,
others at 1, some change banks others change presets or patches. It is advised to test and
audition the PC settings between devices to ensure a good matchup. Check whether the
external device will send a program change number or if it uses the MSB / LSB values to
affect the change.