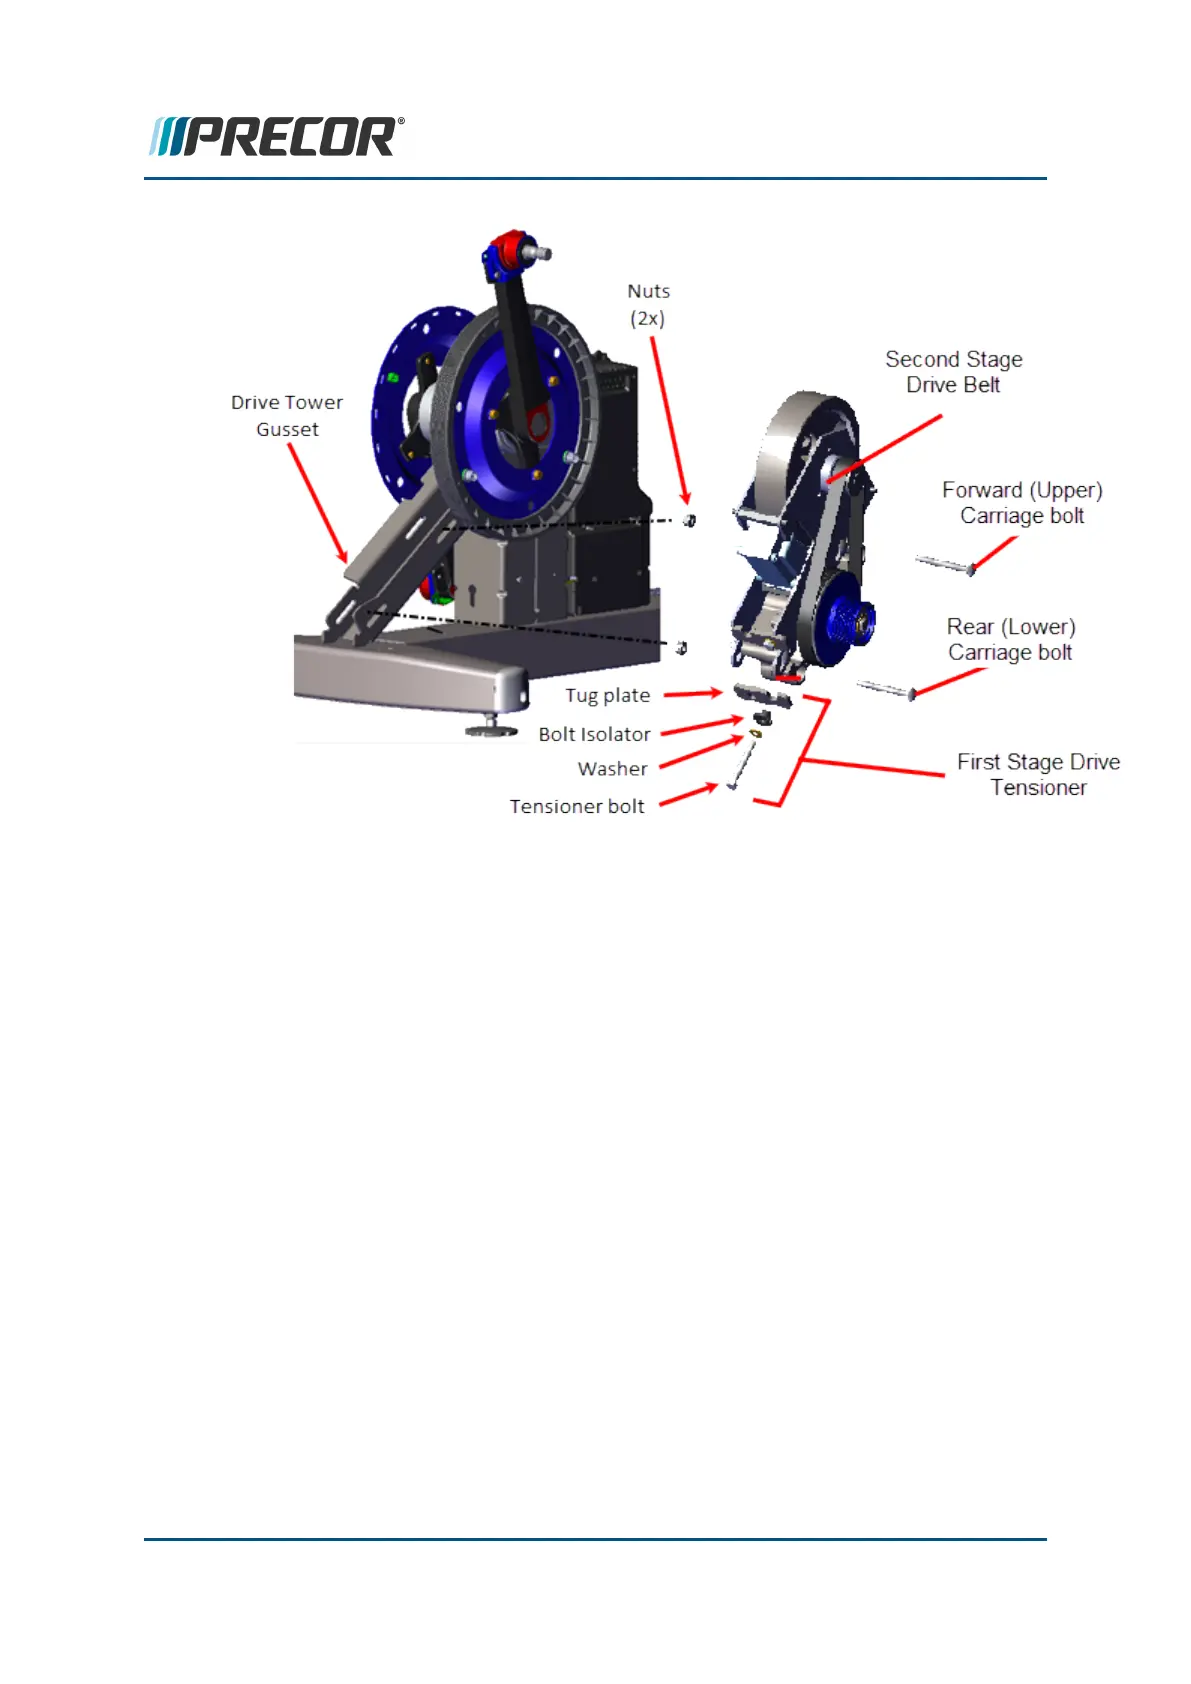
3. Slide the Drive Components assembly downward and install the upper (forward) car-
riage bolt and then slide the Drive Components assembly upward and install the lower
(rear) carriage bolt. Tighten the carriage bolt nuts just enough to keep the carriage bolt
heads inserted into the mounting slot but do not fully tighten.
4. Use a 1/2" socket to install the First Stage Tensioner hardware: the adjustment bolt
(1x), washer (1x), bolt isolator (1x), and tug plate (1x). Tighten the tensioner bolt just
enough to hold the tensioner hardware in place.
5. Install the first stage drive belt by walking the belt onto the Input Drive pulley and the
smaller first stage Step-up Pulley/Tensioner assembly pulley. Rotate the crank and
make sure that the belt is properly centered and seated in the pulley grooves.
Contact Precor Customer Support at support@precor.com or 800.786.8404 with
any questions.
Page 132
6 Replacement Procedures
Generator/Brake Assembly Replacement