Drive Disk Covers Replacement
Drive Disk Covers Replacement
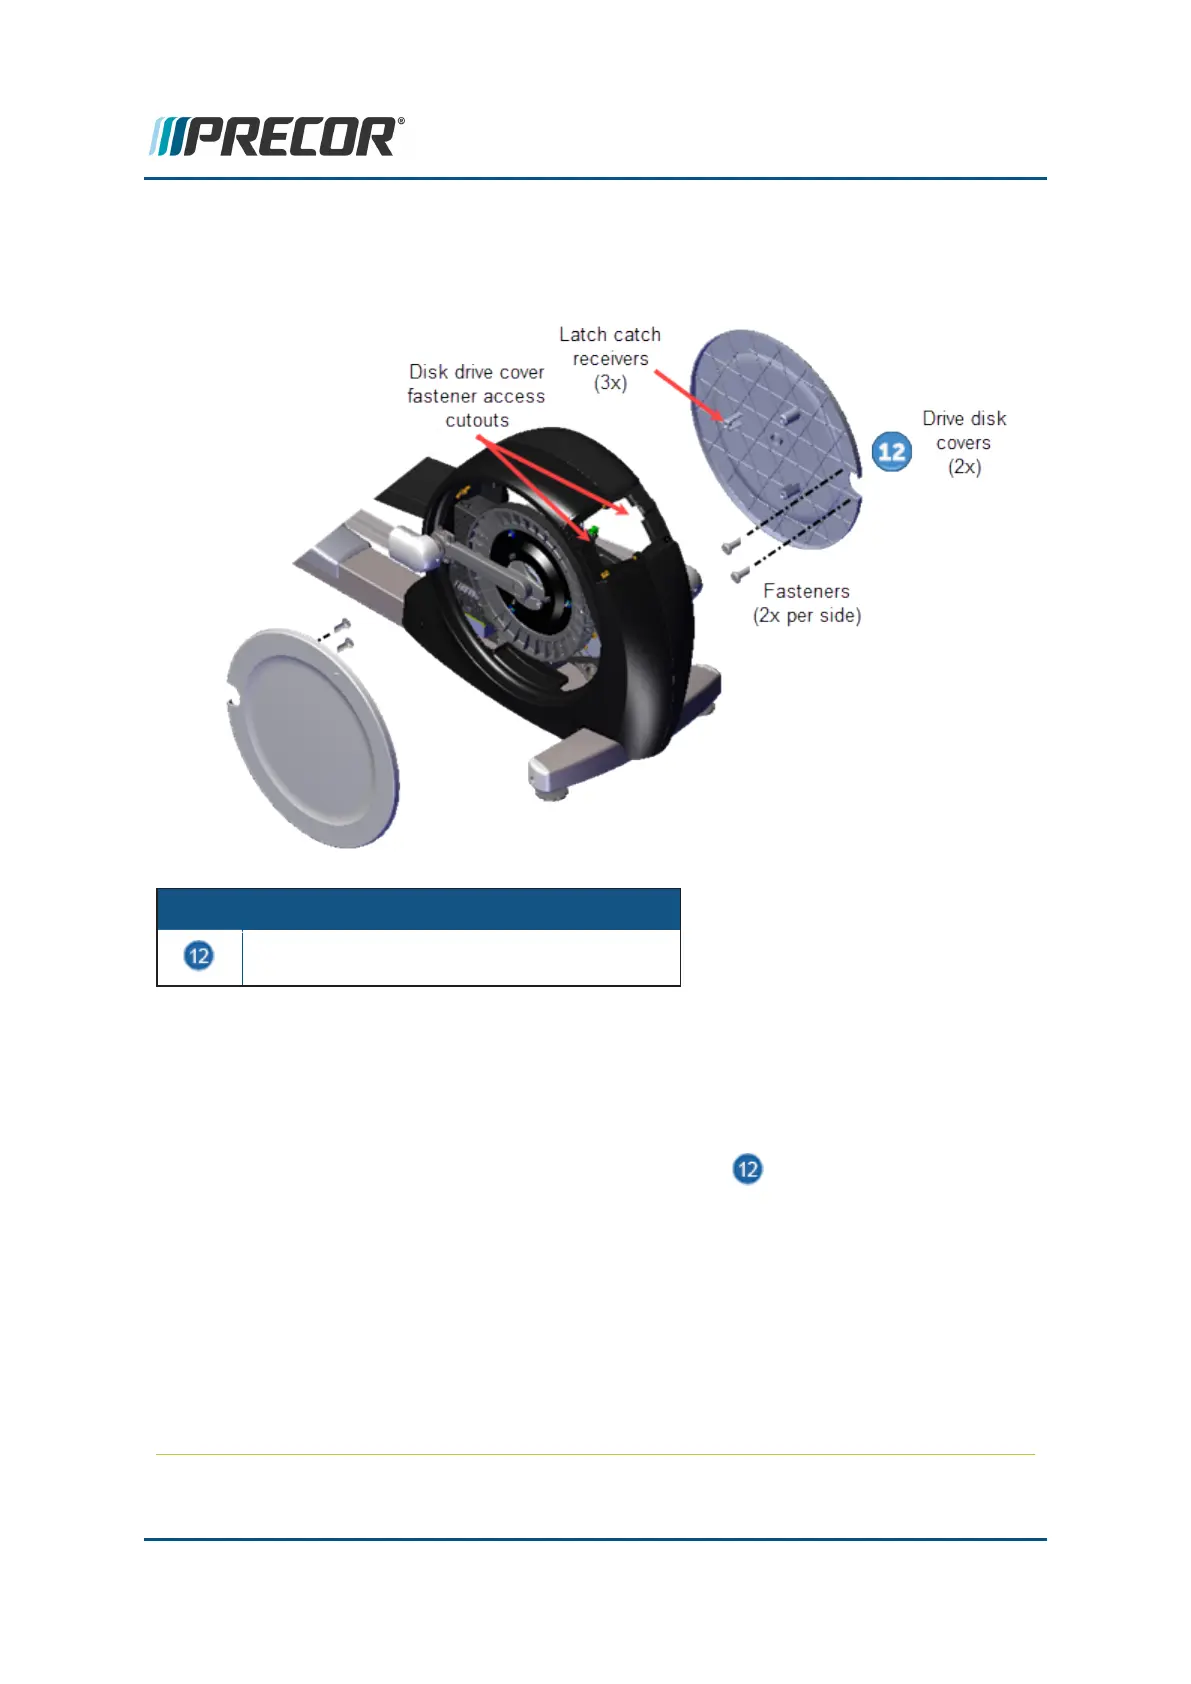
ID Description
Drive Disk Cover (2x)
Removal Instructions
Repeat this procedure for both the right and left Drive Disk covers.
1. Remove the Drive Access panel, see "Drive Access Panel Replacement" on the pre-
vious page.
2.
Rotate the Input Crank until the upper Drive Disk cover attachment screw can be
seen through the Drive Housing cover fastener cutout. Use a #2 Phillips screw drive to
remove the screw. Then slowly move the Input Crank upward until the second screw
can be seen and remove if installed (there may only be one Drive Disk cover attachment
screw installed. However, two screws are required for installation, order any missing
screws.). Retain part(s) and/or fastener(s) for installation.
Note:Some early production units were shipped with only one disk cover crank
attachment screw. When reinstalling the disk cover, order two additional screws and
use two crank attachment crews per disk cover, see Exploded View Diagrams,
bubble # 155.
Contact Precor Customer Support at support@precor.com or 800.786.8404 with
any questions.
Page 84
6 Replacement Procedures
Covers and Panels Replacement