Installation Instructions
Repeat this procedure for both the right and left Drive Disk covers.
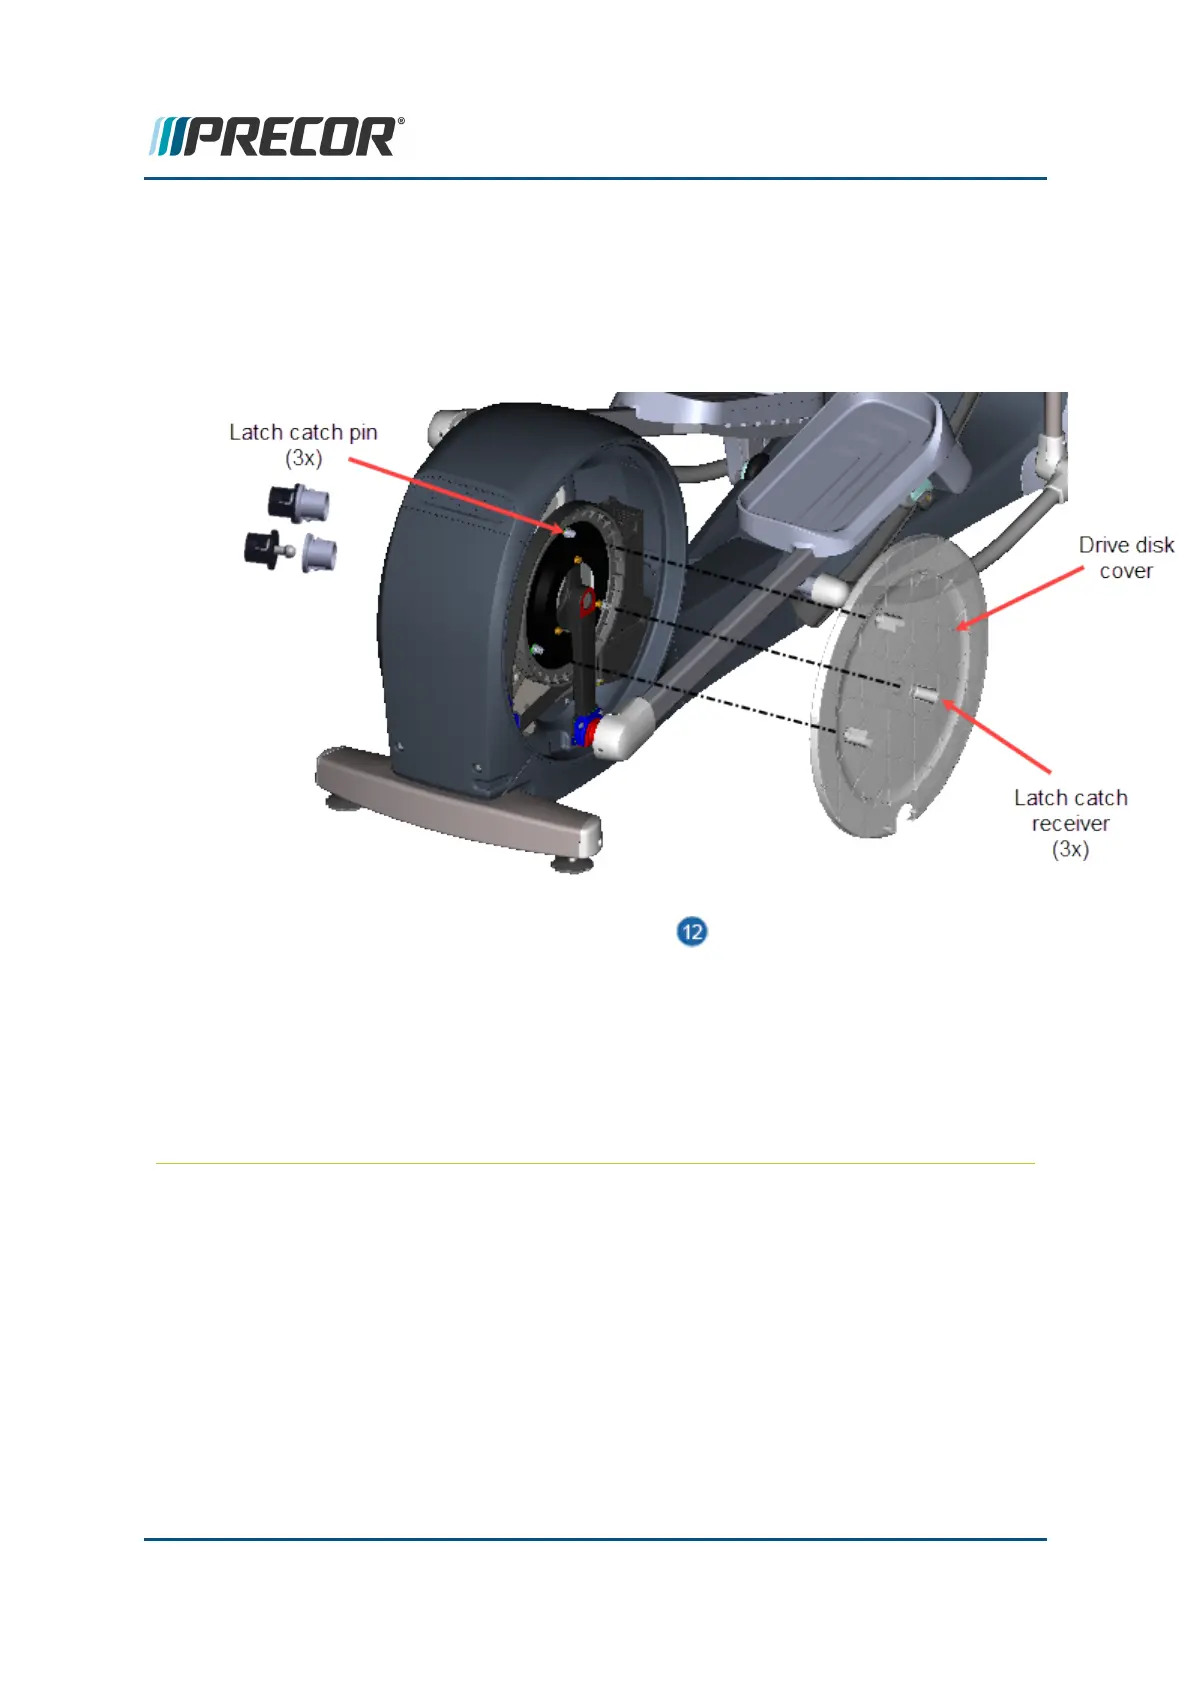
1. Position the Drive Disk cover over the Crank aligning the three latch catch receivers
over the latch catch pins. Then lightly strike the Drive Disk cover at each latch catch pin
location to snap in place. Make sure all three latch catch pins are secure.
2.
Rotate the crank until one of the Drive Disk cover attachment screw can be seen
through the drive cover fastener cutout. Then install the #2 Phillips screw and fully
tighten. Move the crank to the second attachment screw hole and install the second
screw. If the second screw is missing, order a new screw and install (two fastener
screws per side are required)
Note:Some early production units were shipped with only one disk cover attachment
screw. When reinstalling the disk cover, order two additional screws and use two
attachment crews per disk cover.
Contact Precor Customer Support at support@precor.com or 800.786.8404 with
any questions.
Page 86
6 Replacement Procedures
Covers and Panels Replacement