Translation of the original German user manual
55
ENGLISH
the message “Ready Go“ appears, the machine is ready to brew the rst cup of coffee.
5. If you do not perform a ush within the one-minute period (step 5), the display will show the
message “Flush“alternating with the current temperature. In this case, the ush should be started
and stopped based on visual characteristics.
6. If the user does not perform a ush, the boiler temperature cools down to the desired brewing
temperature after a short time.
7. The DRIVE is heated up as soon as the desired preset temperature appears on the PID display.
It is best to keep the portalter locked into the brew head so that it stays warm at all
times.
You can also warm up a cold portalter with a ush. Afterwards, the portalter should be
dried to avoid water drops.
9.2 Manually adjusting the brewing pressure
Important
If necessary, the brewing pressure of the machine can be adjusted or changed manually
via an adjusting screw on the underside of the machine without having to open the
machine.
This adjustment should only be carried out by qualied personnel.
9.3 Preparing coffee
Use the portalter with 1 spout and the corresponding lter (1 cup) for the preparation of 1 cup. Use the
portalter with 2 spouts and the big lter (2 cups) for the preparation of 2 cups. Make sure that the lter
is rmly locked into the portalter.
Fill the ground coffee with the respective grind for espresso into the lter. (The marking inside the lter
basket serves as a guideline for the amount of coffee to use)
Use a tamper to evenly and rmly press down the coffee grounds, ensuring even compaction. A tamping
pressure of approx. 20 kg is recommended. Clamp the portalter rmly into the brew group.
Place the cup under the spout of the portalter (for the preparation of 2 cups, put 1 cup under each
spout).
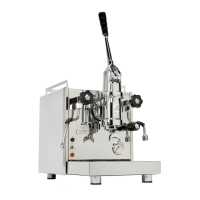
Lift the group head lever upwards to start the brewing process. The timer on the PID- display indicates
the brewing time in seconds. Typically, the brewing time should be around 23 to 25 seconds. The volume
for a single espresso is circa 25 to 30 ml. Place the brew lever back into the original position once the
desired volume is reached.
The remaining pressure/water will be discharged into the drip tray by the lower part of the brew groupe
cylinder.
The pump pressure gauge may still show some residual pressure after the process is complete. You can
monitor the pressure buildup again when preparing the next coffee.
Caution!
Make sure to return the group head lever to the down position after brewing. Failure to do
so may result in hot water and coffee grounds splattering when removing the portalter,
posing a risk of injury.