4. In the Select Physical Drives diagram, click the drives to add them to
your disk array. The ID numbers of the selected drives will appear in the
field below the diagram.
5. When done, click the Submit button. The new disk array appears in the
list.
6. Do one of the following:
− To create additional disk arrays, click the Create More button.
− If you are done creating disk arrays, click the Finish button.
After creating a disk array, you need to create a logical drive on it. Follow the
steps below to create a logical drive:
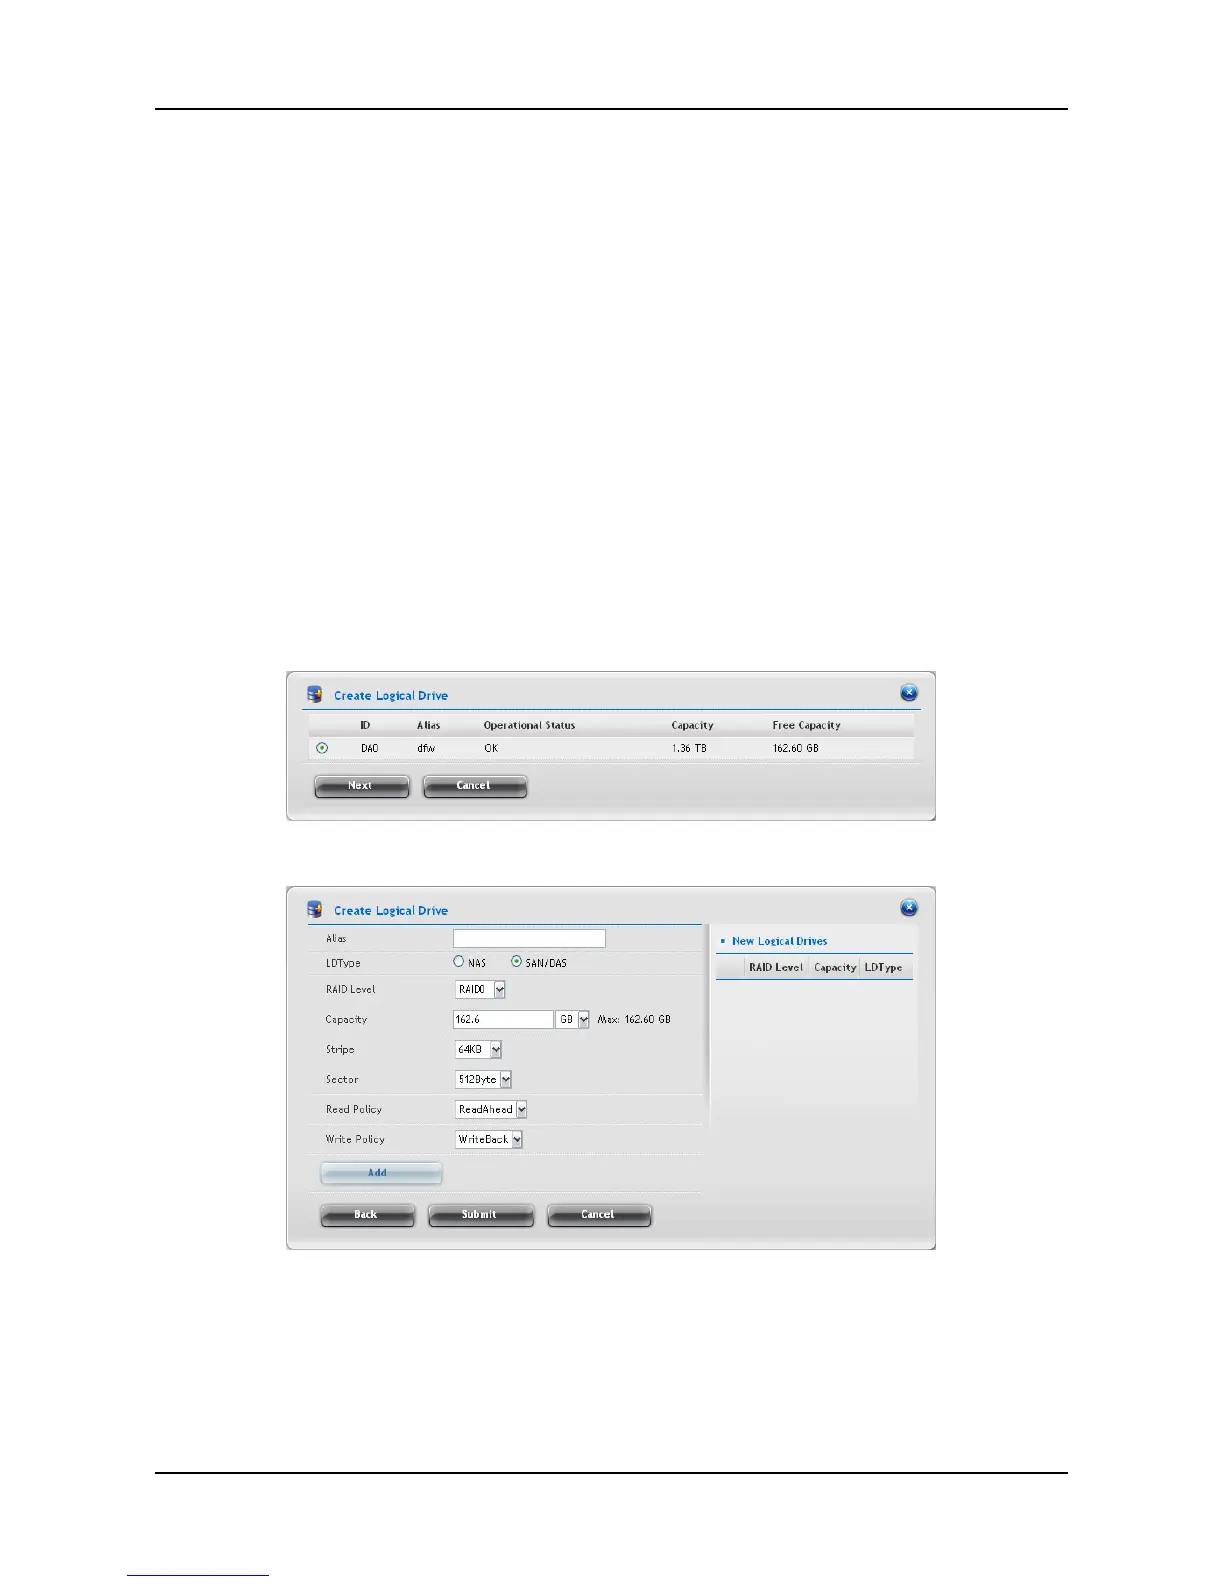
1. Click Storage tab > Logical Drive.
2. Click the Create Logical Drive button.
3. Select the disk array you want to use and click the Next button.
4. In the Create Logical Drive window, complete the required settings:
− In the Alias field, enter an alias at a maximum of 32 characters
(includes letters, numbers, space between characters, and
underline).
− Set the LDType as NAS or SAN/DAS.
39
 Loading...