Installation and Initialization
Tsunami QB-8100 Series (100 Mbps/5 Mbps Models) Installation and Management Guide 21
Plan for:
• Device’s continuous power consumption needs
• Lightning protection and system grounding
• Hardware mounting
• Cable installation including egress
• Pre-testing equipment (back-to-back test procedure)
Step 2: Choose a Location
To make optimal use of the device, you must find a suitable location to install the hardware. The range of the radio device
largely depends upon the position of the antenna. Proxim recommends you do a site survey, observing the following
requirements, before mounting the hardware.
• The location must allow easy disconnection of power to the radio if necessary.
• Ensure free flow of air around the hardware.
• The radio device must be kept away from vibration and excessive heat.
• The installation must conform to local regulations at all times.
Step 3: Gather Required Tools
You should have the following tools available before installing the QuickBridge 8100 units:
• Phillips (cross-tip) screwdrivers
• Large blade standard screwdriver
• Spanner 10
• Wire crimpers (if using connectors that are not pre-made)
• Weatherproofing material for sealing external connectors (such as butyl tape)
NOTE: The total length of cabling between the PC and the QuickBridge units cannot exceed 100 meters, which
includes both the cable from the PC to the power injector and the cable from the power injector to the QuickBridge
unit. Due to DC power requirements, the maximum cable length between the power injector and the QuickBridge
units is 75 meters.
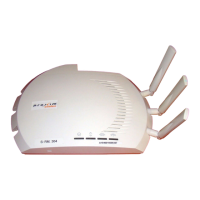
Step 4: Unpack the Product Package
1. Unpack the device and accessories from the shipping box.
2. Note the Ethernet and MAC addresses of the unit as well as the serial number. These addresses may be used when
configuring the unit.
NOTE: The serial number is required to obtain support from Proxim. Keep this information in a safe place.
Step 5: Assemble the Cable
To assemble the ethernet cable and weather proof the RJ45 connector,
 Loading...