OPTALIGN smart RS5 BT handbook
126
7. Mount the laser and sensor across the next coupling.
8. While in the “Measurement” screen, press
h/i long enough to move to the
next coupling to be measured.
Please make sure when moving the laser and sensor to each coupling that the
dimension from coupling center to sensor is entered correctly in the dimensions
screen, since you might not replace the sensor bracket in exactly the same
location each time.
Always make sure the coupling you are measuring is the one actually highlighted
in the machine train.
9. Repeat the measurement procedure as described previously at the second
coupling position.
7.1.4 Evaluating results
Press
k to view the alignment results at the individual couplings. Cycle through all
available results screens using
f/g/k.
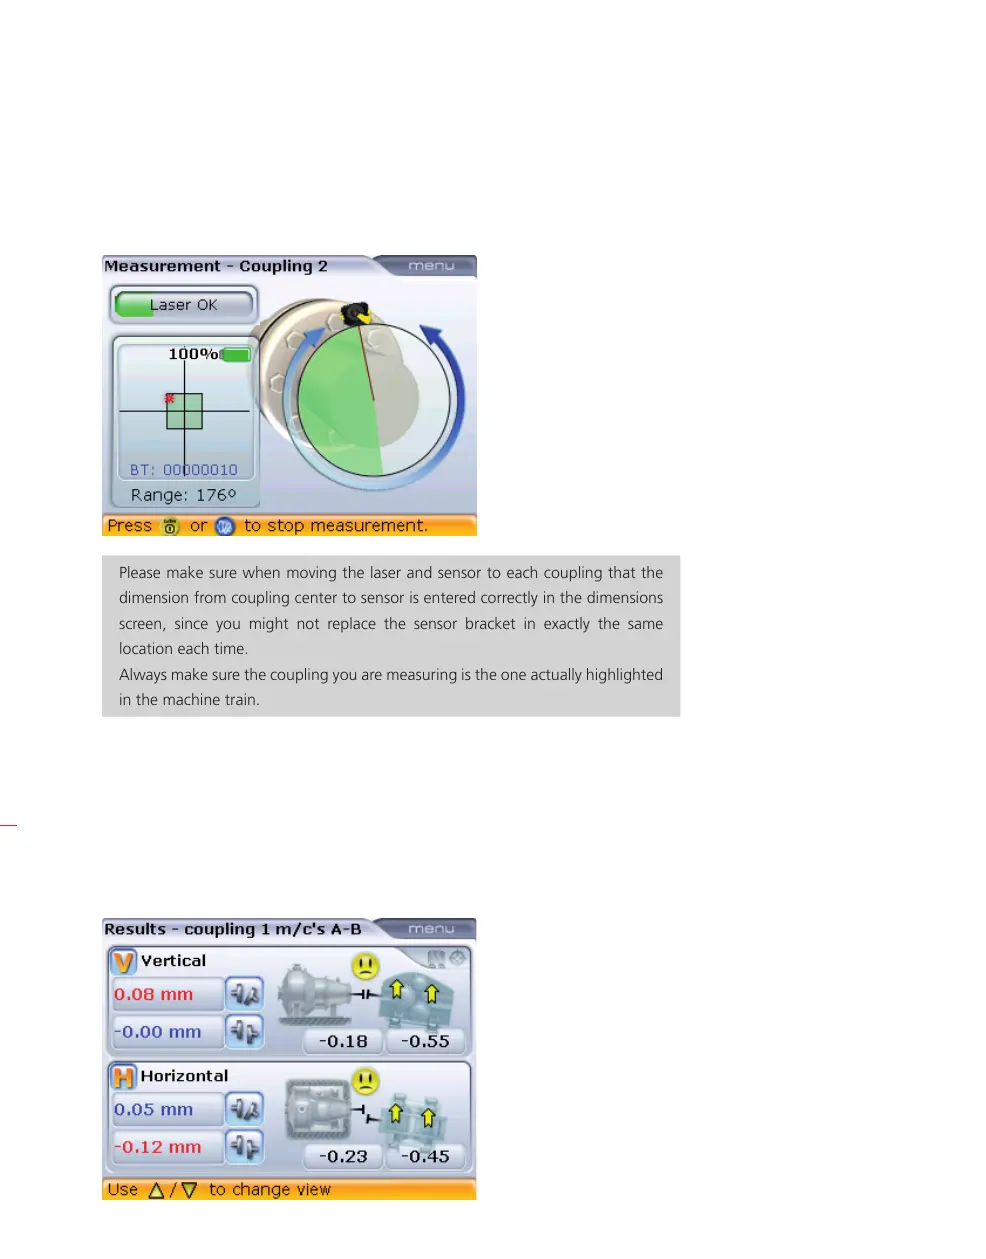
In this example, coupling
2 is measured using
the Continuous Sweep
measurement mode. In
this case, measurement is
stopped by pressing
e.
H
Note
Horizontal and vertical
feet and coupling values
for machines A and B. In
this example, the option
‘All-in-one results’ is
activated in the ‘Shaft
settings’ configuration
menu. If not activated then
the screen displays only
coupling results.