Instructions for Use RAUMEDIC
MPR2 logO
Manufacturer: zwo-400EN
RAUMEDIC AG, Hermann-Staudinger-Strasse 2, 95233 Helmbrechts, Germany Rev. 9 2020-09-22
Page 37 of 99
4.4.1 Operating instructions – connection cable
Plug in or remove the cable always by getting hold at the connector. Never pull the cable.
Do not try to connect a connector with a different mechanical coding in a wrong port. If something works
stiffly, check once again for safety reasons whether the correct allocation is attempted.
Do not try to open the connectors.
The Redel plugs (all connectors with the exception of the temperature and USB connectors) have been
provided with a push-pull locking system which prevents that the plug-in connections can be removed
by pulling the cable. To undo the plug-in connection, get hold of the connector in the direct vicinity of the
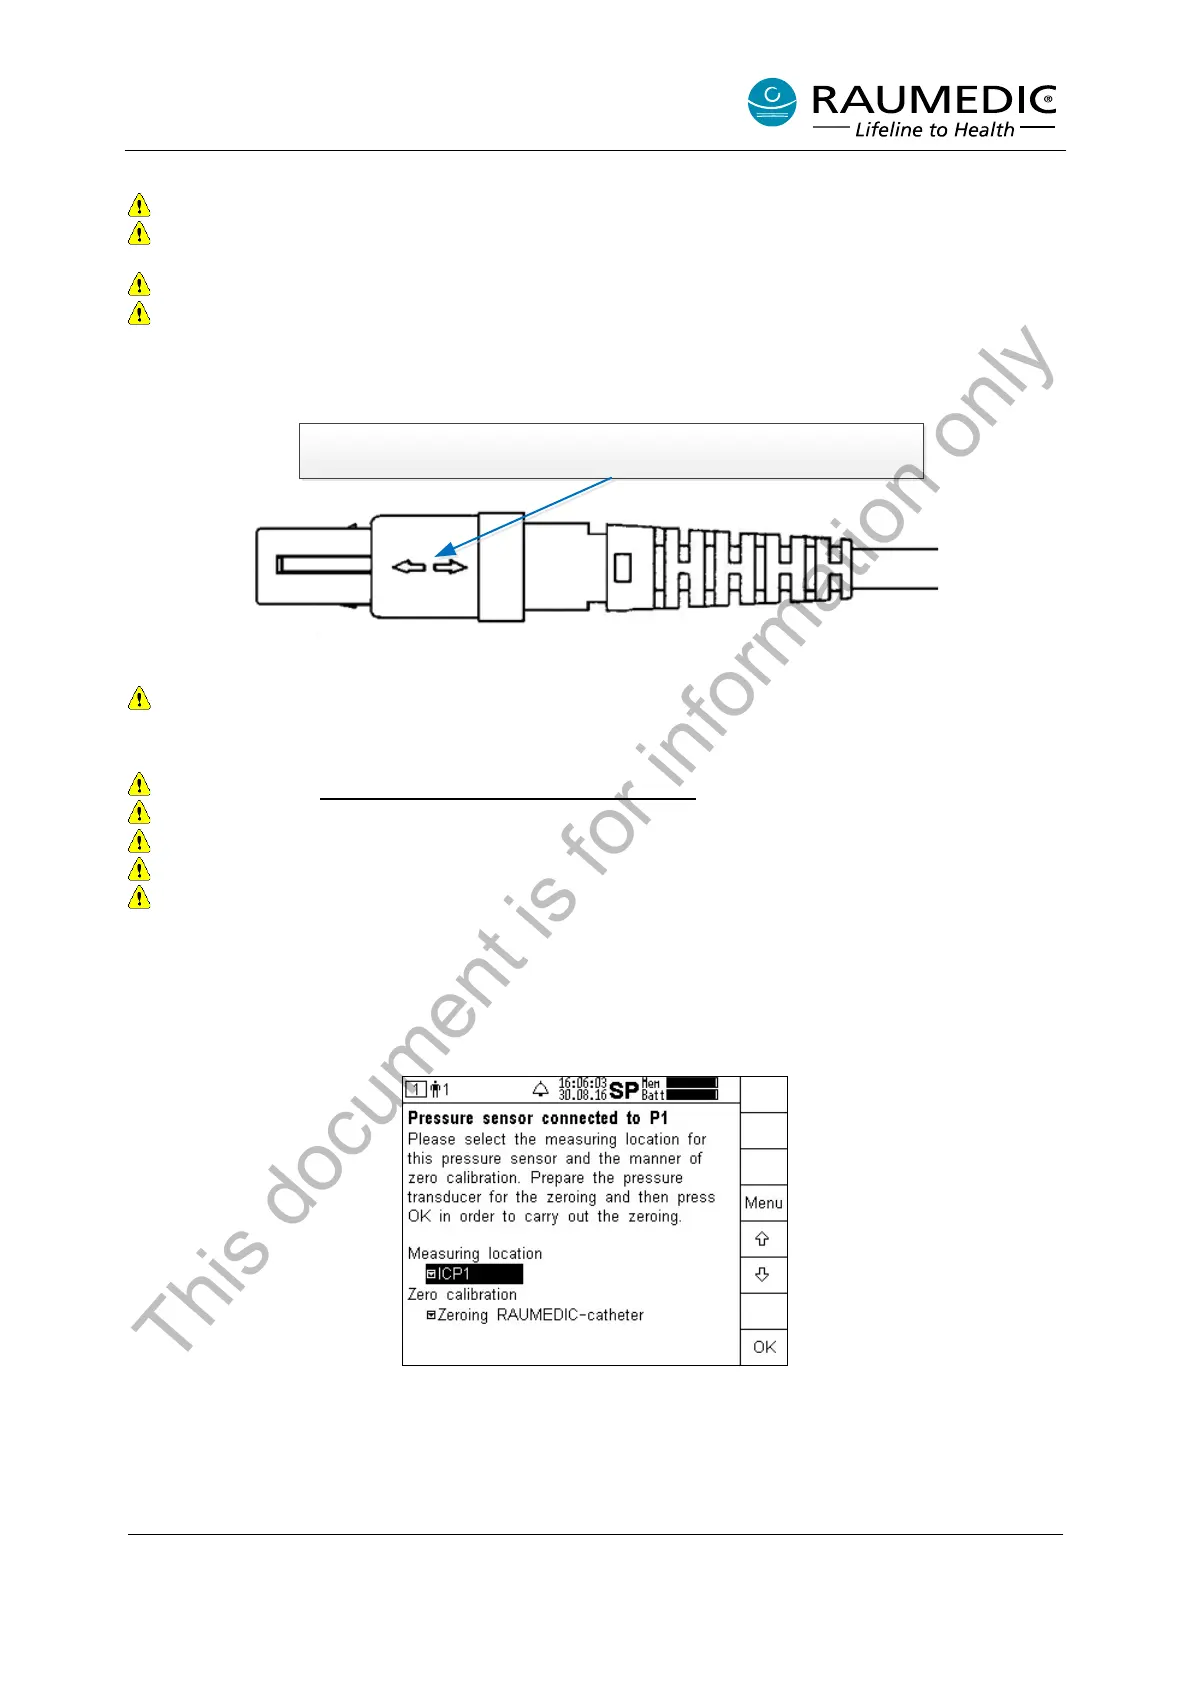
port (at the connector part with the two arrow symbols).
Get hold of the connector here! Never get hold on the bush or cable!
Figure 9: Cable connector
The FOC is a fibre-optical cable. Please observe notes on the FOC in the Instructions for use.
4.4.2 Transducer for invasive blood pressure IBP
Observe chapter 3.1 Invasive pressure measurement IBP
Keep the connection cable ready prior to connecting the pressure transducer.
Use approved accessories only.
Observe the instructions for use of the accessories.
Observe the permissible measuring range of the transducer.
The MPR2 has two pressure input sockets P1, P2/T2 to connect pressure sensors (external transducers
or micro-chip precision pressure catheters). It is insignificant for the further measurement, to which of the
two input sockets the pressure sensor is connected. The pressure sensor connected is recognised
automatically. Please observe that the P2/T2 port has been designed as a multi-purpose port, which is
designed for the preferred connection of a PTO catheter.
A new patient has already been created, the memory mode has been set, and the limiting alarm values
have been selected. The MPR2 recognises that you have connected a pressure sensor to port P1. In this
screen you can select the measuring location and the process for the zero calibration.
If you want to begin with the selection of the measuring location, press the Menu key. The pull-down menu
with the overview of the measuring locations available will open. Please keep in mind that you can allocate
a measuring location once only.
This document is for information only