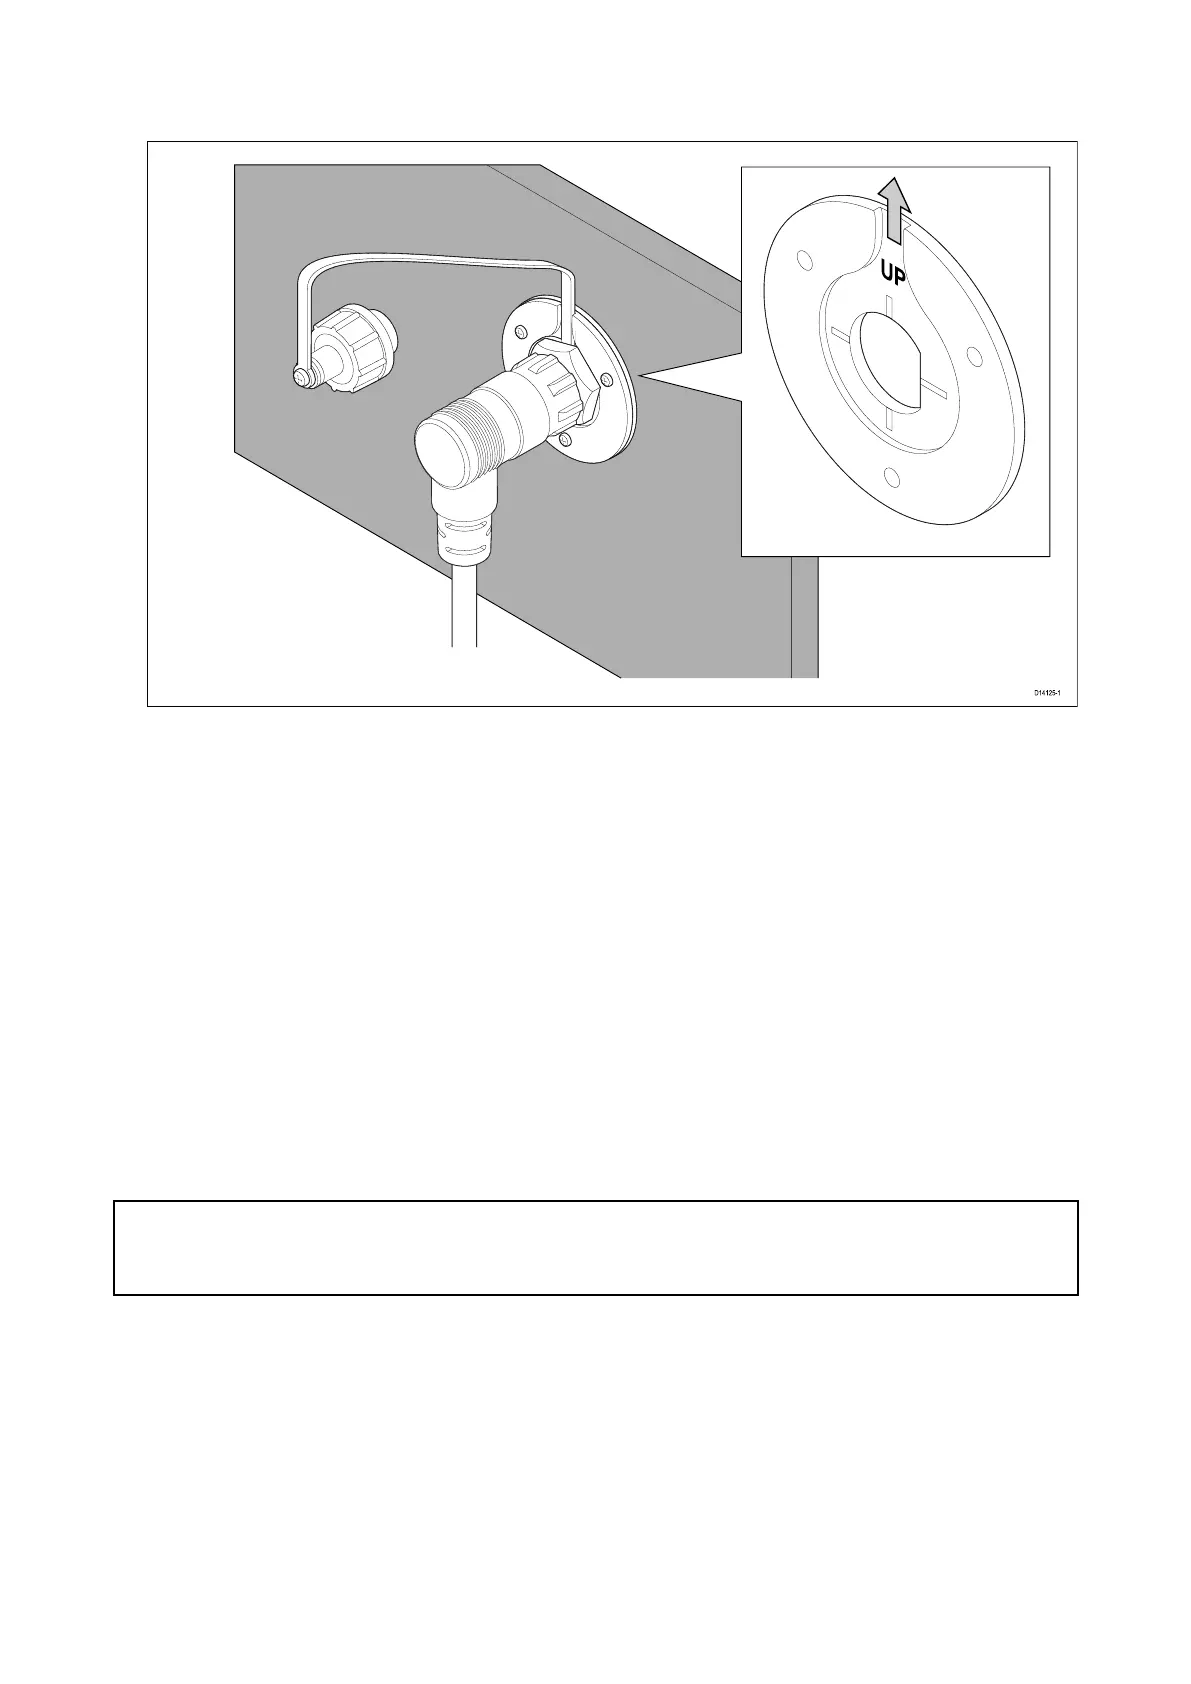
2.Ensuringcorrectorientationofthemountingplate
,offeruptheplatetothedesiredlocationand
markthelocationofthescrewholesandthecenterholeonthemountingpanel.
Toensurethatthehandset’sconnectorpointsdownwhenconnected,orientatethemounting
platesothatthelanyardgroveispointingstraightup.
3.Drillthemountingholesusingasuitablesizedrillbit.
4.Drillthecenterholeusinga25mm(1in.)holecuttingsaw.
5.Pulltheconnectorendofthecablethroughtheholeinthemountingsurface.
6.PlacetheMountingplategasketovertheendoftheconnector.
7.Withtherecessedsidefacingawayfromthemountingpanel,placetheMountingplateover
theendoftheconnector.
8.PlacethelanyardendoftheSplash-proofdustcapovertheconnector,ensuringthelanyardsits
intherecessintheMountingplate.
9.PlacetheMountingplatenutovertheconnectorandtightenclockwiseusinga13/16in.(21mm)
socketwrench,beingcarefulnottodamagetheplasticnutbyovertightening.
10.SecuretheMountingplatetothemountingsurfaceusingthesuppliedscrews.
11.AttachtheHandset/Fistmicconnectortothecableconnectorandrotatethelockingcollar
clockwisetosecure.
12.ConnecttheoppositeendofthecabletotherequiredconnectoreitherontheBasestationorto
anotherpass-throughpanelmountingplateconnector.
Note:
Drillbit,tapsizeandtighteningtorqueisdependentonthethicknessandtypeofmaterialtheunit
istobemountedon.
Mountingthewirelesshub
Beforemounting,ensurethat:
•yourselectedlocationmeetsthelocationrequirementsfoundinthisdocument.
•youpayparticularattentiontothewirelesslocationrequirements.
•sufficientspaceisavailableaboveortoonesideofthehubfortheantenna.
•theproductoperatescorrectlyatthedesiredlocationbeforemounting.
Installation43
 Loading...