32
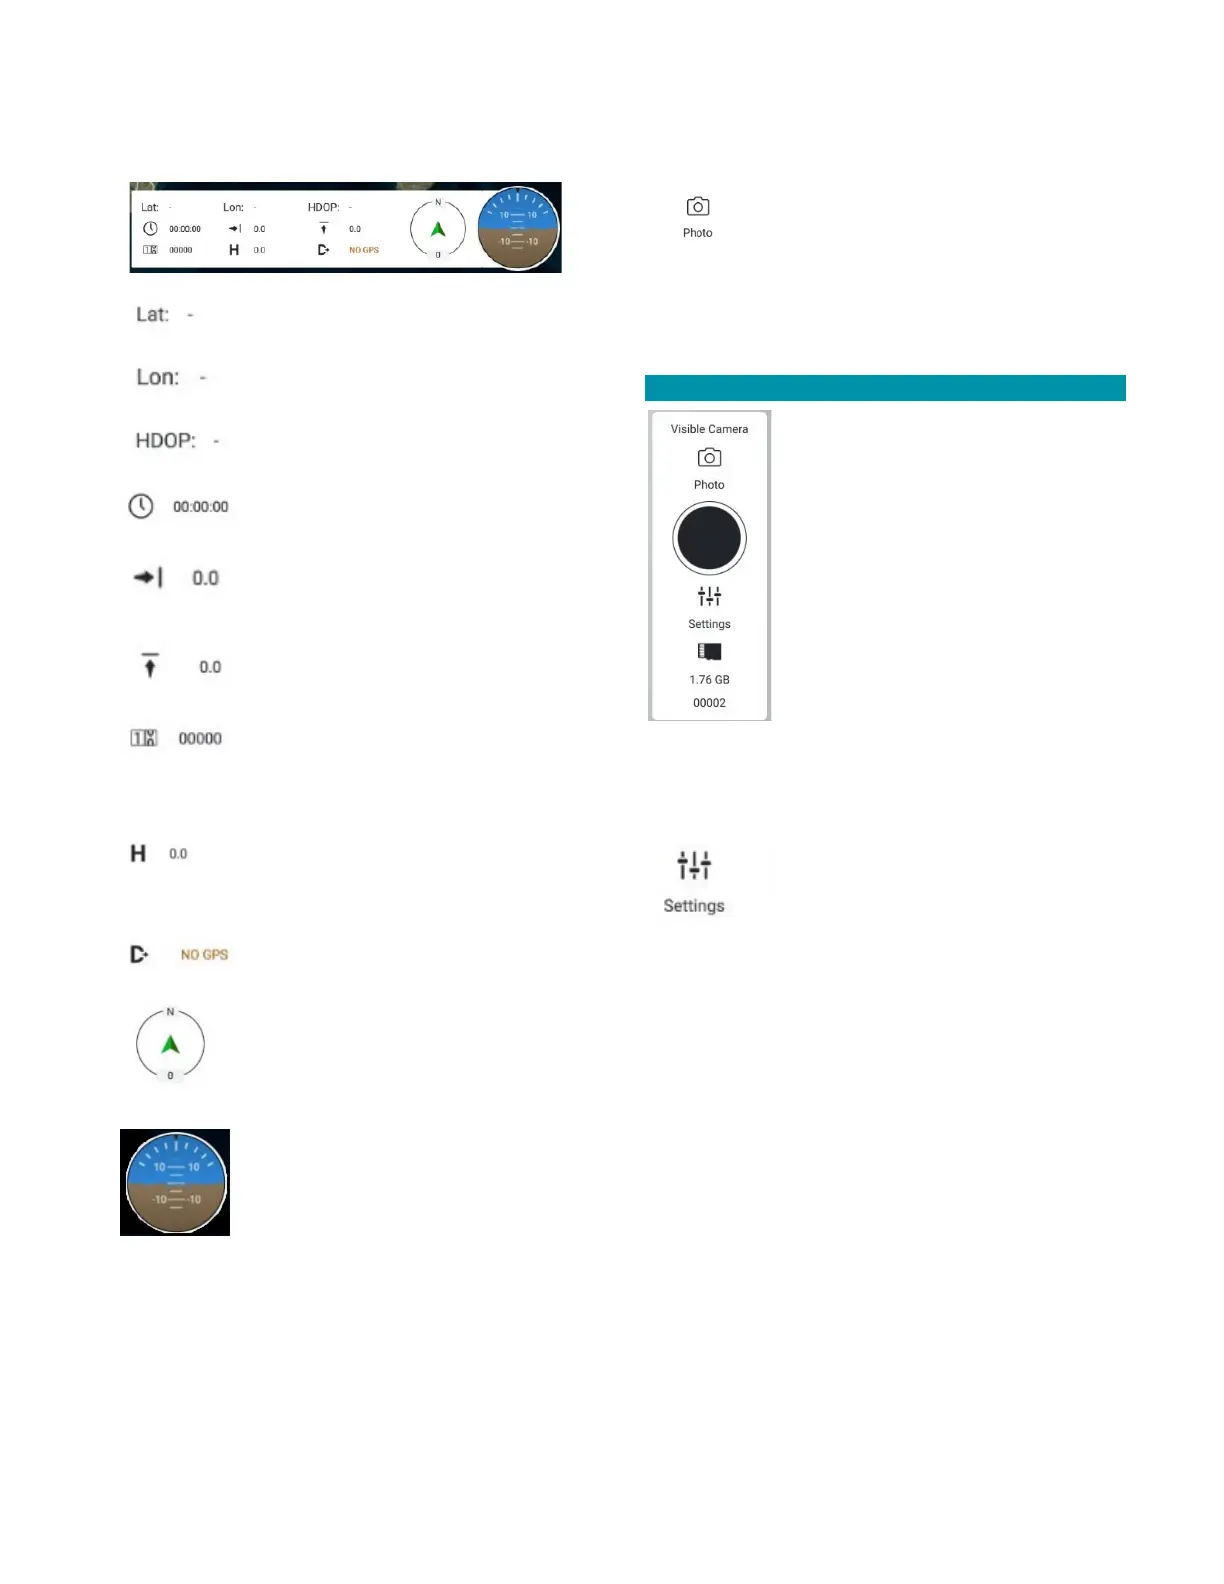
INSTRUMENT PANEL OVERVIEW
hrs:min:sec
Forward speed of the drone in
meters/second
Altitude change in meters/second
Odometer, indicating meters the
drone has traveled during the
mission
Indicates the current altitude of
the drone in meters above ground
(AGL)
Heading of the drone from true
north (not magnetic)
Attitude indicator, also known as
“artificial horizon,” which shows
the drone relative to the Earth’s
horizon
CAMERA CONTROL PANEL
Touch the VIDEO icon or the PHOTO icon to toggle back
and forth from live video to taking
photos.
Alternatively, press the lower left button on the rear-
panel of the TAC to toggle between video and still
photos. The icons will behave as described above to
indicate which mode the system is in.
PHOTO MODE
Touch the black circular icon to snap a
photo. A rotating circular icon appears
briefly in the middle of the button
while the photo is being processed.
When the photo is processed, the
black circle icon will reappear.
The amount of storage remaining is
indicated below the SETTINGS icon,
and the number of photos taken is also
seen at the very bottom of the
window.
Alternatively, press the front lower right button on the
TAC to take photos. The icons will behave as described
above to indicate whether a photo is being processed.
Touch the SETTINGS icon to open the
PHOTO SETTINGS window. Here you
can select either the EO or IR (Boson)
cameras, select gimbal controls, and
turn on/off the screen grid and gimbal control graphics
on the FLY SCREEN.
Alternatively, press the upper left switch button on
the rear-panel of the TAC to toggle the active camera
between EO and IR.