23
VEHICLE SETUP
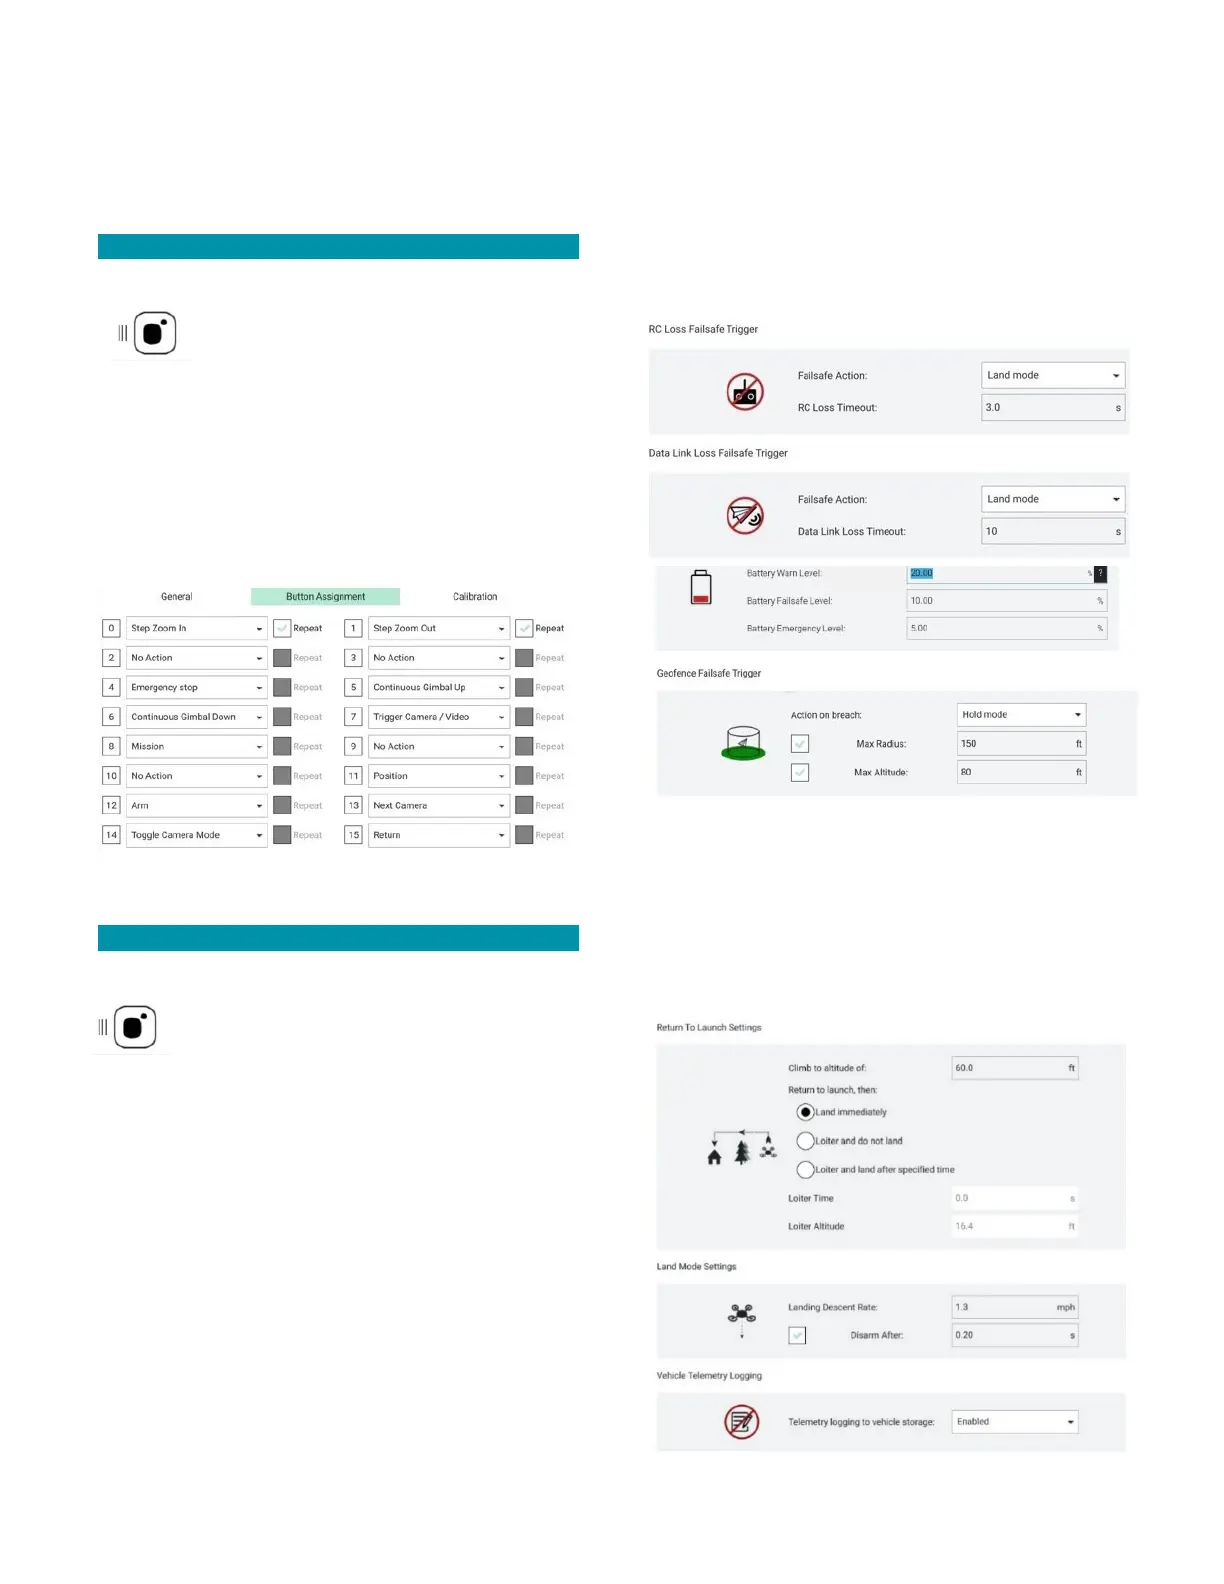
Use this screen to customize safety parameters,
calibrate the drone, and to customize the joystick and
buttons configurations on the TAC.
BUTTON & JOYSTICK SETUP
Connect the drone and the TAC.
Touch the MENU icon.
Select VEHICLE SETUP.
Select JOYSTICK.
Use the GENERAL, BUTTON ASSIGNMENT, and
ADVANCED windows to customize the joystick and
buttons, if so desired.
Select the SET TEAL DEFAULTS in the ADVANCED
screen to reset all settings, if needed.
SAFETY SETTINGS SETUP
Connect the drone and the TAC.
Touch the MENU icon.
Select VEHICLE SETUP.
Select SAFETY.
Here you can set a low battery failsafe trigger for when
the battery pack reaches a certain percentage of
charge. This includes setting the preferred failsafe
action, i.e., return to launch, the battery warn level, the
battery failsafe level, and the battery emergency level.
Recommendations:
• Low battery warning - set to at least 20%
• Critical battery level action - set to RTL at 10%
or higher
• Emergency battery level action - set to land
immediately at 5% or higher
• RTL height - set higher than any nearby
obstacles to ensure the drone can clear them
as it returns home
You can also establish an RC loss failsafe trigger and a
data link loss failsafe trigger.
You can also establish a geofence that will confine the
drone to the established parameters. This is helpful for
those just starting out or for those who have definite
boundaries that cannot be breached.
You can also establish the Return to Launch (RTL)
settings, the landing settings, such as landing descent
rate, and enable/disable the vehicle telemetry logging.