72
CAMERA & GIMBAL
PAYLOAD REPLACEMENT
Both the FLIR Hadron EO/IR camera and gimbal are
replaceable in the field. Use the specific tools to
prevent damaging parts in the repair process.
CAMERA & GIMBAL REPLACEMENT INSTRUCTIONS
1. Place the drone on its back on a table or
workspace. Hang the antenna off the edge of
the table to prevent damage.
2. Remove the four rubber grommets
gimbal brackets. Use a screwdriver to push the
grommets through the hole.
3. Use your fingernail or a
screwdriver to press
the tab on the motor
cable connector.
4. Pull the connector straight up to disconnect it
from the socket.
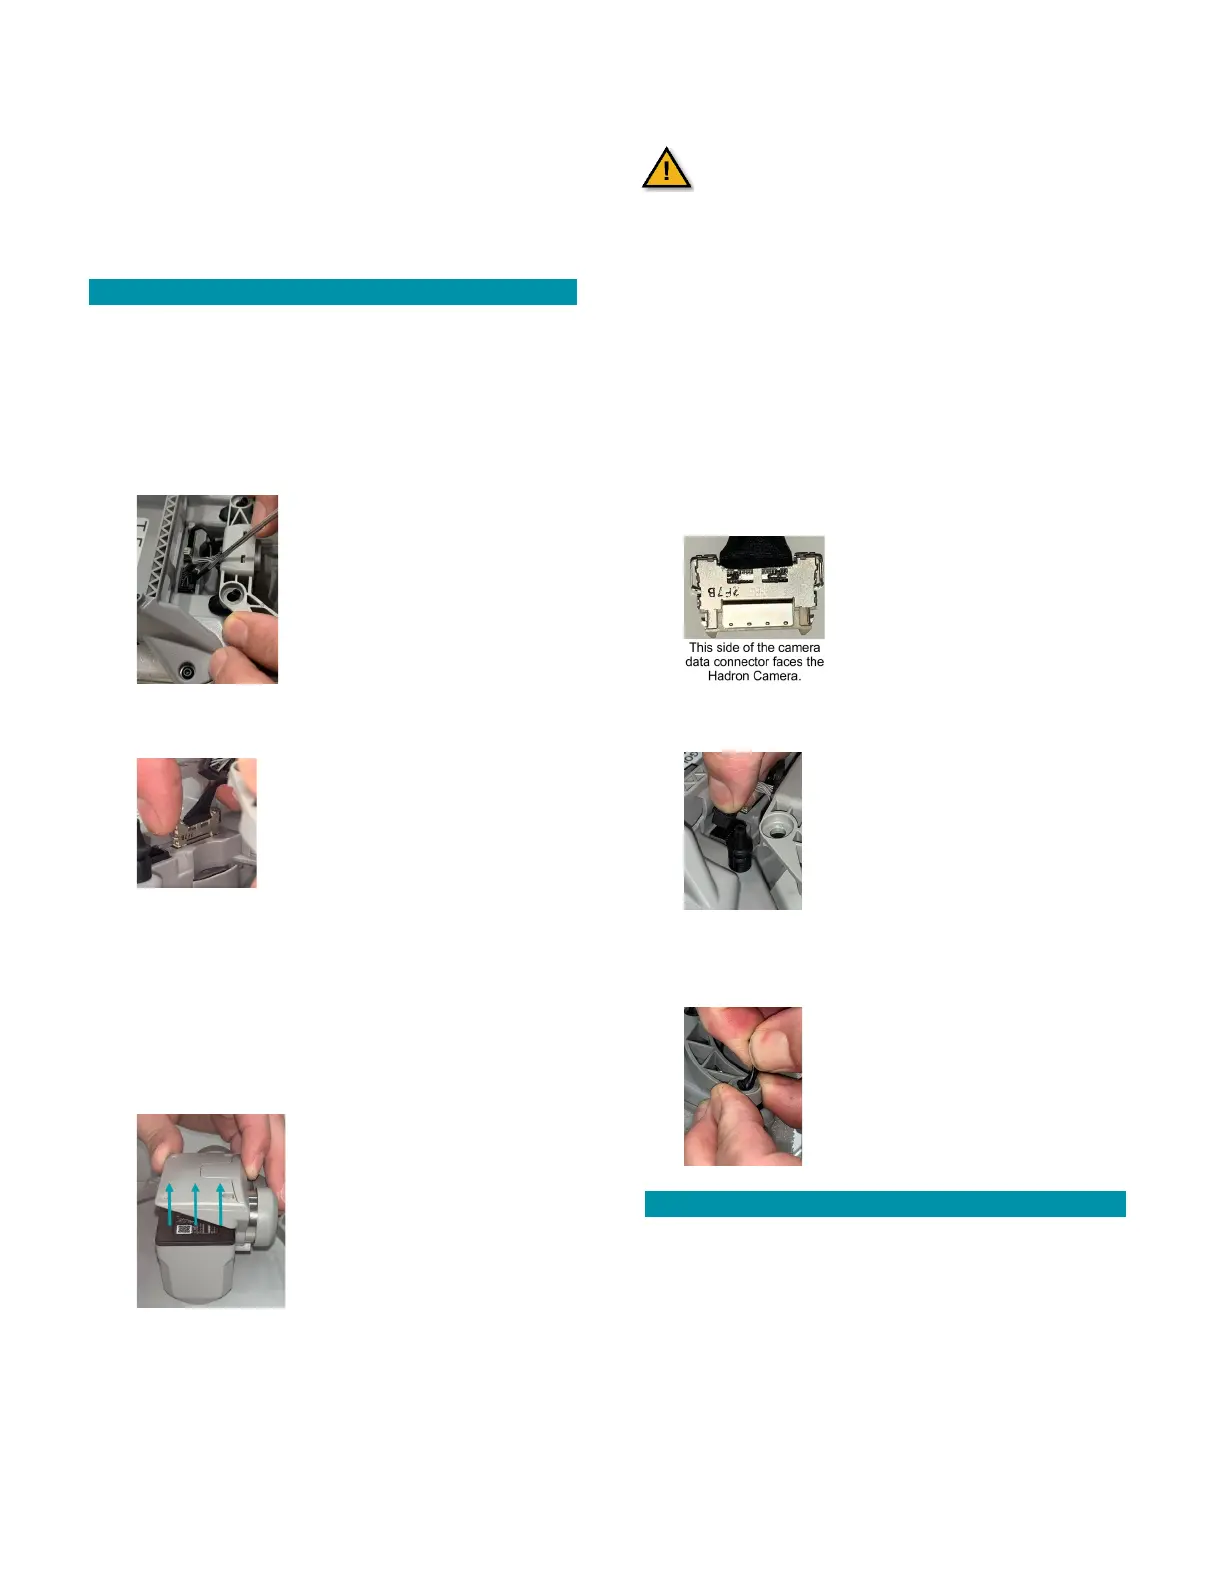
5. Squeeze
the side
latches of the camera
data cable connector to
release it.
6. Pull the connector straight up to disconnect it
from the socket.
7. Use a T5 Torx screwdriver to remove the four
M1.6 x 0.35mm screws from the back of the
Hadron camera. Set the screws aside for re-use.
8. Pull the Hadron camera
away from the gimbal.
The exposed PCB is ESD sensitive and static
discharge can damage the electronics.
Minimize handling of the exposed PCB.
9.
Check the gasket around the PCB on the
Hadron camera is properly aligned. Adjust if
needed.
10. Push the Hadron camera onto the gimbal. Press
straight down until you feel the connector click
into place.
11. Use a T5 Torx screwdriver to secure the four
M1.6 x 0.35
mm screws in the back of the
Hadron camera.
data cable connector to
the drone. The side of
the cable
toward the front of the
drone.
motor cable connector
to the mating socket in
the drone. The tab on
the connector faces the
front of the drone.
14. Align the rubber grommets on the gimbal under
the holes on the gimbal brackets.
rubber grommets
holes.
SYSTEM CHECKOUT
1. Manually move the gimbal pitch and roll
axis and check for binding or obstructions.
2. Check that no wires are pinched.
3. Power on the system and confirm the
gimbal properly functions and is properly
oriented.
SYSTEM CHECKOUT