100
16.Inserting,RemovingandChangingtheFilament
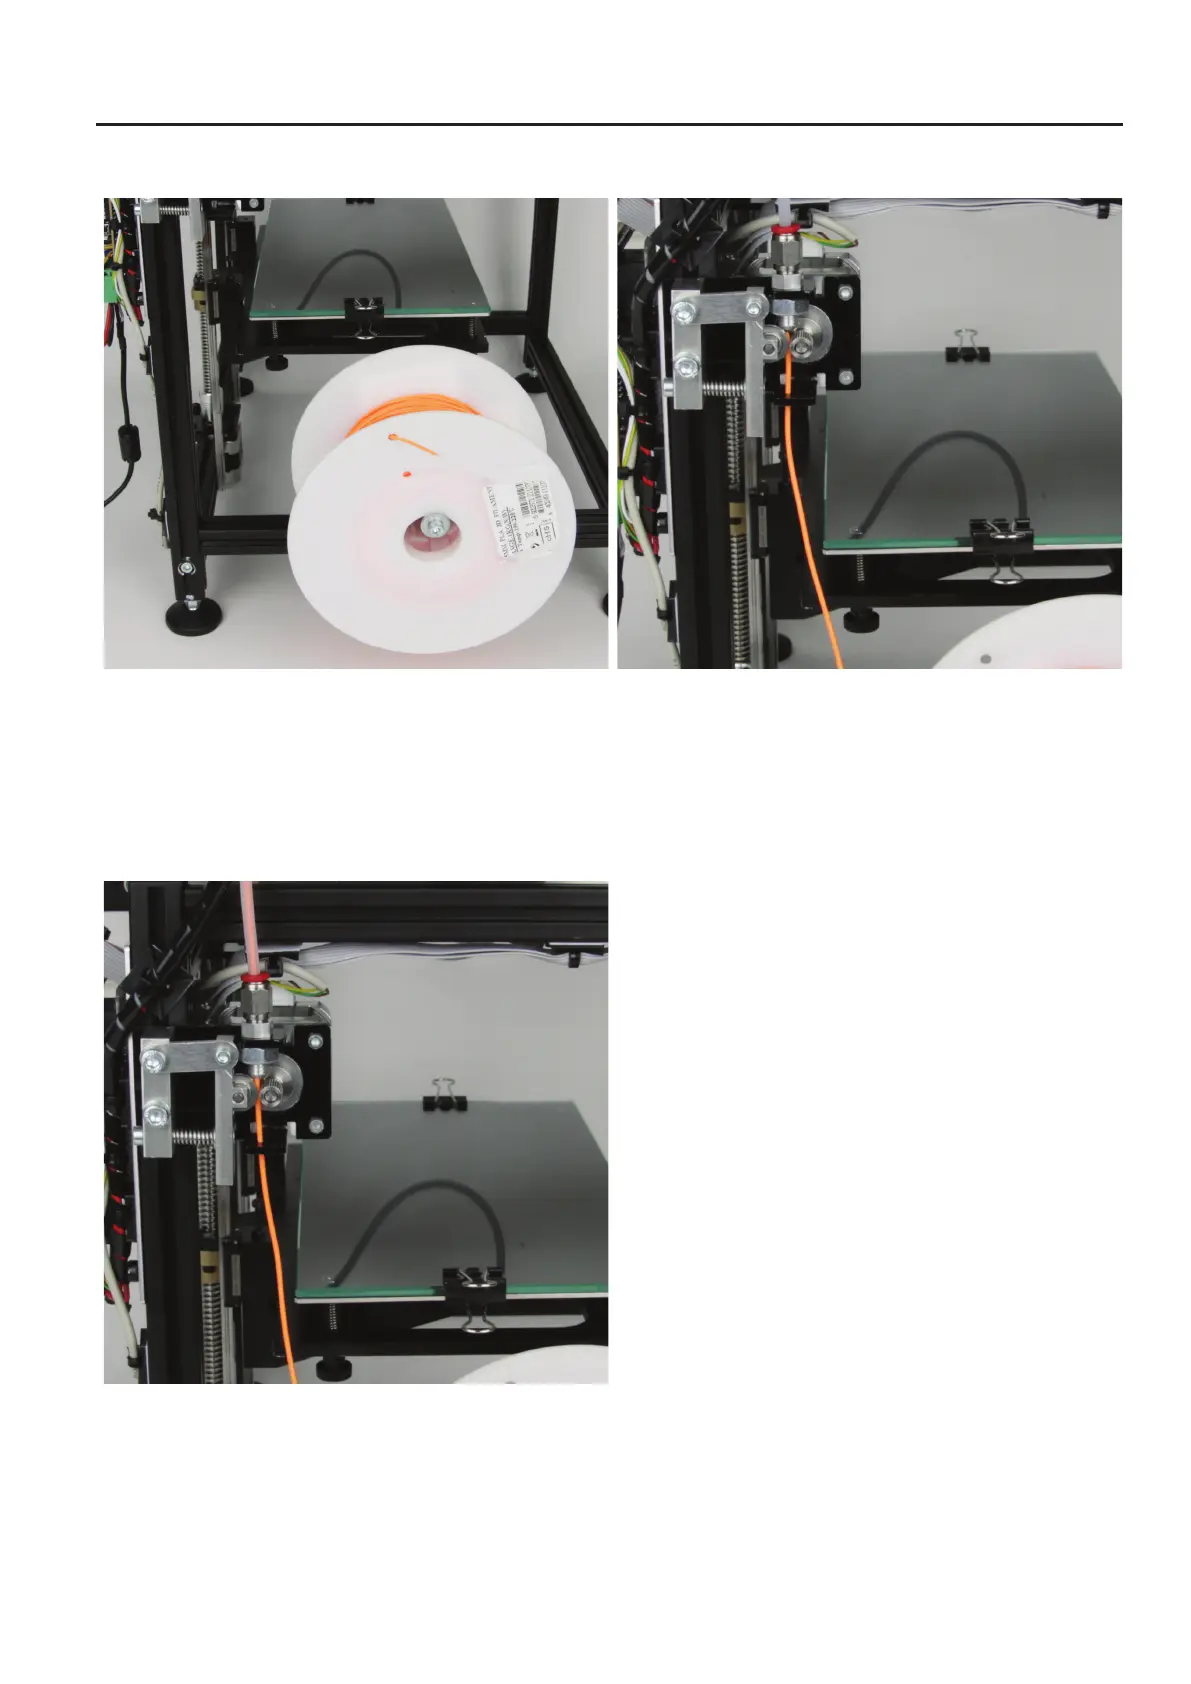
a)InsertingtheFilament-MechanicalPart
Pushthelamentrollontheshaftofthelamentholder.Thelament
roll must move freely.
Thetipofthelamentshouldbecutslightlydiagonally.Thismakes
insertion easier.
Pushtheballbearingholderandinsertthelamentintothegroove
of the ball bearing from below through the opening of the extruder
motor holder.
Pushthelamentpasttheinfeedmotorandthroughtheentirela-
menttube.Whenitisvisibleattheotherendofthetube(attheex-
truder),pushthelamentintotheextrudertothestop.
Ensure that the Filament runs cleanly in the groove of the ball bearing
after insertion.
It must be possible for the feed motor to turn without slippage or
catchingwhenpullingorpushingatthelament.
Then switch on the printer if you have not done so yet.