96
b)SettingtheZ-Stop
Before starting calibration, set the end stop in the Z-direction.
The hexagon screw should be about 1 to 2 mm in the thread. Counter the screw with the counter-nut.
Check that the Z-limit switch is clearly pushed by the hexagon screw.
Moveallaxesintothehomeposition
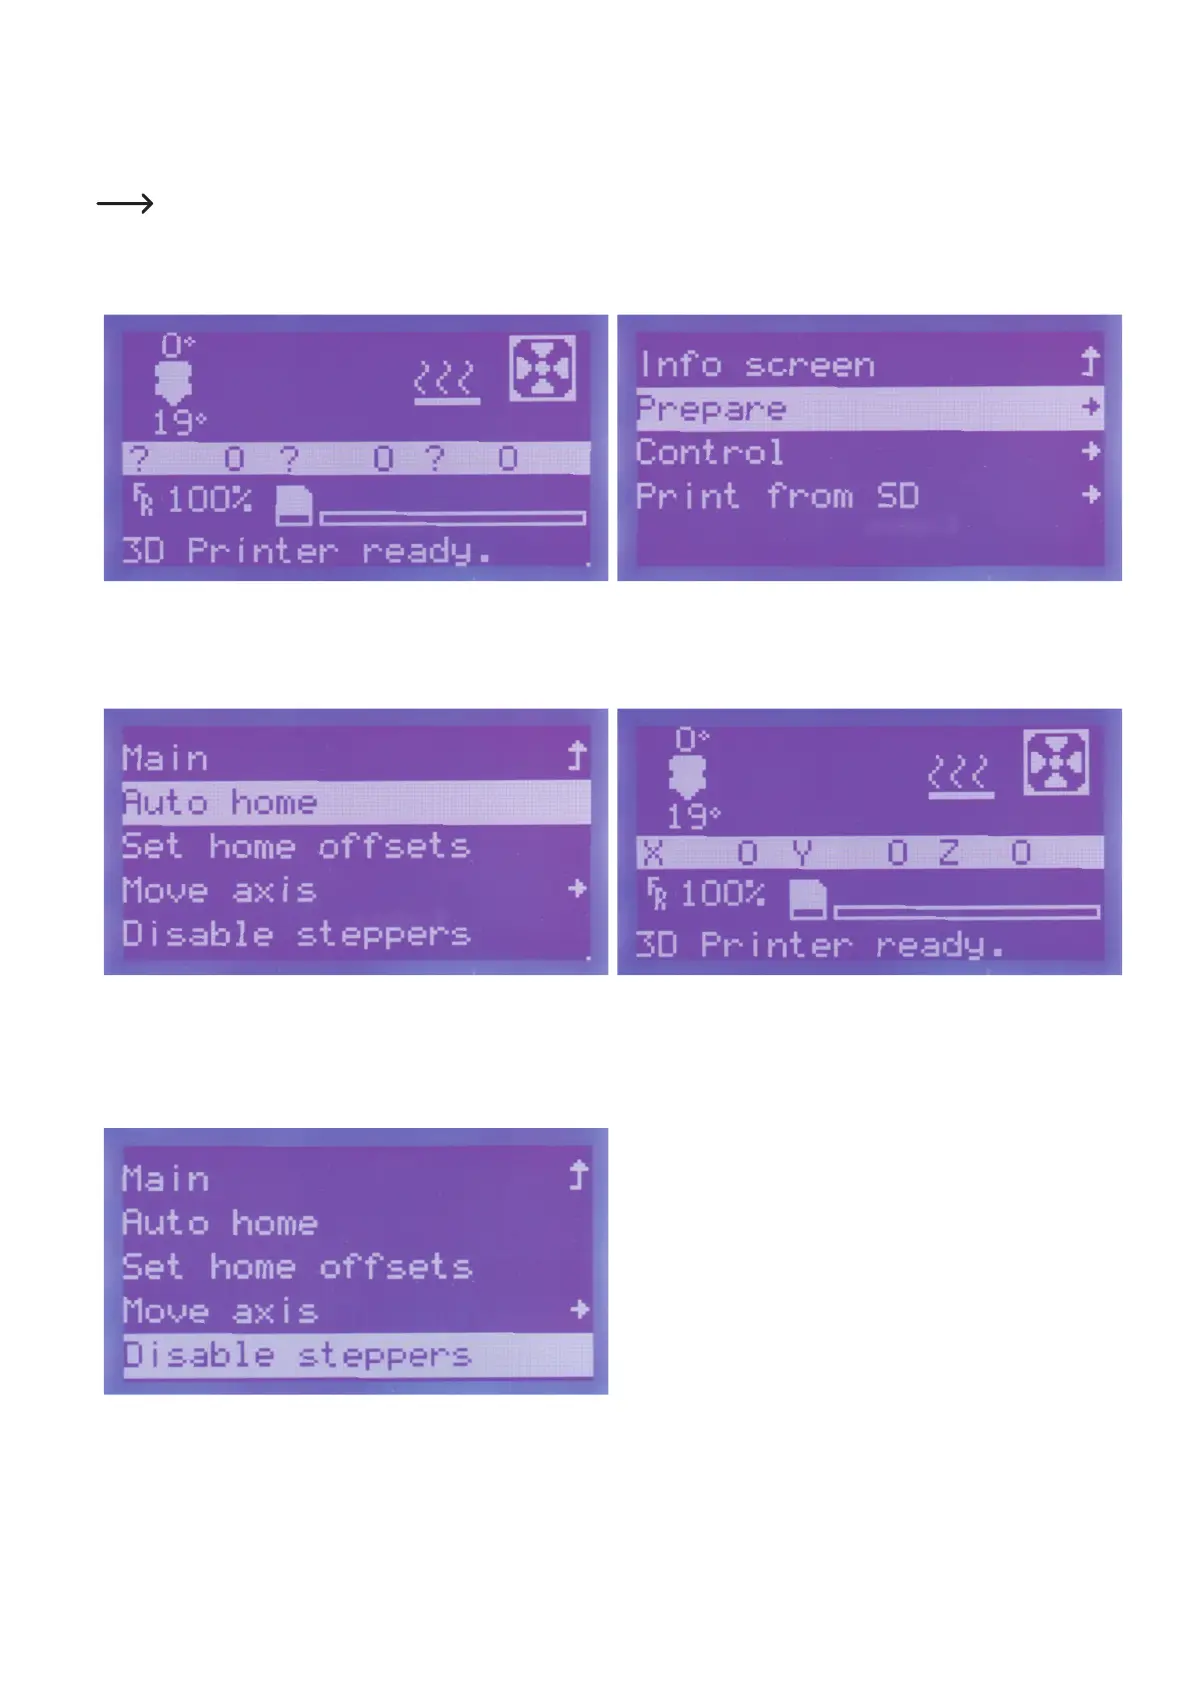
Pushbuttonfortheoperatingknob(10)inthemainmenu. Turntheoperatingknob(10)untilyouhaveselectedthemenuitem
"Prepare"andpushthebuttonoftheoperatingknob(10).
Turn the operating knob (10) until the menu item "Auto home" is
selected.Pushthebuttonoftheoperatingknob(10).
All axes move into the home position.
The printer will switch back to the main menu automatically after a
few seconds. The axes are no longer displayed with question marks
now.
Go to the menu "Prepare" and navigate to item "Disable steppers".
Pushthebuttonoftheoperatingknob(10).
Bythis,allmotorsareswitchedoffsoyoucanmovetheXandYaxes
manually.