136
Cleaningtheprintingplate
Becarefulinthepreassembleddeviceorwhenusingtheoptionalheatingplatekit:Dangerofburns.Lettheheatingplate
cool off before cleaning.
Clean and degrease the heating plate thoroughly with a soft rag after each print. If you are printing directly on the glass panel, use a little ac-
etoneforcleaning.Ifyouareusingtheadhesivelmuseamilddetergentwithalcohol.
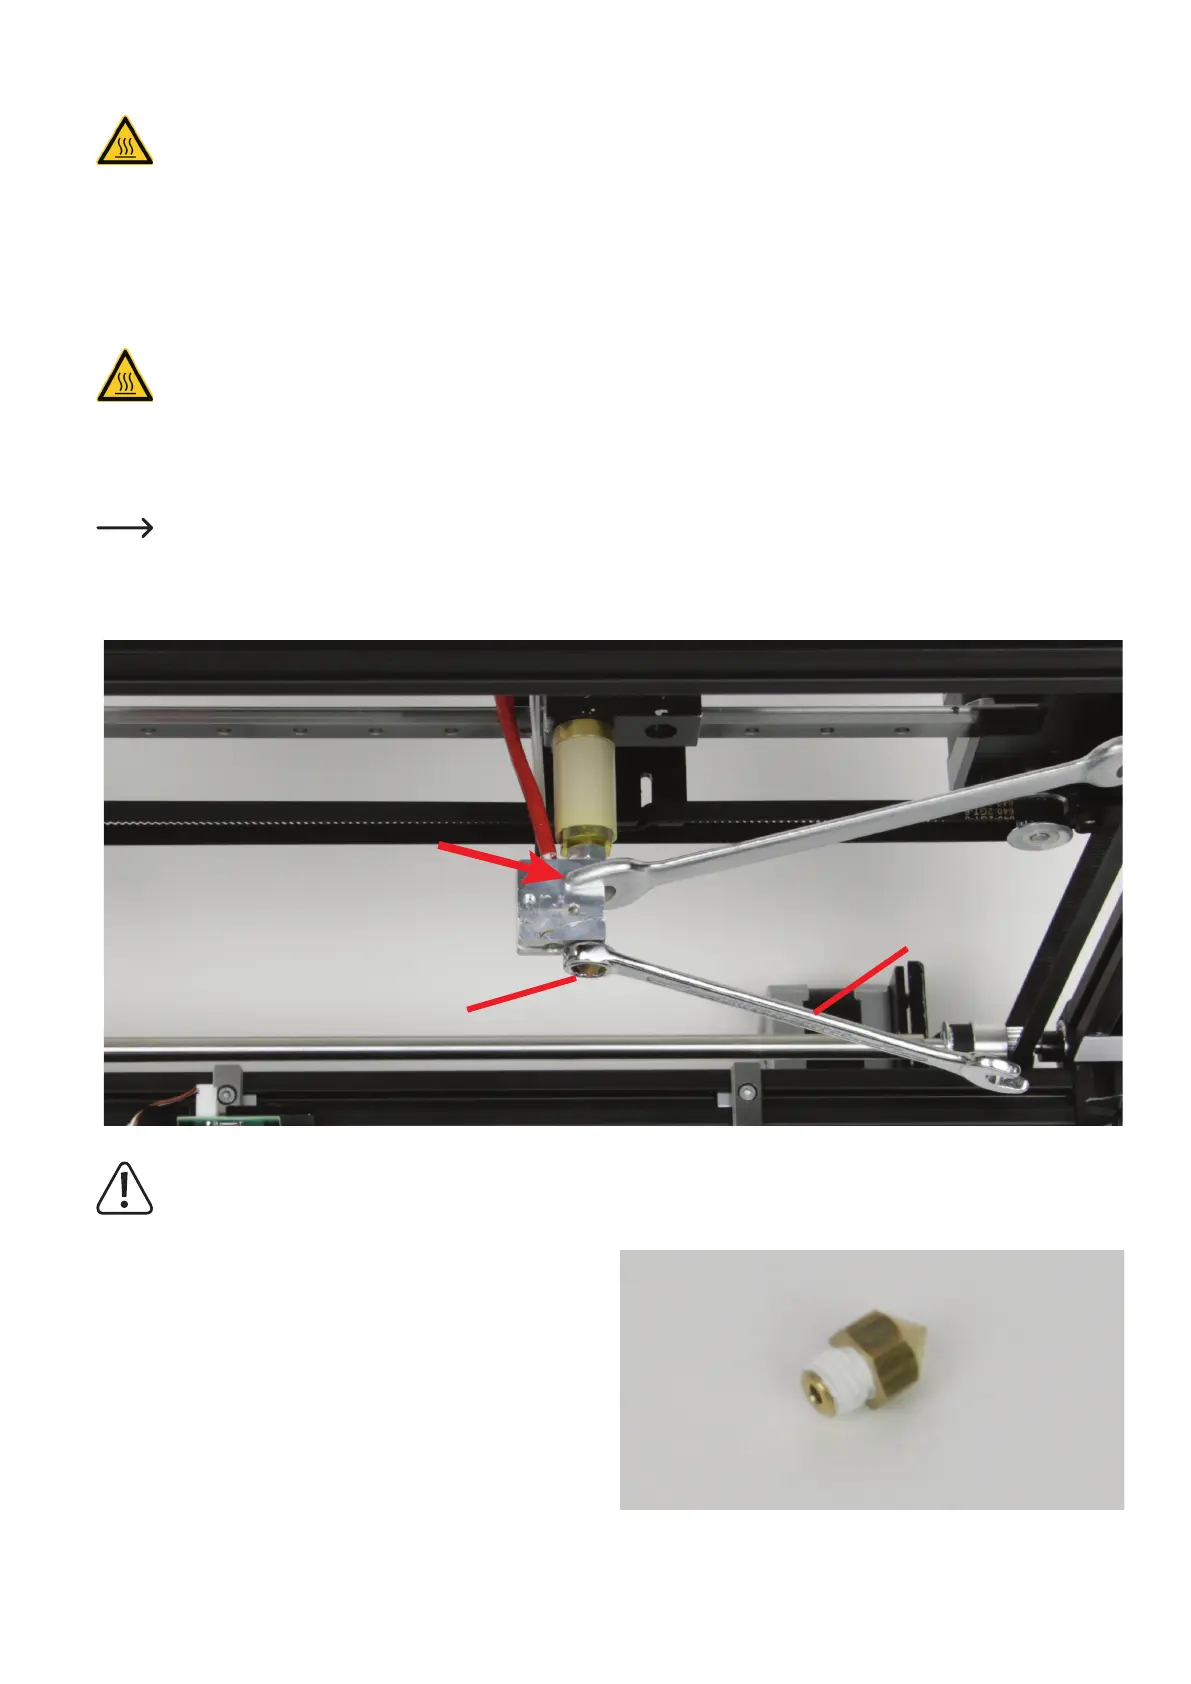
e)NozzleChange
Caution:Dangerofburns.Donotdirectlytouchthehotnozzleandtheextruder.
• Toreplacetheextrudernozzle,theextrudermustrstbeheatedtoatemperaturesuitablefortheinsertedlamentmaterial.
• Whenthetemperatureisreached,removetheinsertedlamentmaterialasdescribedinchapter"16.c)RemovingandChangingtheFila-
ment".
For the sake of simplicity, we have removed the fan sheet for the pictures.
• Screwofftheextrudernozzle(1)fromtheextruderwithan8mmringspanner,open-facedspannerorhexagonwrench(2).Securetheheat-
ing block against twisting with an 11 mm open-faced spanner. Do not damage the lines of the temperature sensor.
Theextrudermustnottwistduringnozzlechangeandthenozzlemustneverbeturnedwhencoldsincetheextrudermay
otherwisebedamagedandrendereduseless.
• Cutabout2to3cmthreadsealingtapeoffoftherollandwindit
around the thread of the new nozzle. Cut off the sealing tape that
protrudes over the thread with a sharp knife, e.g. by running the knife
along the upper-most groove of the thread.
The sealing tape must never protrude beyond the thread.
1
2