99
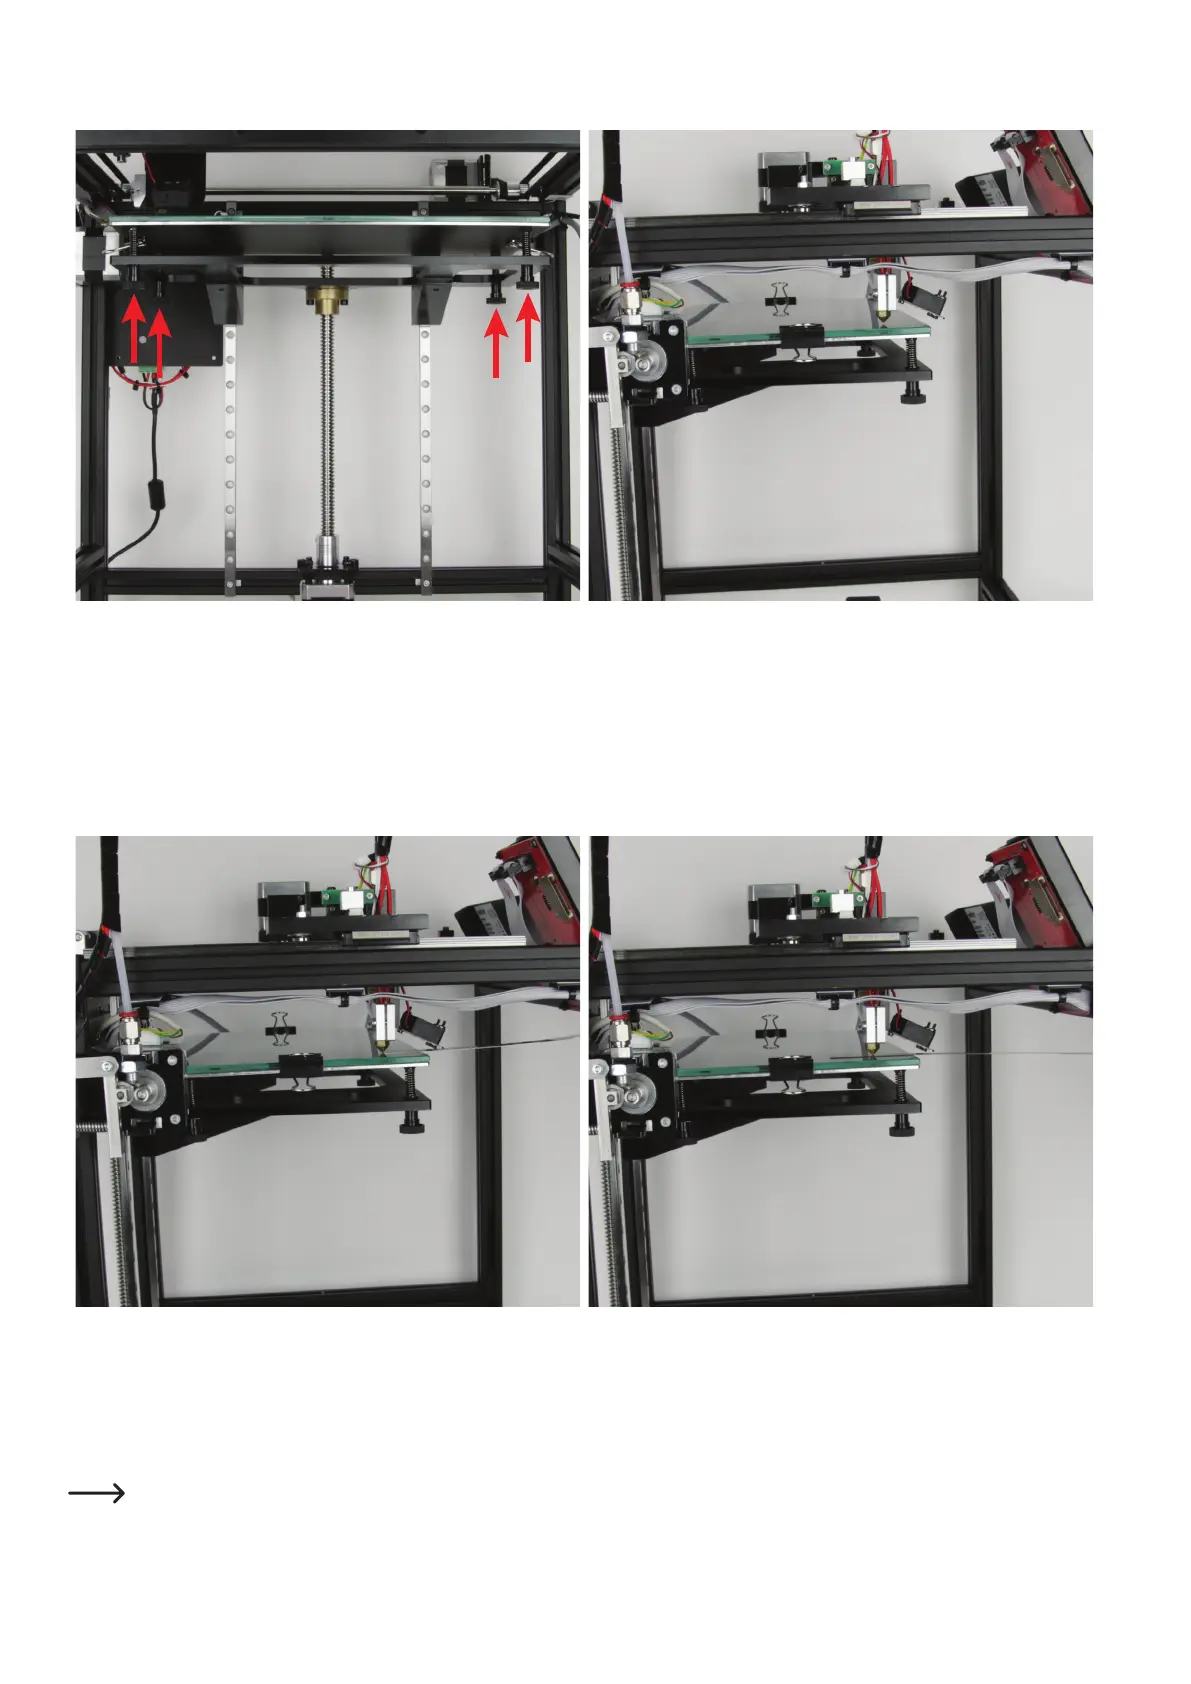
d)SettingthePrintingPlate
The 4 knurled nuts at the bottom of the table can be used to adjust
the printing plate.
First,turnall4knurlednutsto theright(thiswillmovetheprinting
plate closer to the table), until you can move the extruder carriage to
any position of the printing plate.
Generally set the distance between the nozzle and the printing plate
support. The distance should be equal everywhere if possible.
Thenstartthenesettings.
Setadistanceof0.3mm(feelergauge)everywherebetweenthenoz-
zle and the printing plate support for the printing plate and the nozzle.
Start at the point with the largest distance and proceed in sequence.
Measurethedistancewithafeelergaugesheet(0.3mm).Whileturn-
ing the knurled nuts, the feeler gauge sheet must not be caught be-
tween the nozzle and the printing plate support.
The feeler gauge sheet must be pushed slightly under the nozzle.
Whenithits,thedistanceistoosmall(gureontheleft).
Repeat setting until the distance between the nozzle and the printing plate is 0.3 mm everywhere. Then the calibration is completed.