107
17.FirstPrintofanExampleObjectfromtheSDCard
Whenheating,theremaybeslightdevelopmentofsmokeorsteam.Thisisnormal.Pleaseensurethecorrespondingven-
tilation.
IfyouareusingPLAlamentforprintingandusingthemakerconstructionkit,sticktheenclosedadhesivelmonthe
printingplateforbetteradhesionoftheprintedobject.Usetheenclosedgluestickforthepreassembleddevice.
Alternatively, you canuse a slightly structure maskingtape or special glue adhesivemasking tape (Conrad order no.
1093104)thathasbeendevelopedspecicallyforthispurpose.
TheprintinglescanbefoundinthedownloadpackageinthefolderGCODE-PLA.
Beforestarting,downloadthecurrentdownloadbundle.Thecorrespondingdownloadcanbefoundontheproductpageof
ourwebsiteorinthedownloadarea.
In our example, the object "20_20_20Q.gcode" from the download bundle is printed.
Pleasenote!Thepreassembledlefromthedownloadbundleisslicedwithoutheating.Ifyouareusingthepreassembleddeviceor
theconstructionkitwithheating,slicetheleanew(instructionsstartinginchapter"19.e)PlacementofaPrintingObjectinthe
Software").Youmayneedtoactivateheatingintheslicersettingsrst(chapter"19.h)MoreDetailedDescriptionoftheSlicerFunc-
tions").Alternatively,youcanusetheadhesivelmoradhesivetapetoincreaseadhesion.
CopytheleontoyourSDcard.
PushtheSDcardwiththeprintingleintotheSDcardreaderatthe
right of the 3D printer.
Important! The contacts of the memory card must
pointtowardsyouwheninserting!Simplypulloutthe
card for removal!
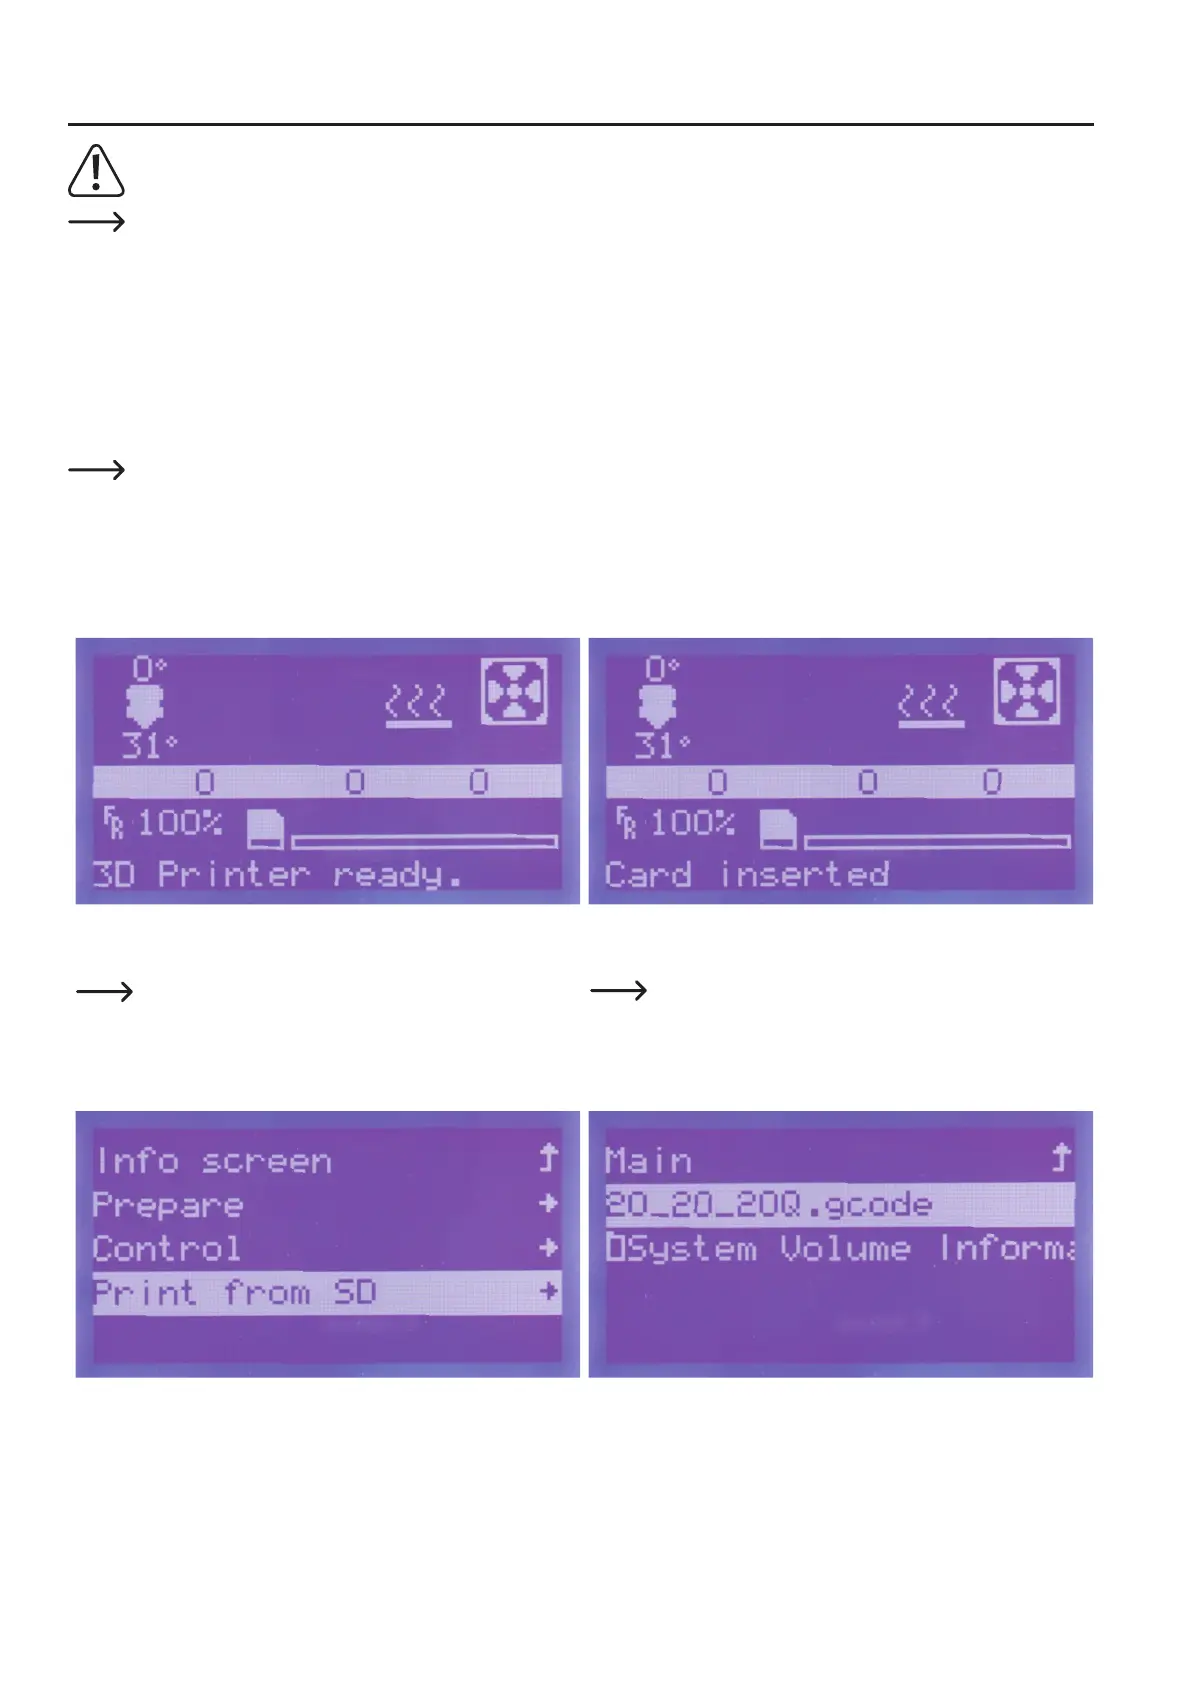
The card will be recognised automatically.
The printer shows this with a corresponding message.
Simplypulloutthecardforremoval!Thisisnotper-
mittedwhiletheprinterisprintingfromthememory
card.
Pushthe buttonof the operatingknob (10) inthe main menuand
turntheoperatingknob(10)untilthemenuitem"Print from SD" is
selected.Pushbuttonfortheoperatingknob(10)againforselection.
Turntheoperatingknobtoselectthele"20_20_20Q.gcode" and
pushthebuttonoftheoperatingknob(10).