108
The display switches back automatically to the main menu.
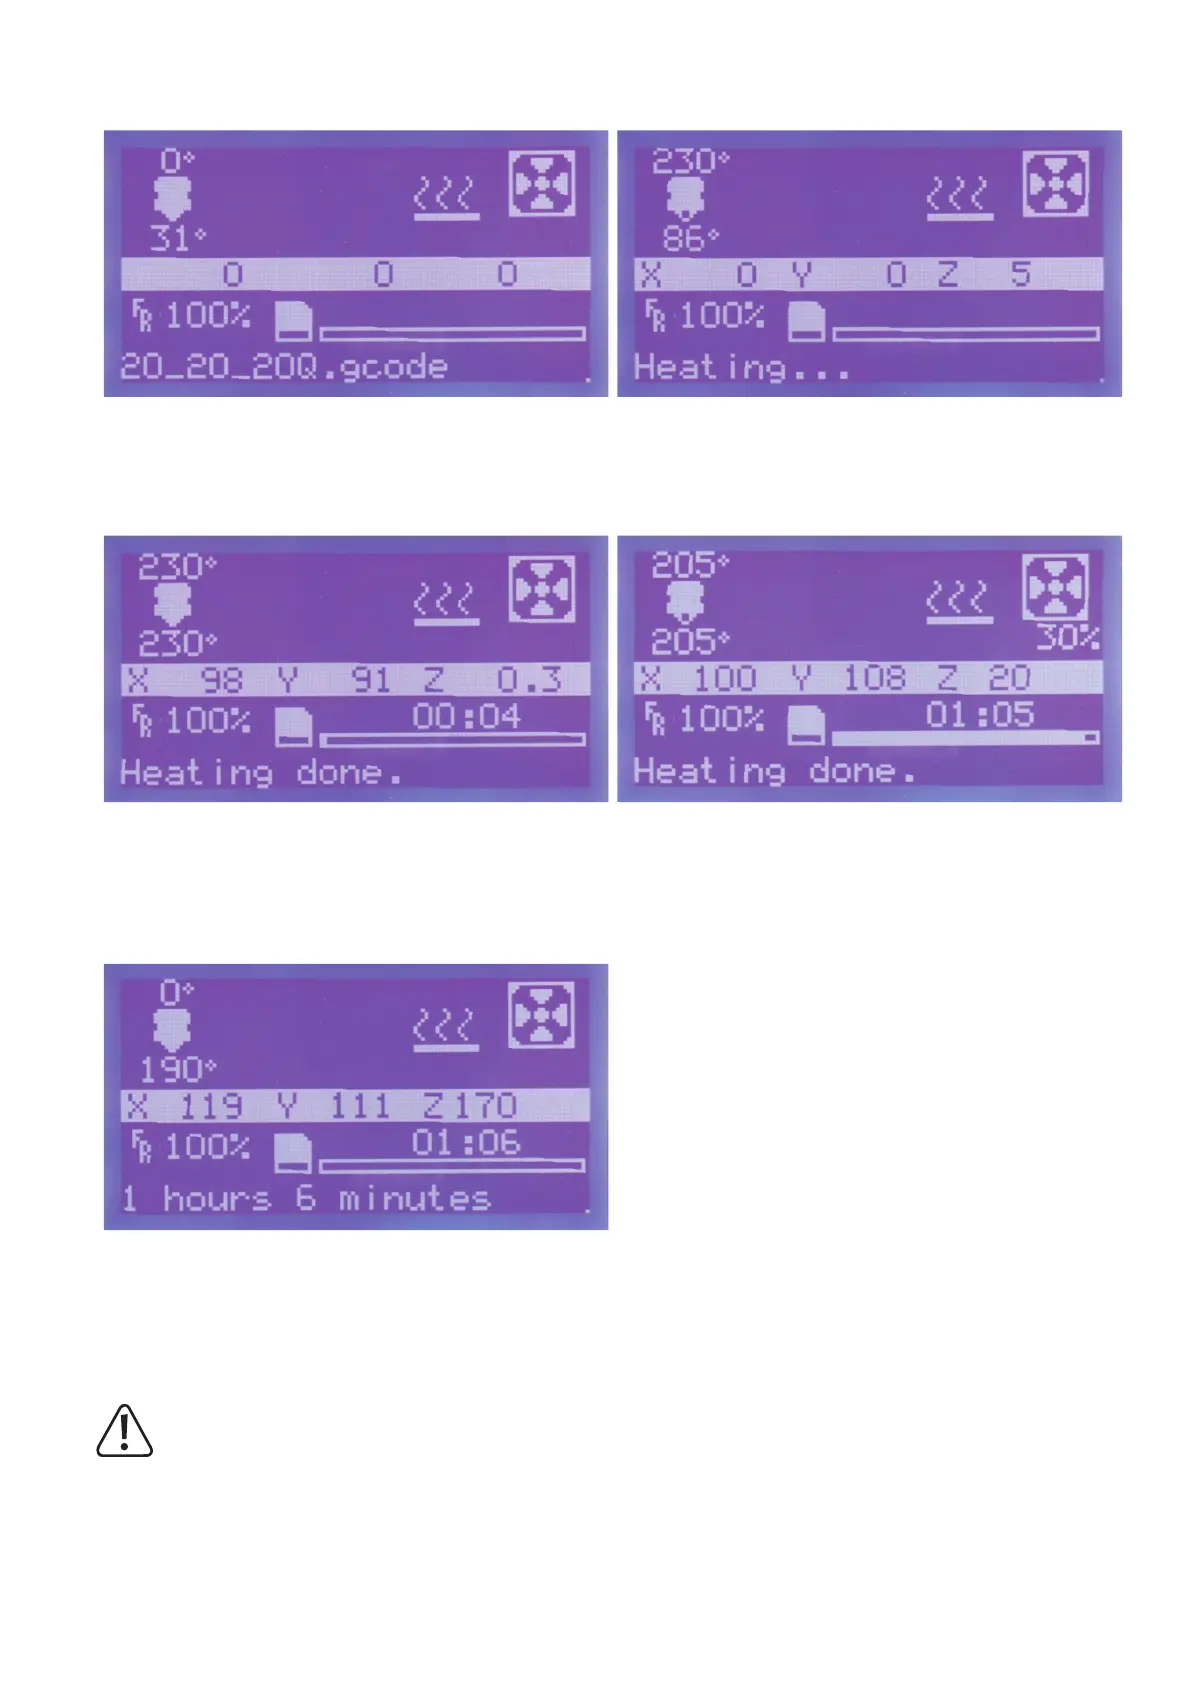
Then move the axes to their home positions.
The extruder is heated up.
Once the extruder has reached its operating temperature, printing
starts.Thedisplayshowsthepositionsoftheindividualaxes(7).The
already-printed time is placed below this.
When the fan starts to run, the current speed is displayed under the
fansymbolin%(6).
When printing is completed, the printing plate moves all the way
down. The heating of the extruder is automatically switched off.
Printingisthuscompleted.Youcanremovetheprintedobjectaftera
brief cooling phase.
Duringtherstcentimetresofprinting,thedistancebetweentheprintingplatesupportandextrudercanbecarefullyne-adjustedmanuallywith
the 4 knurled screws at the bottom of the pressure plate. Turn all 4 knurls alternatingly and observe the printed line.
Forthissetting,observethattheextrudermustnottouchtheprintingplatesupportsinceitmaybedamagedotherwise
(lossofwarranty/guarantee).