15
10.AssemblyoftheMechanicalParts
Thischapter("10.AssemblyoftheMechanicalParts")generallyisonlyrelevantforpurchasersofthemakerconstructionkit/con-
struction kit. Owners of the preassembled device can skip this chapter. However, the chapter is helpful when there is an error or
smaller repairs are necessary.
a) General Information
Takeenoughtimefortheassembly.Hurryingoftenleadstomistakesthatmaydamagecomponentsorruinthetimebenet
by elaborate rework.
Theworkplaceshouldbesufcientlylargeandcleansothatthedifferentcomponentsandassembliescanbeputdownand
installed easily.
Alwaysobservetheimagesduringassembly.Here,theassemblylocationsandcorrectalignmentofthecomponentsare
shown.
Allmechanicalcomponentsoftheconstructionkitareproducedextremelyprecisely.Neverapplyanyforceduringassem-
bly.Allpartscanbeassembledwithoutanygreatapplicationofforce.Ifthisisnotthecase,rethinktheassemblystepand
rereadthecorrespondingdescriptionintheseinstructions.
When tightening thescrews, ensure thatyou do not tighten themtoo tightly. Manyscrews are turned into aluminium
threadsandthereforemustnotbetightenedasfarasitwouldbepossible,e.g.,insteelthreads.Atablewiththerecom-
mendedtighteningtorquesofthescrewscanbefoundintheappendixoftheseinstructions.
Ifyouhaveorderedanoperationalaccessorieskit(e.g.housingkitorheatingplatekit)alongwiththeconstructionset,readthein-
structions of the respective kits before installing the construction kit. This may change individual work steps.
Sort the screws by size before assembly. This facilitates assembly, since you do not have to look for individual screws.
The delivery includes some screws, nuts and other small parts in larger numbers than necessary. They are meant as replacements
in case a screw or similar material is lost in assembly.
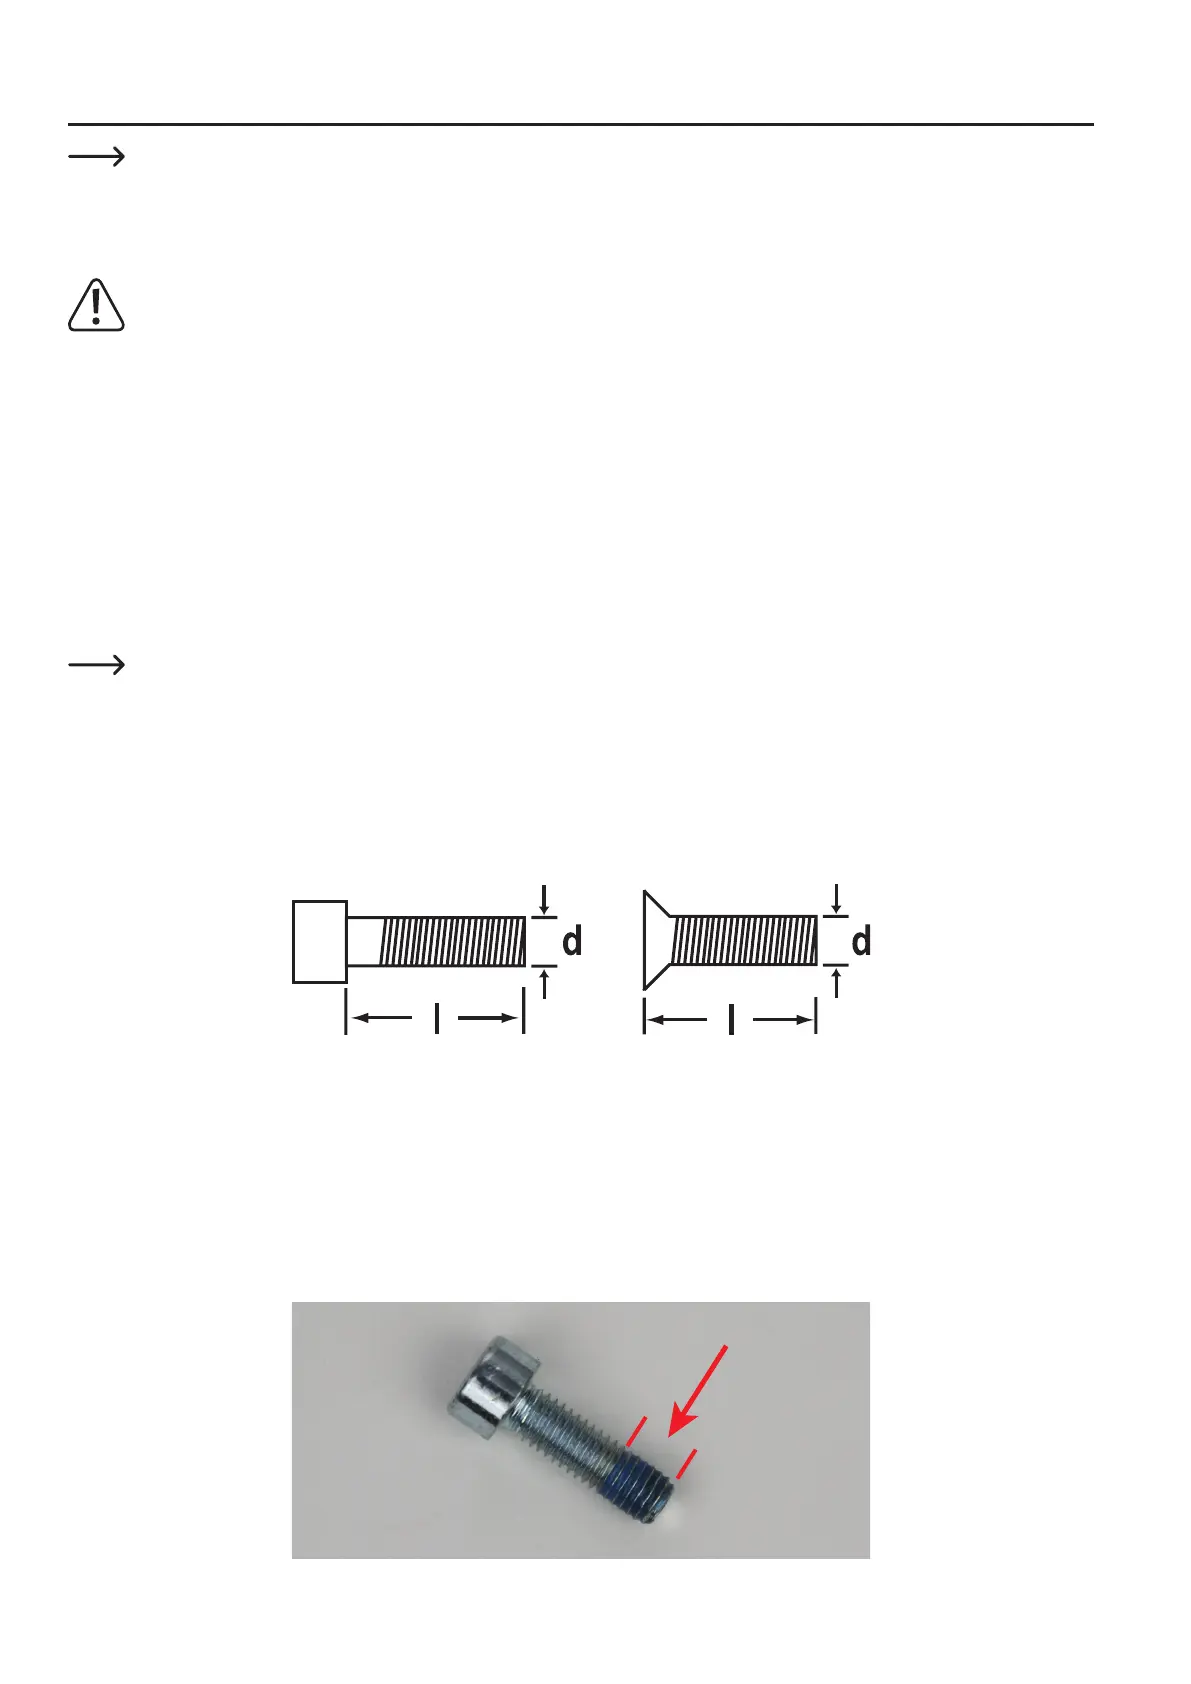
Forcylinderheadscrews,thelength(l)ismeasuredwithoutthescrewhead;forcountersunk-headscrews,thelengthmeasurement
takesplacewiththescrewhead.Thediameter(d)isalwaysmeasuredbythethread.
Applicationofthethreadlockervarnish
In the following instruction, some screws can optionally be secured with threadlocker varnish. This is indicated accordingly in the text.
Procedure:
Put a small drop of threadlocker varnish medium-strength onto the thread start. Observe that you must only use a small drop as shown in the
following screen.